How to Reduce Video File Size on PC and Phones
This article shows you the most effective ways to reduce the size of your video files on a Windows PC, Mac, or mobile phone.
Ultra high-definition videos have arrived, and so are the displays that can do justice to them. Full HD (1080p) has become the lower spectrum of display resolution, available on most newer displays. The 4K resolutions have started to take center stage. Did you know a single minute of an uncompressed single minute of 1080p video can go upwards of 4.4 GBs? Higher resolutions would undoubtedly fill the storage up to the brim.
Compressing video helps reduce its size. Consequently, the video will require less bandwidth for transferring over the internet, streaming amongst other things. More importantly, the savings on storage are enormous as an editor. Video compression is done by comparing the similar pixels of video and grouping them. It helps save on the video size while retaining the quality.
There are different ways to reduce the file size of a video. You can start by trimming the footage, removing the unnecessary parts, or lower the video resolution or quality.
How to Reduce Video Size on Windows 10
FilmForth
A good video editor doesn’t have to be complex and make a hole in your pocket. FilmForth is here to change that. It does not cost a dime, and the interface is ample for users with various levels of computer expertise. Download the software via Microsoft shop and avoid downloading from any third party.

Features
- Convert the video using the in-built Duo video converter. Consequently, convert the content into any format. The application is installed separately while it can be accessed from FilmForth.
- Trim the videos to reduce the file sizes with the help of the trim tool.
- Take advantage of the split option for dividing and removing the unwanted parts.
Method 1: Delete the Unwanted Part to Reduce Video Size
Step 1.Launch FilmForth and create a “New Project” by drag or add the video file.
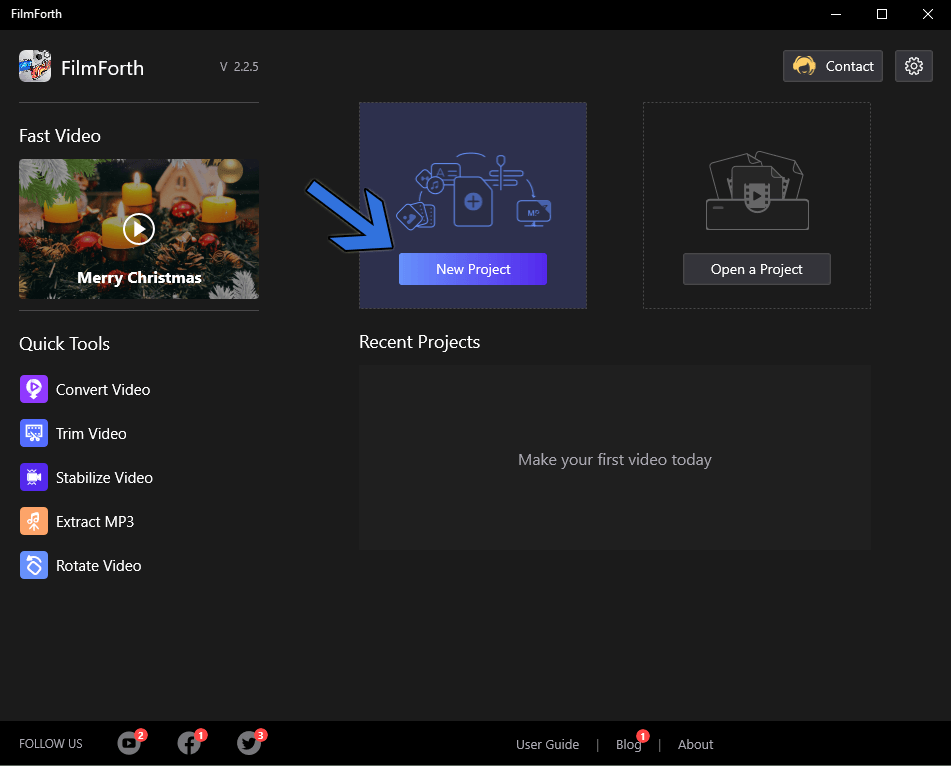
Launch “New Project”
Step 2.Once the video has been imported, move the yellow seeker line to the point you want to split.
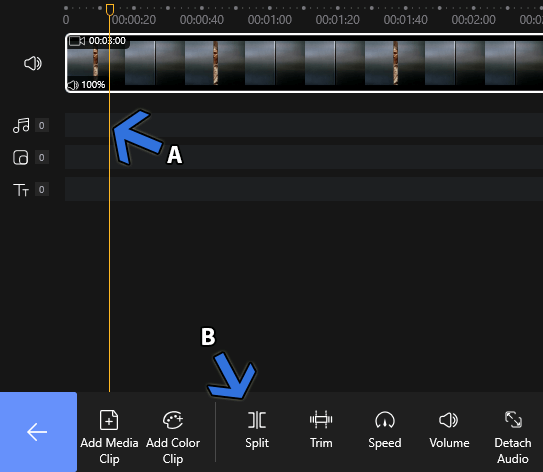
Split the Video
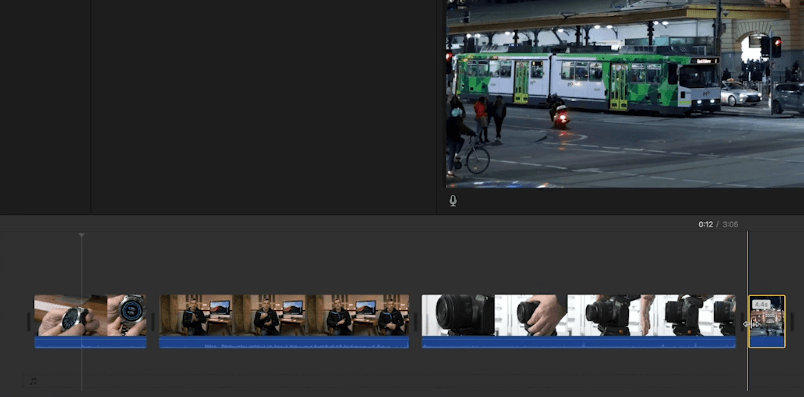
Step 3. Select the divided part and click the “delete” button on the keyboard. Delete the unwanted parts, and the size of your video will be reduced.
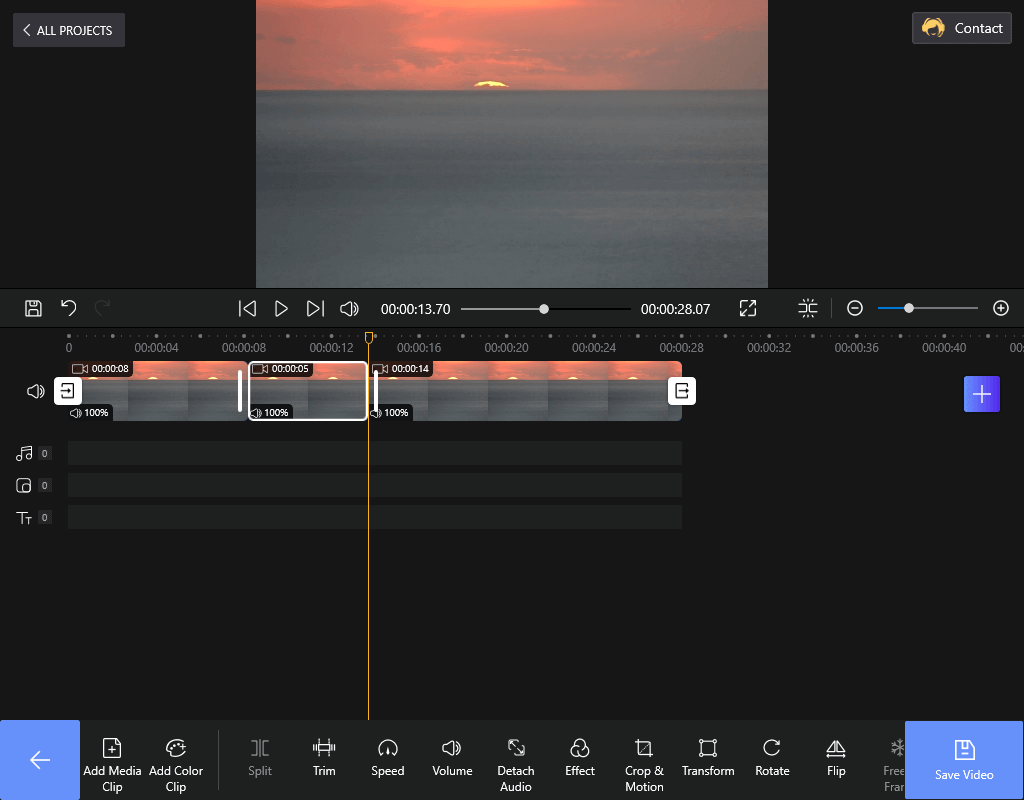
Delete the Unwanted Part
Method 2: Trim the Video Length to Reduce Video Size
Step 1. Import the video via creating a “New Project”. Then select the video track in the timeline and click “Trim” in the menu below.
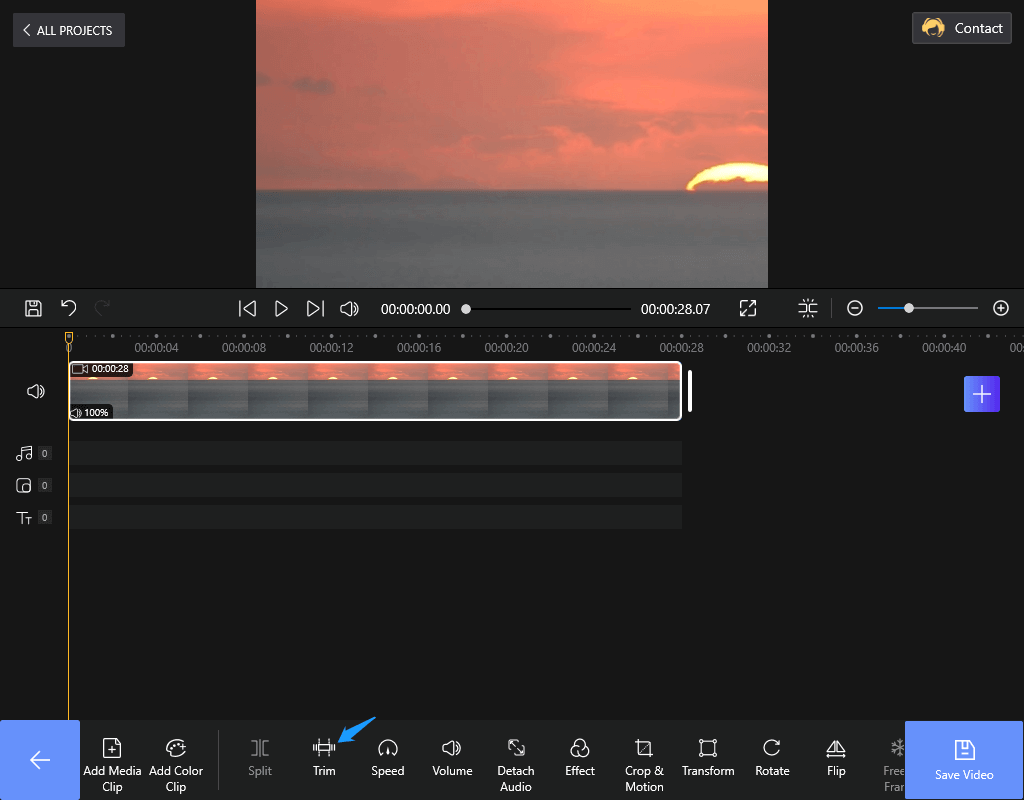
Trim the Video
Step 2. Trim the length of the video as you want from the start or the end of the video.
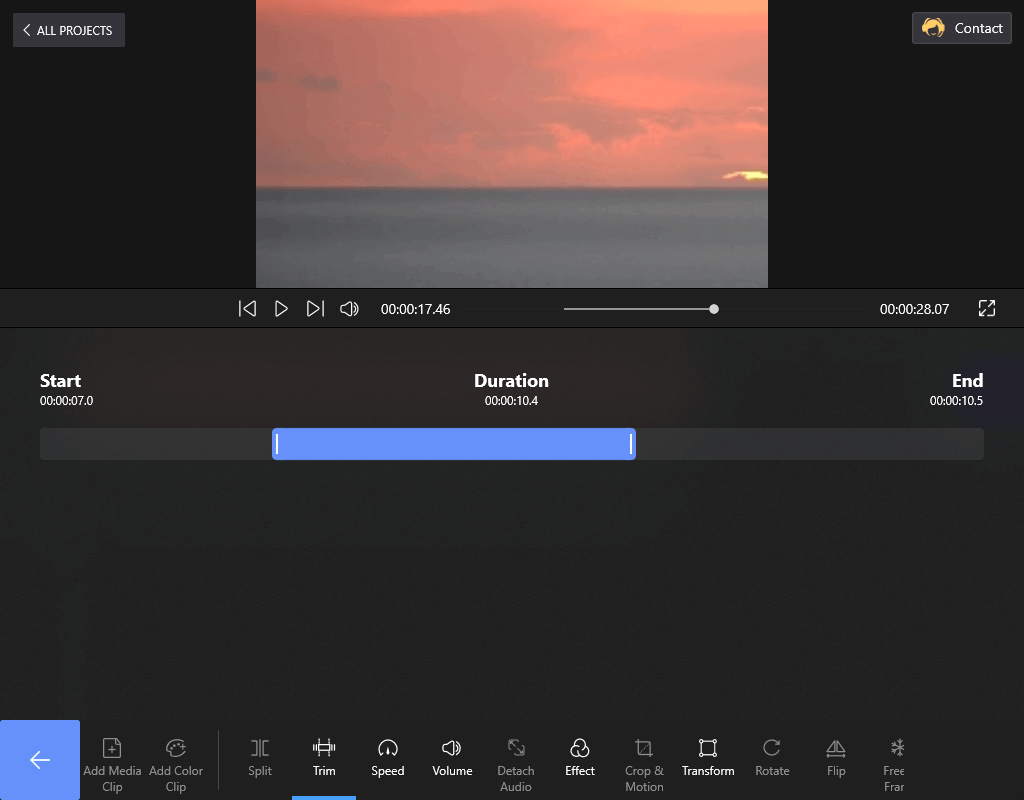
Trim the Video Length
Reduce video length will help you reduce the size of the video.
Method 3: Lower the Video Resolution/Quality to Reduce Video Size
Step 1. Import the video via creating a “New Project”. Then click “Save Video”, a video setting window will pop up.
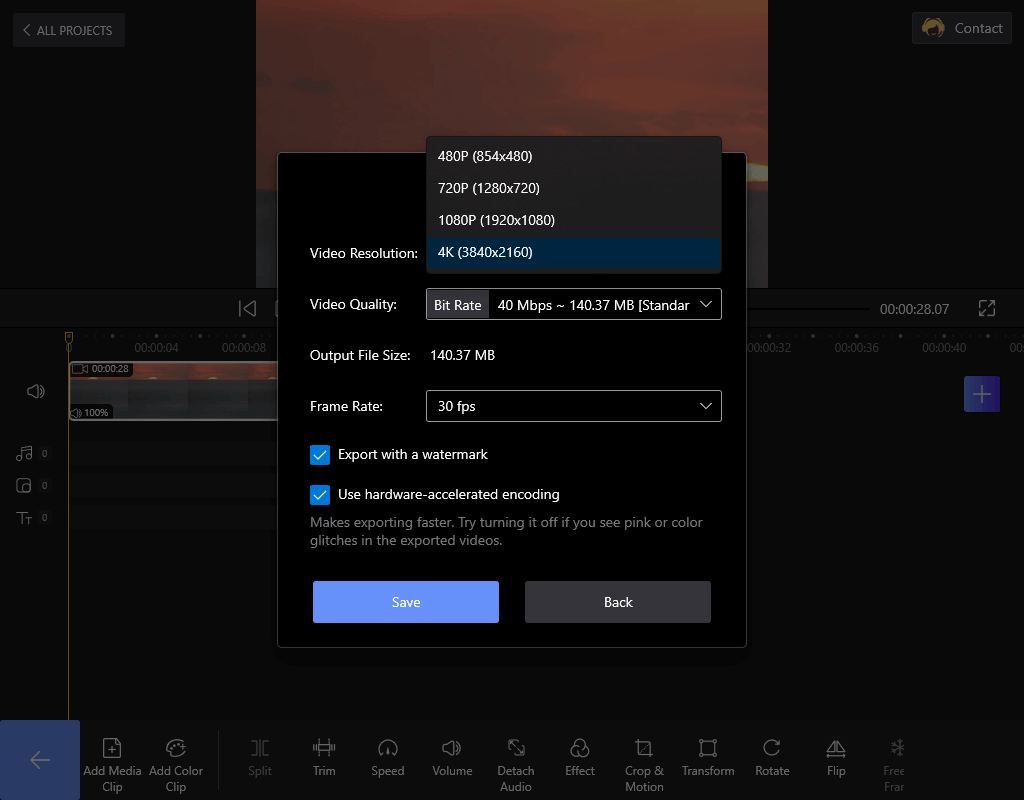
Lower the Video Resolution
Step 2. In the Video Resolution/Quality menu, choose the lower resolution/quality. This will help reduce the video size.
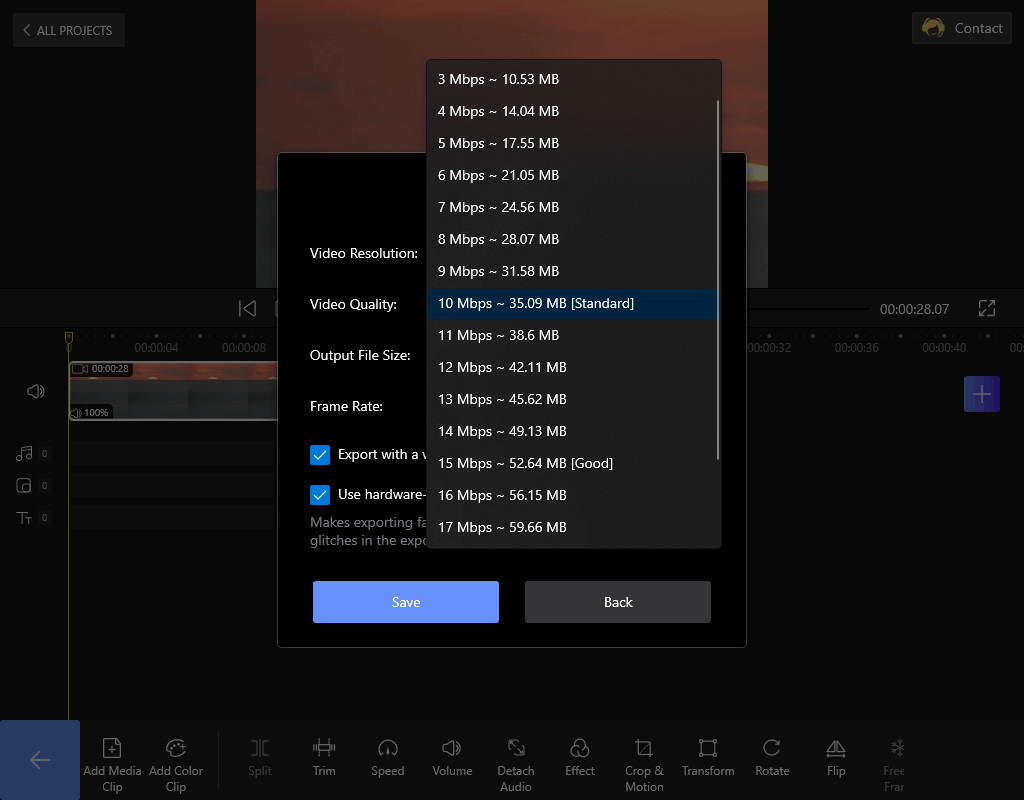
Choose Lower Video Quality
How to Compress a Video on Mac
iMovie
iMovie is a video editing application by Apple, shipped as a part of the media bundle for macOS, iOS, and iPadOS based devices.
Features
- An intuitive timeline makes it incredibly easy to edit videos in real-time. You can trim the video from there itself. Apart from that, add different audio feeds, effects, and more to the video.
- Edit and create videos quickly using the Magic movie feature.
- Cross-platform support lets you shuffle editing work between Mac, iPad, and iPhones.
Reduce Video File Size Using iMovie
Let us learn to reduce the video file size by changing the resolution of the video.
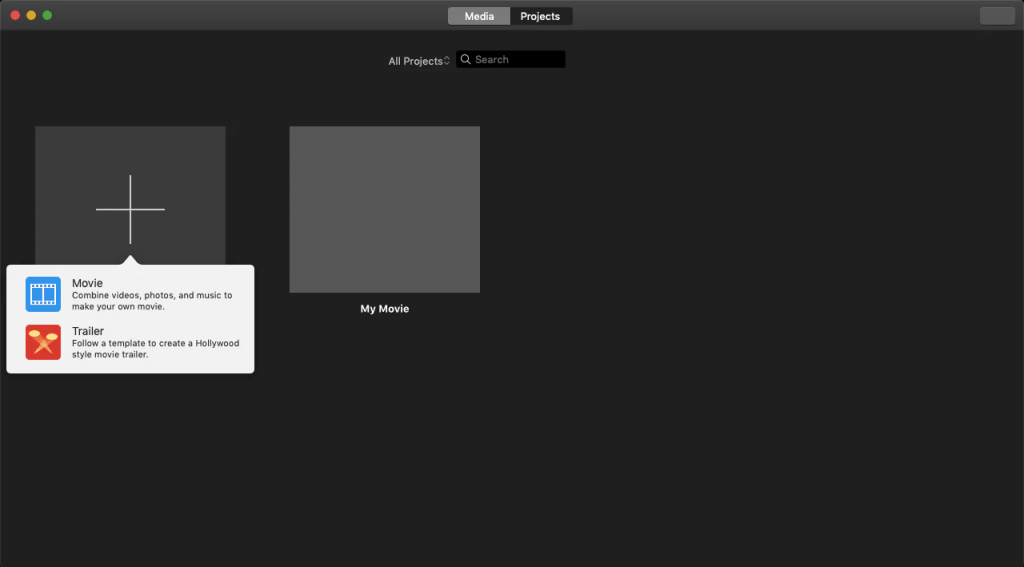
Step 1.Launch iMovie and head to the Project tab.
Step 2.Create a new project by clicking on the Create New tile, accompanied by a large plus sign.
Create a New Project
Step 3. After that, it’s time to import a video. You can use the keyboard shortcut Command-I. Drag and drop feature is also available.
Step 4. On the other hand, you have the traditional Import media button for the same.
Step 5. Now the video will appear in the timeline.
Add the Video
Step 6. After that, we provide a name for the project. Click on the Project icon, and a popup window for the name will appear on the screen.
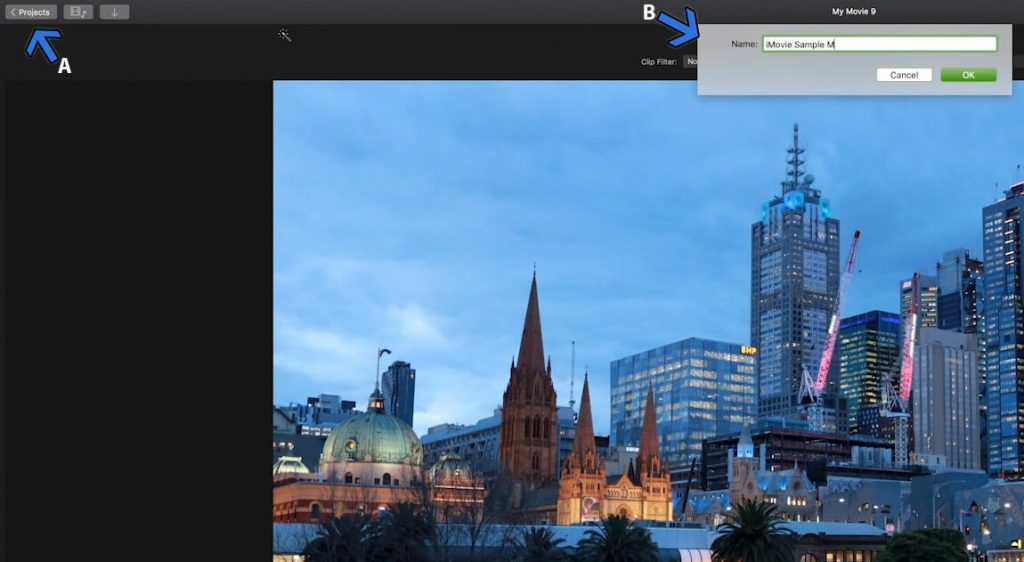
Name the Video
Step 7. Head to the home project window and click on the circular button next to the video.
Step 8. A menu will appear; head to Share Project > File.
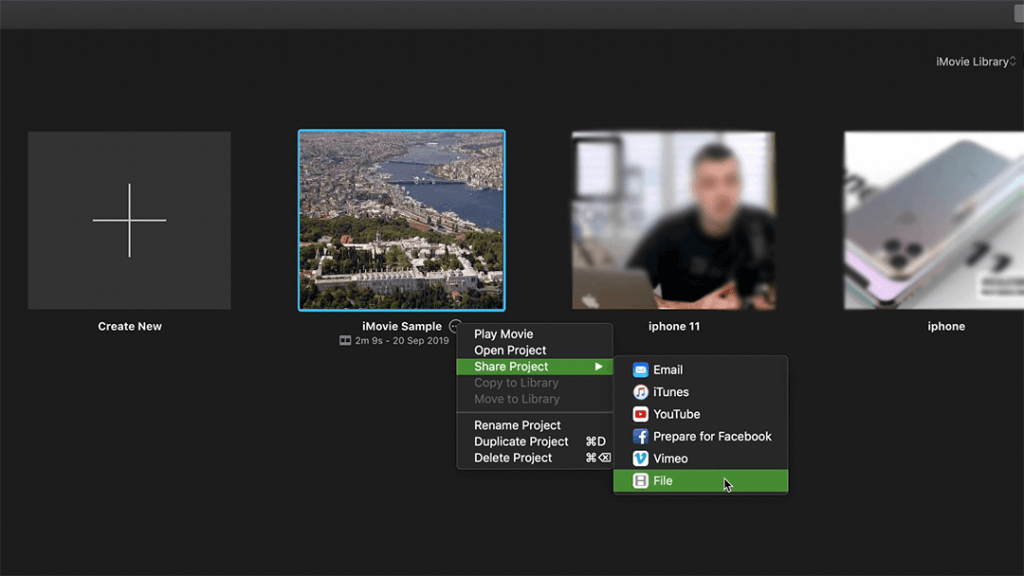
Find the “File” Button
Step 9. As you click on the File option, the save settings wizard will pop up on the screen.
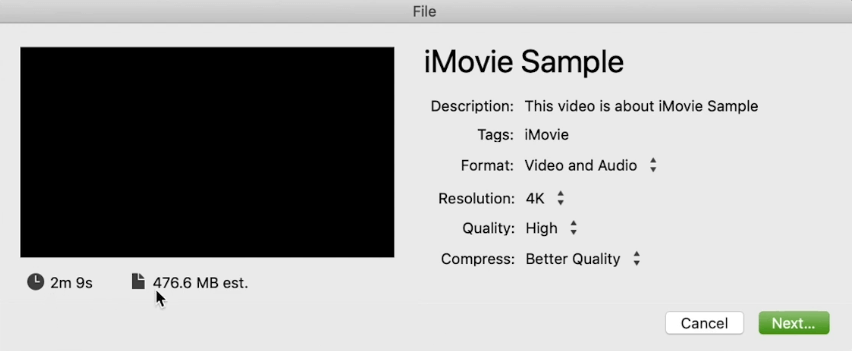
Lower the Resolution
Select the resolution and reduce it according to your needs. Lower resolutions will result in reduced file size in the standard practice. Click on the Next button and save the video in your desired location.
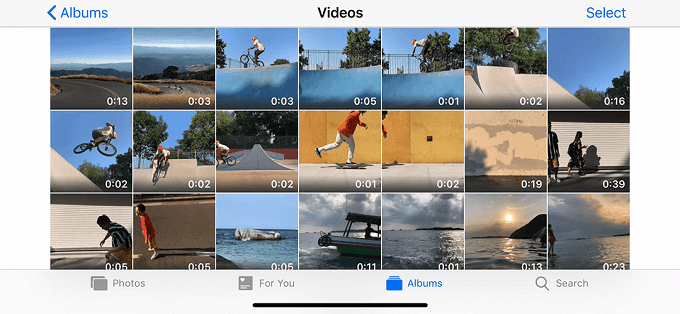
How to Compress Videos on iPhone
Photos for iOS
The photos app on the iPhone provides you easy access to the camera roll. You can view them in different aesthetic ways and manage the photos in grids.
Features
- Streamlined editing tool for photos and videos lets you do the standard edits without requiring iMovie or other professional-grade video editors. Edit in the app and upload them directly to social media using the share option.
- The AI-based tool highlights the best shots and hiding similar photos, screenshots, and more.
- For You tab helps you relive old memories from the past while providing the option to edit them
Reduce Video File Size Using Photos
We will trim the video in order to reduce the video size.
Step 1. First and foremost, we head to Photos and select the video.
Head to Photos App
Step 2.Tap on the Edit option, located at the top-right corner of the screen.
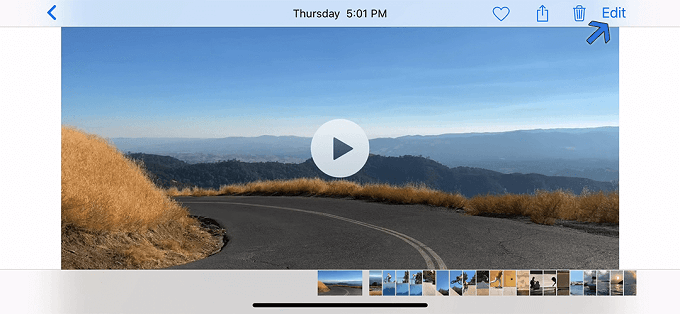
Click “Edit”
Step 3.Slide the ends to trim the video according to your needs. This way, you can remove the unnecessary parts from either end.
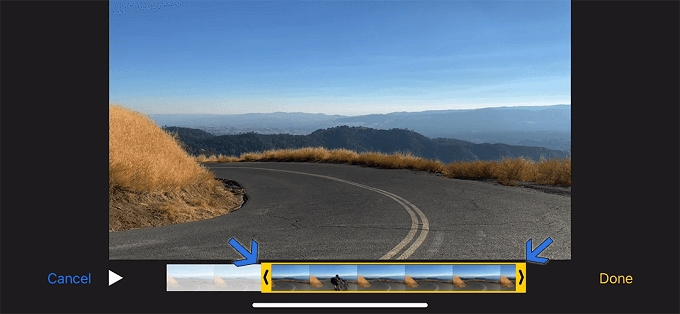
Trim the Video
Step 4.Tap on Done, followed by tapping on Save as New Clip.
Step 5. The video will be saved as a new clip while the original video will remain intact.
How to Compress Videos on Android
Video Converter – FX Converter
This video converter is a part of the media suite of FX Converter. When you click on the Convert button of the app, the video converter’s Play Store link will open up.
Features
- Export videos directly to the external storage. Convert large files and save on your phone’s space.
You can also import videos from external storage and sources. - Convert videos into multiple formats.
- Extract audio from video clips with ease.
Reduce Video File Size Using Video Converter – FX Converter
Step 1. Launch the Video converter and select the video file from the storage.
Select the Video File
Step 2. Tap on the format button, and the options for converting the video to different formats will appear on the screen.

Choose a Video Format
Step 3. When you are done selecting the format, tap on the start convert button. The converted video will appear in the output folder. Convert video format will help reduce the video size.
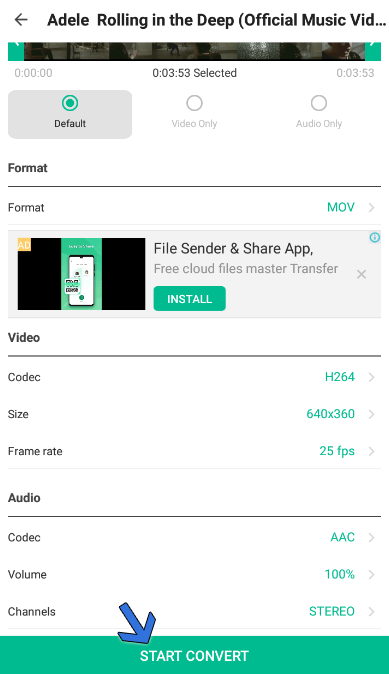
Convert the Video Format
How to Compress Videos Online
Online Video Converter
The online video converter is a relatively quick way to compress and convert videos online. You don’t need to install any application anywhere. Everything is done online.
Features
- Import videos from the computer, cloud (Google Drive, Dropbox), direct video URL. No need to upload large files and spend your bandwidth.
- Different device profiles with preset settings.
- Convert videos from any device by visiting the tool’s website.
Reduce Video File Size Through the Online Video Converter
Step 1. Head to the online tool and upload a file. You get a variety of options, such as cloud upload, direct URL, apart from local storage.
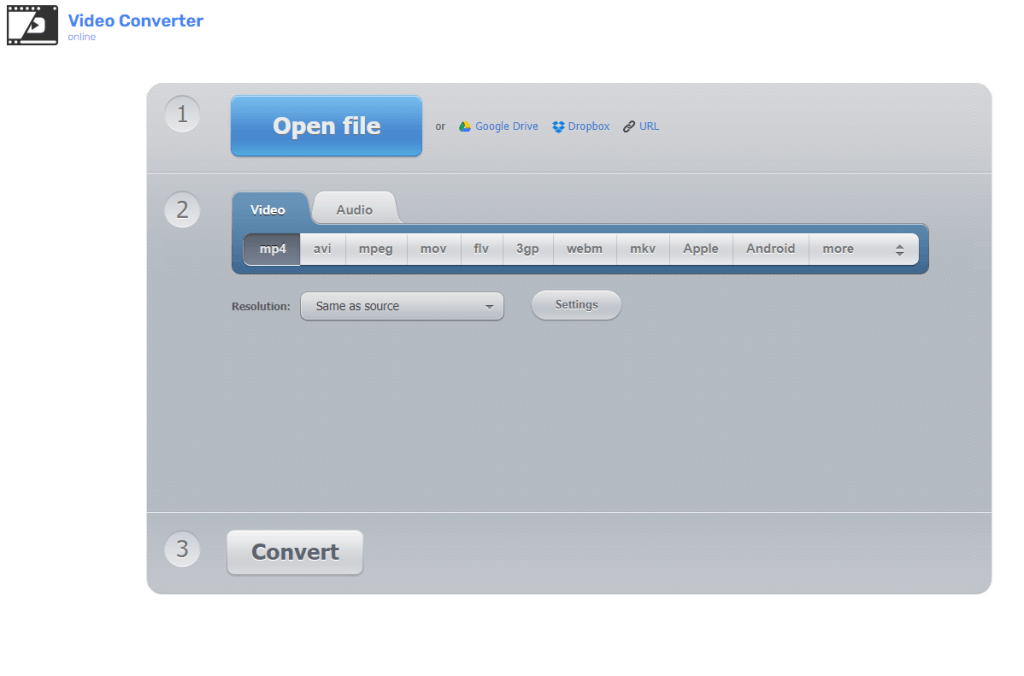
Upload the Video File
Step 2. In the 2nd section, select the format in which you want the video exported as.
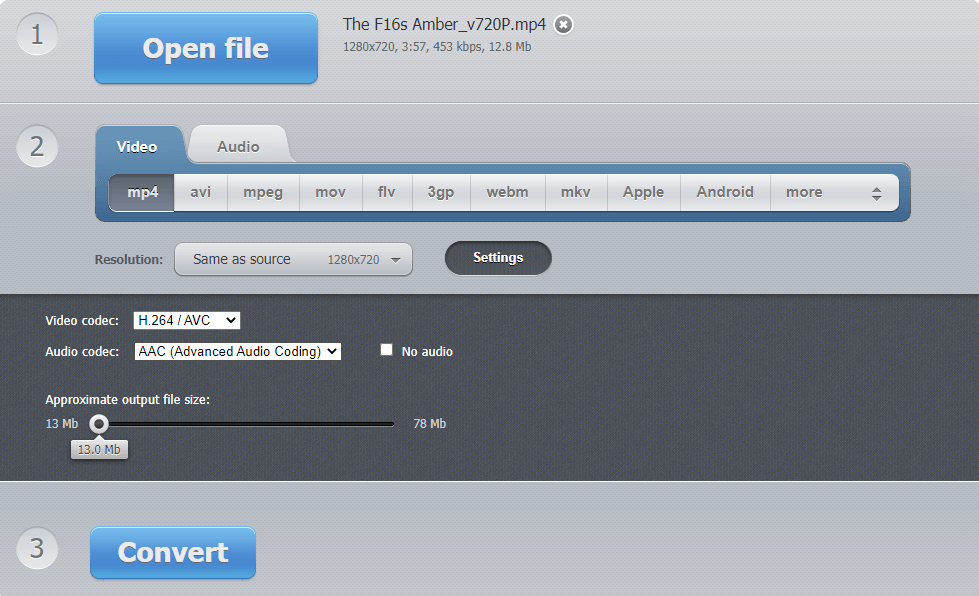
Pull the Video Size Bar
Step 3. Click on the Settings button, and the advanced video settings will appear. You can select the video codec, audio codex and see the approximate size of the output video.
Conclusion
Reducing video file size looks easier on the outside. We have to prevent quality loss while maintaining a similar video configuration. Formats such as MOV, WMV make it increasingly difficult as they are uncompressed media containers. Video editing utilities like FilmForth and iMovie can reduce the video size through various techniques.

Karen is a professional writer with a background in column writing who enjoys resolving complex topics and explaining them in interesting ways.
Related Articles
FilmForth - Free Video Editor
- Easy to use and no skill required at all.
- Export video to MP3 with one click.
- Add transitions, effects, filter, text to the video as you want.
- Remove, replace, record and edit the background audio easily.
- Change the speed, volume, and subtitle on video with ease.
- Stabilize, trim, rotate, and convert video in seconds.