Rectangle-screen Record Steps
RecForth provides professional recording technologies to help users capture the screen in multiple ways. You can choose Rectangle mode to customize the area of the recording screen.


Full-Screen Record
Partial-screen Record
How Rectangle Recording Screen
We will go to preview how to do a rectangle-screen recording through RecForth now. This recording mode allows you to take screenshots.
Step 1. Download and Install
You can go to Microsoft Store or just tap the download button to get RecForth on your computer. Wait for a while, it will tell you the download is completed. Then find the RecForth and start it after it is installed on your computer.

Step 2. Start to Rectangle Recording Your Screen
Choose the Rectangle icon, selecting the area you want to record. The size of the recording box can be determined by dragging and dropping, or you can customize the value of the rectangle size. In the drop-down box, there are two modes: desktop and mobile phone. You can select them according to your own needs, then the captured video can be adapted to the device when playing.
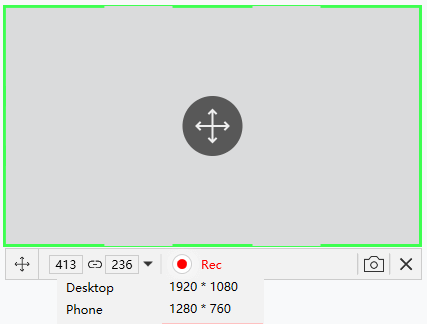
Customize Rectangle Size
Then click the Rec button below the rectangle to start recording. It will start recording with your customized rectangle size. To pause/resume recording, click the Pause/Resume button next to the red Rec button. If you want to end the recording, hit the red Rec button again to stop the current recording.

RecForth Function Buttons
Rectangle recording mode allows you to take screenshots. Tap the screenshot button and RecForth will save the content of the current screen as a picture to the recorded file.
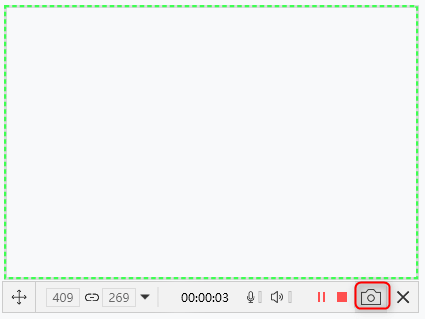
RecForth Screenshot Button
Step 3. Find and View the Video
Click the Red Record button to end the recording will automatically generate recording files. Then a “My Video” interface will pop up, in which you can play the video, open the video in the folder, rename the video, and delete the video. And you can get our other software by clicking the last two icons. It will help you edit and convert your video.
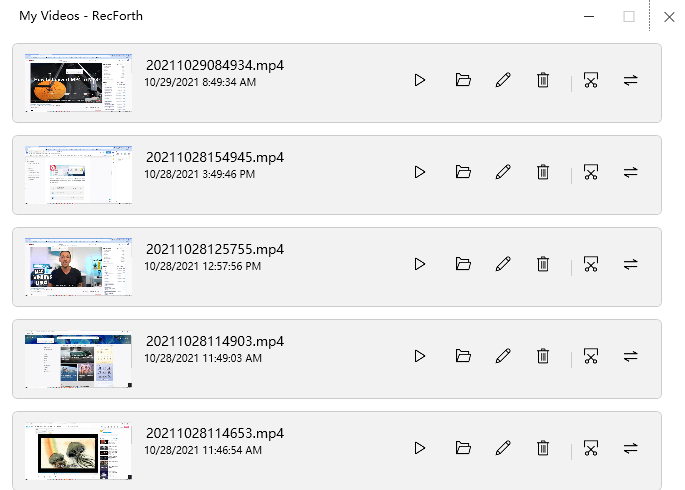
My Video Interface
Note: The Webcam can’t be opened in this kind of recording mode.