Window Recording Mode
In this mode, you can record only one window, and anything outside that window will not be recorded, which protects your privacy.


Full-Screen Record
Partial-screen Record
How to Window Recording Screen
In projects that use Window recording mode, make sure that other screens do not overwrite the window you have selected so that you do not record other screen actions. The following content is about how to use the window recording mode.
step 1. Download and install
If you’re new to RecForth, please click the Microsoft Store button to download RecForth. It will turn to the Microsoft Store page after you click the button, then you can get RecForth from here. Once RecForth is successfully installed on your computer, you can launch and use it.

step 2. Start to window recording your screen
Click the Area icon, then choose the Window from the drop-down.
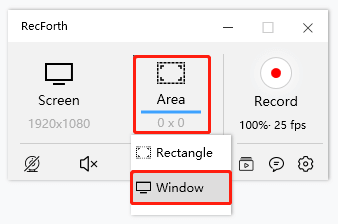
RecForth Window Mode
If you want to record one portion of the window, move your mouse over that window and click, then an action box will appear in the lower right corner and click the Red record button to start recording.
Window Mode Action Box
During recording, you can Pause or Resume the recording by pressing the Pause or Resume button. The shortcut key F2 can also Pause or Resume recording.
RecForth Pause Resume Icon
step 3. Playback your recorded video
The video will be generated automatically after recording. You can also click the My Video icon to the right of the Pointer icon, then a “My Video” interface will pop up.
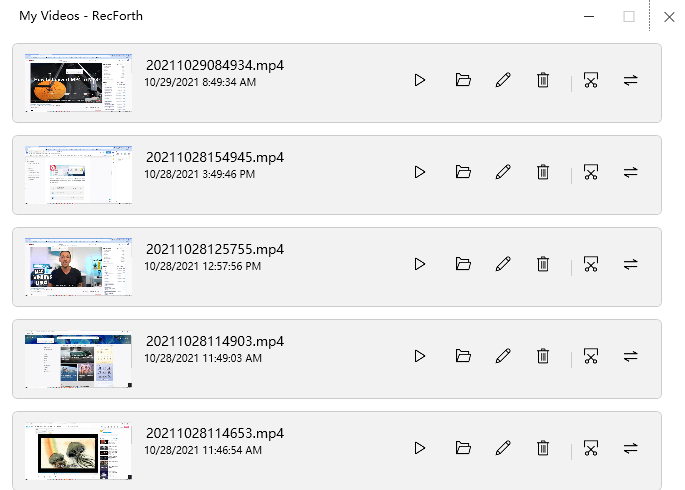
My Video Interface
The Webcam can’t be opened in this kind of recording mode.