How to Change Video Speed in 2023
This article gives you the easiest way to slow down your video on Windows 10.
This post will show you the steps to change video speed on Windows 10.
No matter to speed up or slow down specific parts of a video, the detailed steps will show you how to change the playback speed from 0.002x to 64x.
To calibrate the speed of the scenes in the video in a matter of seconds will need great video editors. Known for all, the Photos app is one of the default software on Windows 10. It gathers photos from the computer, phones, and some other devices. So you can view pictures via the Photos app. Also, it provides many video editing features that will allow users to edit the video simply.
Let’s dive in.
Step 1. Launch Photos App
Select the program on your computer, and tap to run it on the PC. Now you will see the Collection, Albums, People, Folders, and Video Editor. Tap the Video Editor button to go on.
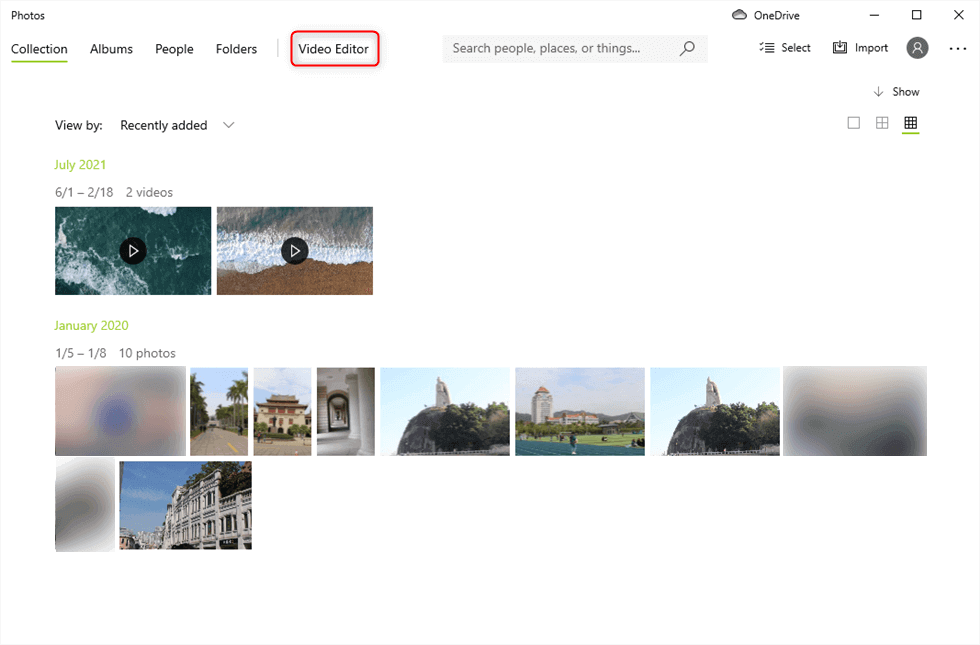
Choose Video Editor on Photos
Step 2. Upload Video to Photos
Upload the video you are going to change the speed by clicking the blue Add button, you can choose your clips from PC, collection, or the web.
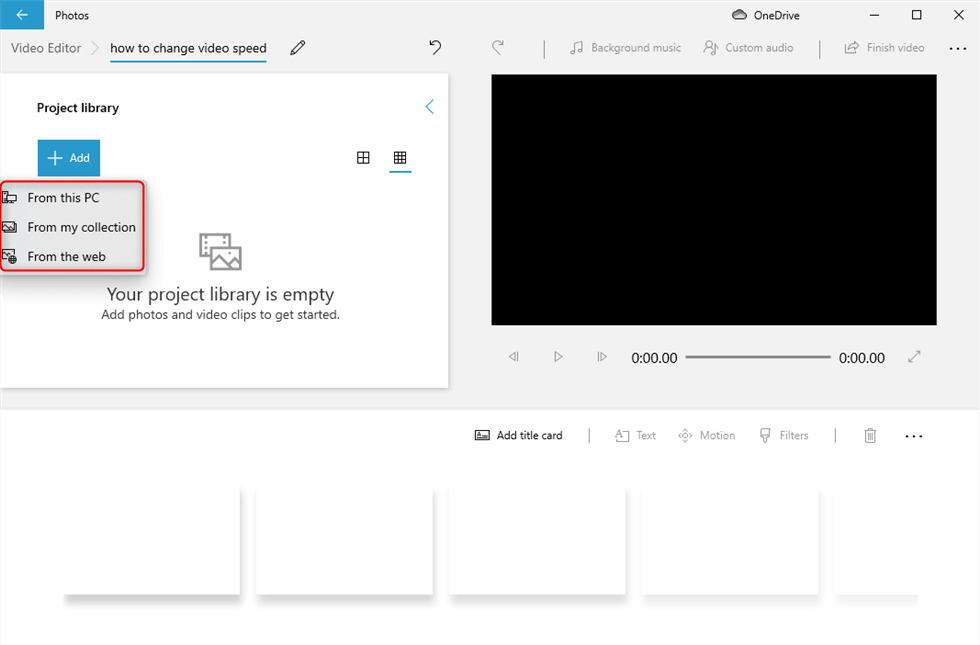
Click on Add Button to Upload Video
Now you have to drag the uploaded video from the project library to the editing bar. And the editing toolbar will show you at the same time.
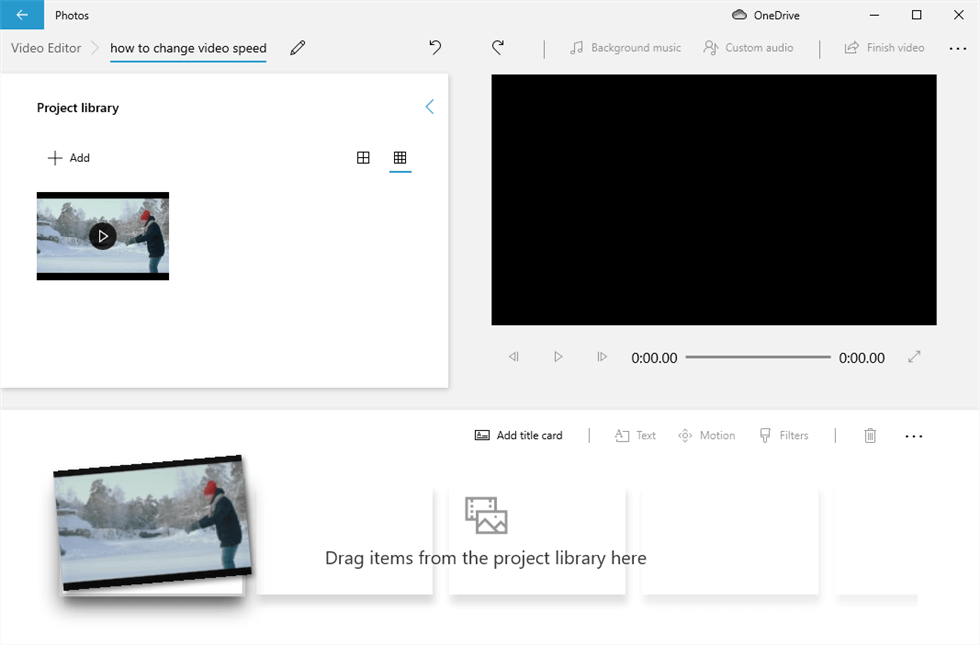
Drag the Video Clip to the Editing Box
Step 3. Adjust the Video Speed
Hit the Speed button and modify the playback speed by moving the speed-changing button.
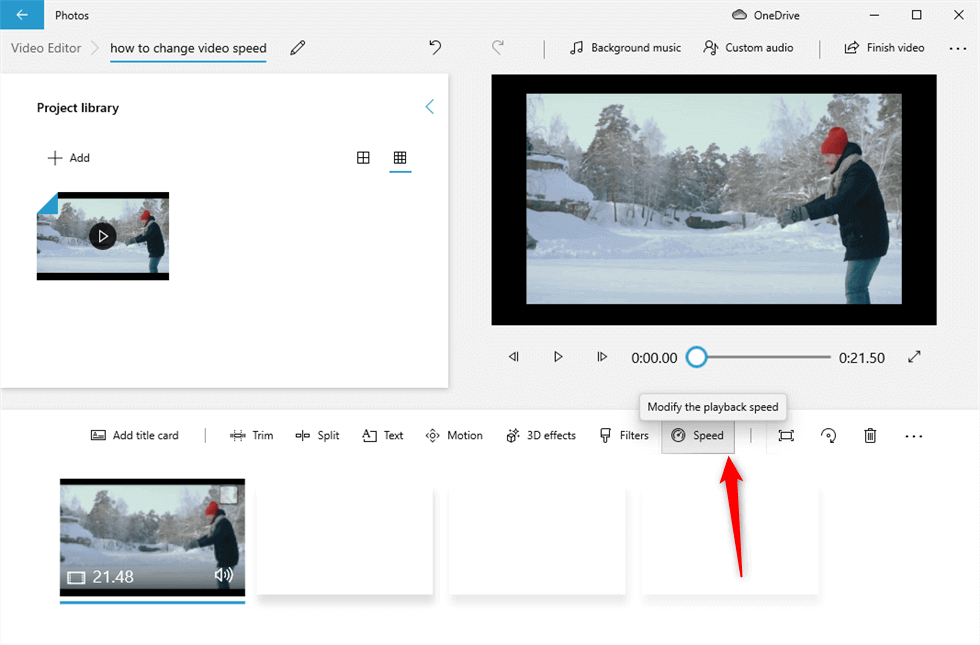
Modify the Playback Speed
You can move the button to adjust the video speed from 0.02x to 64x. After you complete the speed changing, you can tap the play button to preview the video you had changed.
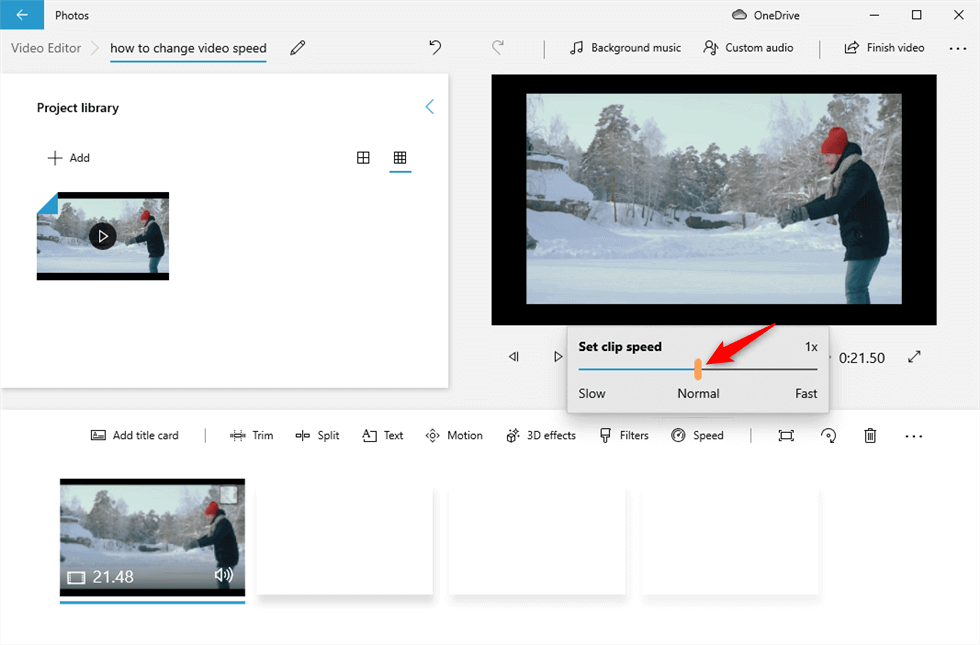
Slide the Button to Adjust Video Speed
Step 4. Export Video
Finally, click the Finish Video button on the top-right corner to export the video.
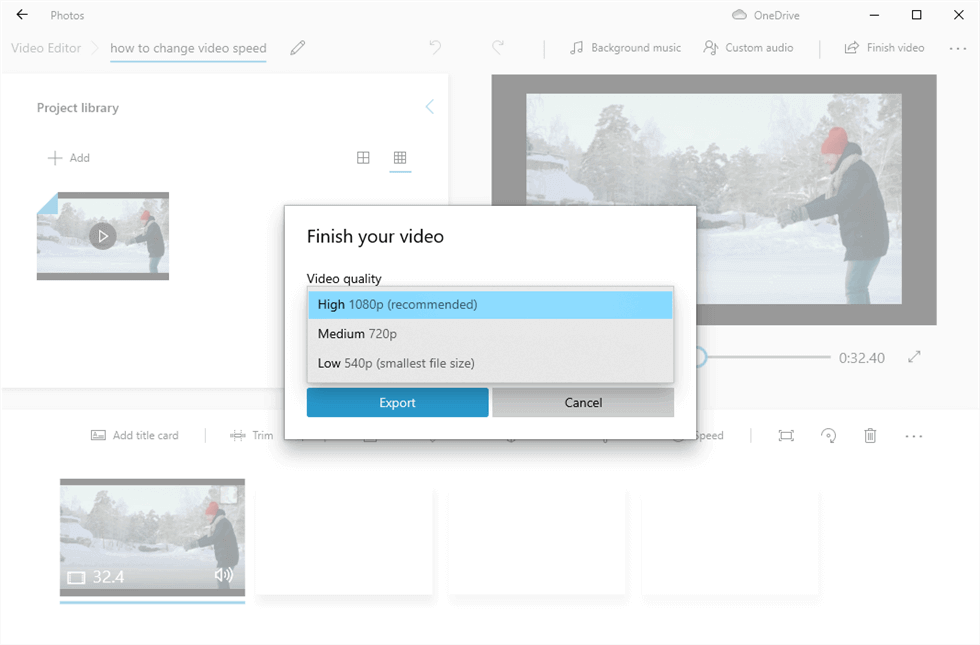
Export Video
Besides the Photos app that can be used to change the video speed, there are quite a lot of Photos alternatives to help change the video speed. FilmForth would be one of them. Except for the video speed changing, it also supports editing the video with different powerful features.
FimForth is free to use. With its user-friendly interface, everything is right there on the screen. That’s not all, and you can export your video without the mandatory watermark of the editor. This is uncommon in the free video editing apps segment.
FilmForth – Free to Change Video Speed
Changing the speed of the whole video or a certain part of the video.
- No Skills Required
- Free to Use
- Save & Share Without Watermark

Video Tutorial: How to Change Video Speed
You can also check the detailed steps from this video tutorial to change the video speed.
How to Change Video Speed via FilmForth
With FilmForth, you can not only change the whole video speed but also change a certain part of video speed. Both can be done in just a few clicks. Let’s take a look at how to make it.
Step 1. Upload Video to Video Editor
Download and launch FilmForth and create a new project by clicking on the New Project button.
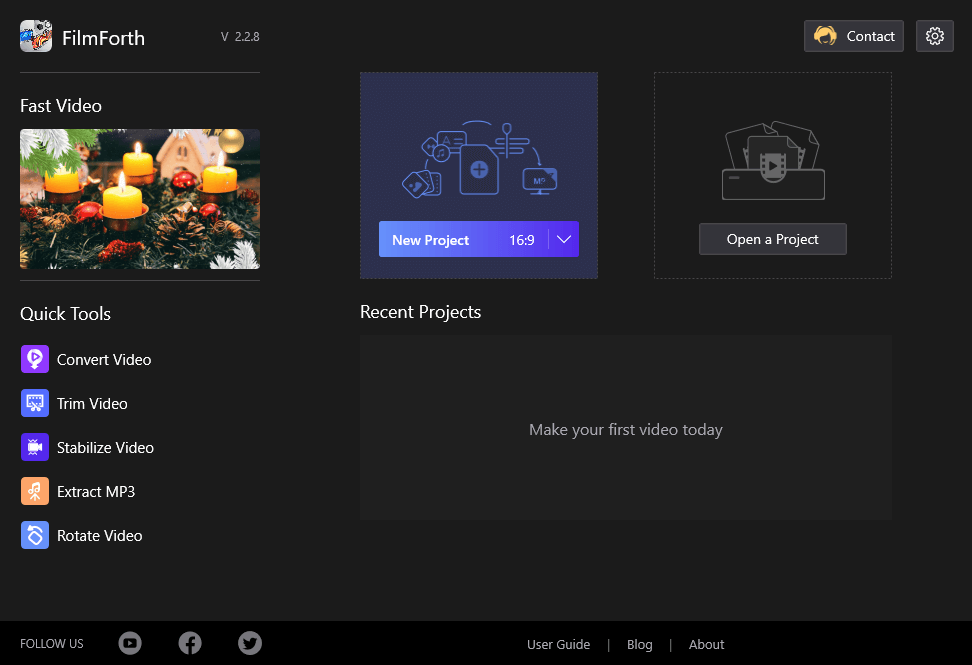
New Project on FilmForth
Import a video using the Add Video/Photo clips button. You can drag and drop a video to do the same.
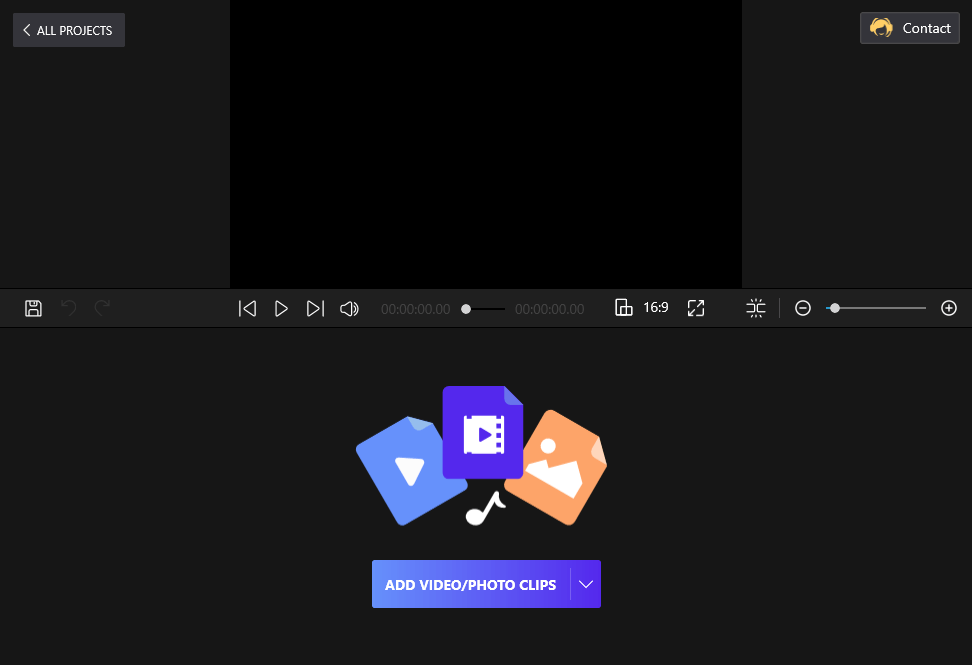
Drag and Drop the Video to FilmForth
Step 2. Change the Video Speed
Tap the Speed button and there will pop up a small window that will show you the speed you may need. Just drag the slid to adjust the speed you will need.
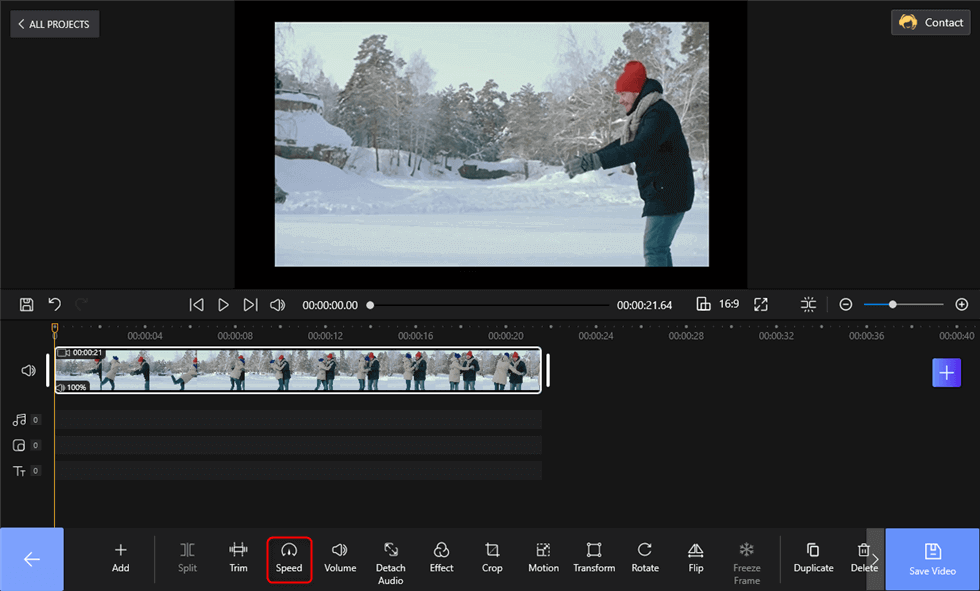
Change the Video Speed on FilmForth
Here, you will find a slider scale. The 1x denotes the default speed of the video.
- Slide left to the 1x, and your video will be slowed down.
- Slide right to 1x, and the video will speed up.
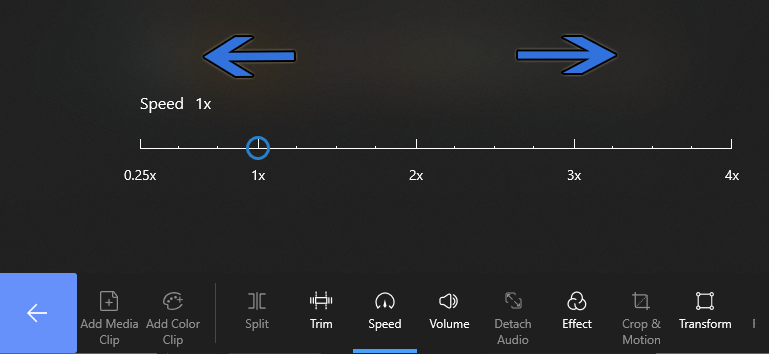
Change Video Speed on FilmForth
Step 3. Export the Video
You can preview the video speed by clicking the play button to play the video. When the speed meets your need, you can hit the Save Video to export the clip to the computer.
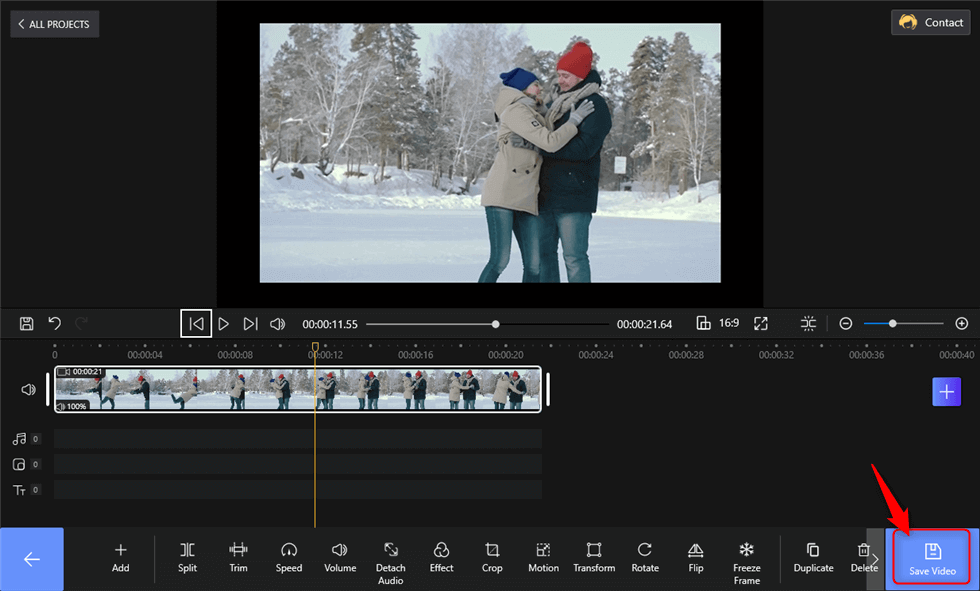
Export the Video
You Must Know:
- For changing the speed of a particular scene, split the video into smaller parts. Select the clip in question and calibrate the speed to your liking.
- You can revert to the original speed by moving the button to 1x.
Conclusion
Speeding up specific parts of the video saves viewers from the mundane stuff. You can fast forward the parts and scenes that are unimportant to the narrative. On the contrary, slowing down a video adds a bit of drama and slows down the scene.
When changing the video speed is as simple as dragging the mouse pointer in either direction, creativity sprouts up. FilmForth is a video editor that has been making all the right noises in the arena.

Related Articles
FilmForth - Free Video Editor
- Easy to use and no skill required at all.
- Export video to MP3 with one click.
- Add transitions, effects, filter, text to the video as you want.
- Remove, replace, record and edit the background audio easily.
- Change the speed, volume, and subtitle on video with ease.
- Stabilize, trim, rotate, and convert video in seconds.