How to Make a Slideshow on PowerPoint
This article will reveal the detailed 4 steps to make a slideshow on PowerPoint. You can learn how to add music, text, and transition effects to the slideshow on PowerPoint easily.
In this post, Steps to make slideshows with PowerPoint will be intorduced because PowerPoint can meet all your needs while making a slideshow. Some features of PowerPoint you may be interested in.
- PowerPoint is generally free for Windows users as Microsoft Officials were added by default in some regions.
- It owns lots of great transitions effects, supports animated texted adding, and free-to-use built-in music, etc.
- No watermark was marked while exporting the slideshow. This would be the best part.
With PowerPoint, you don’t need many tricks that will help you make a nice slideshow. There are only 4 steps. Now let’s follow the detailed 4 steps and learn how to make a slideshow on PowerPoint.
Video Tutorial: How to Make a Slideshow on PowerPoint
In this tutorial, you can easily learn 2 methods to make a slideshow. You can directly go to 1:58 and get the detailed steps to make a slideshow on PowerPoint.
Step 1. Launch PowerPoint and Get Started
You can start PowerPoint from the start menu. There are some templates you can apply to make a slideshow. Or just tap the Blank Presentation to start from scratch.
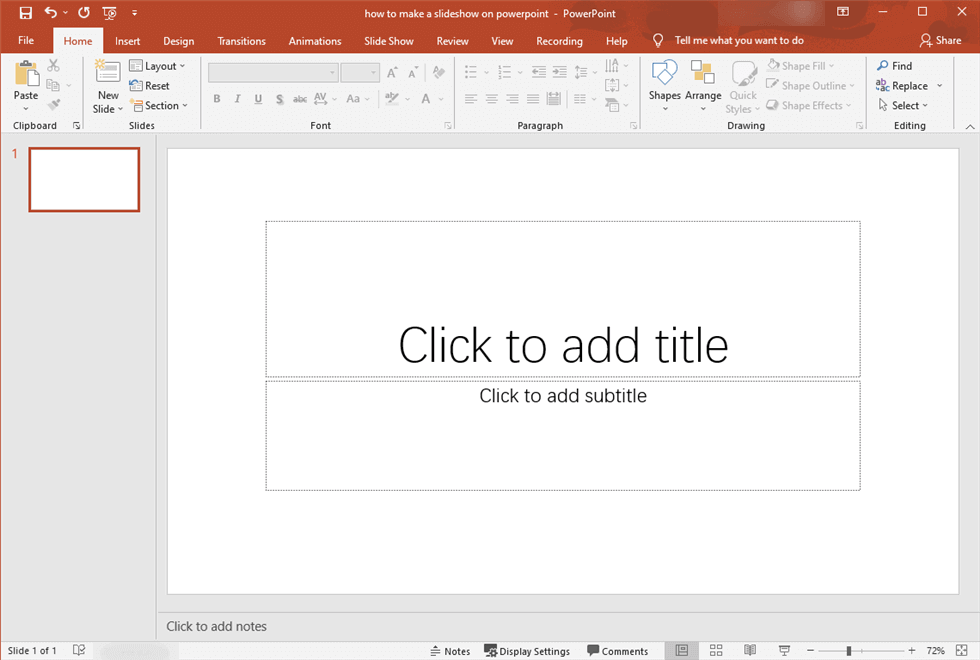
Launch PowerPoint and Get Started
If we have a blank presentation with the cover page. On the left, we have the slides in a thumbnail overview. You can use the mouse pointer to rearrange multiple slides.
Also, there are some templates you can choose from. Tap the File button on the top first. And the template’s dashboard will open up. Here you have a collection of templates, which are ready to use. You can also lookup the online library of Office for templates.
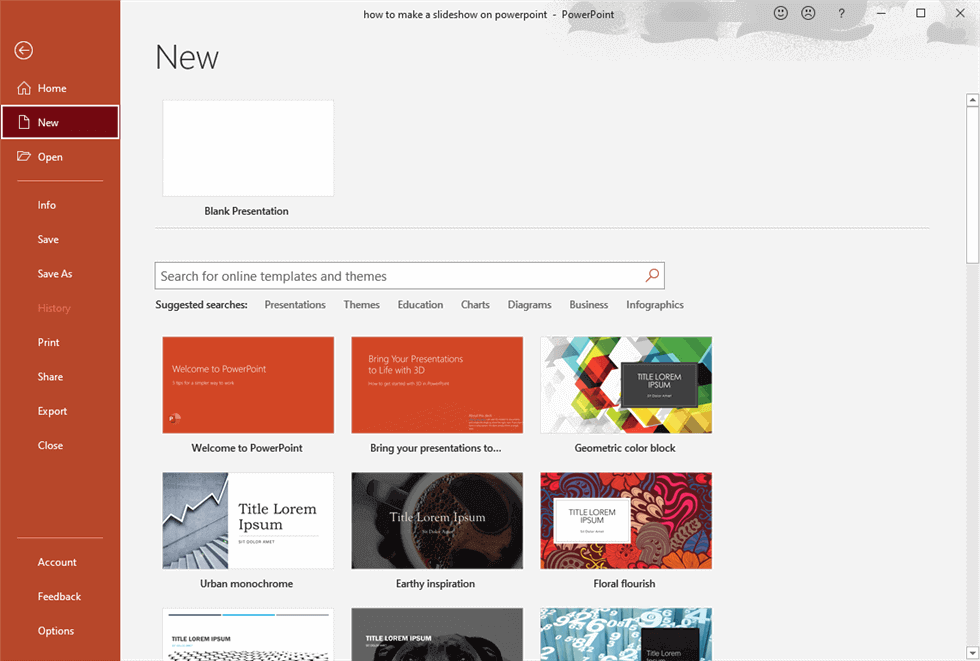
Choose a Template
As an average user, you can make a slideshow with PowerPoint using the premade templates. We won’t be doing that because the adjustments needed on the templates can be intimidating for many. Instead, let’s select the Blank Presentation and start from scratch.
Step 2. Upload Pictures to PowerPoint
Drag the pics to the blank page or tap the Pictures from the Insert to upload pictures from the computer. Also, you can directly use the Ctrl+M to add clips. You can upload pictures at one time by tap the Photo Album.
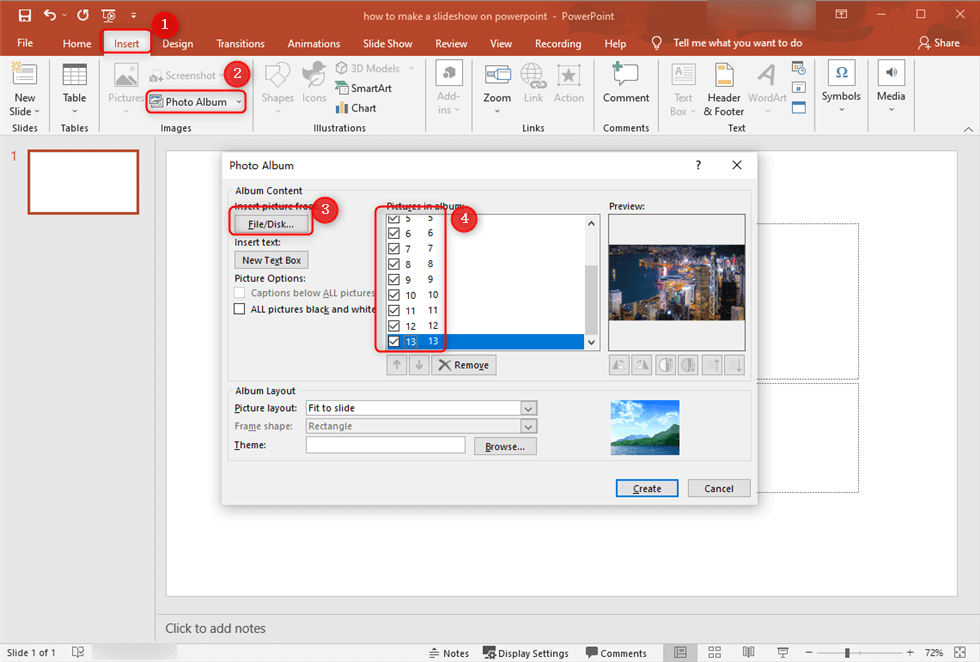
Add Photos to PowerPoint
By default, the slide format with Title and subtitle will appear. You can head to the New Slides menu and choose a different format. And then, next time you add a new slide, the chosen format will be applied to it.
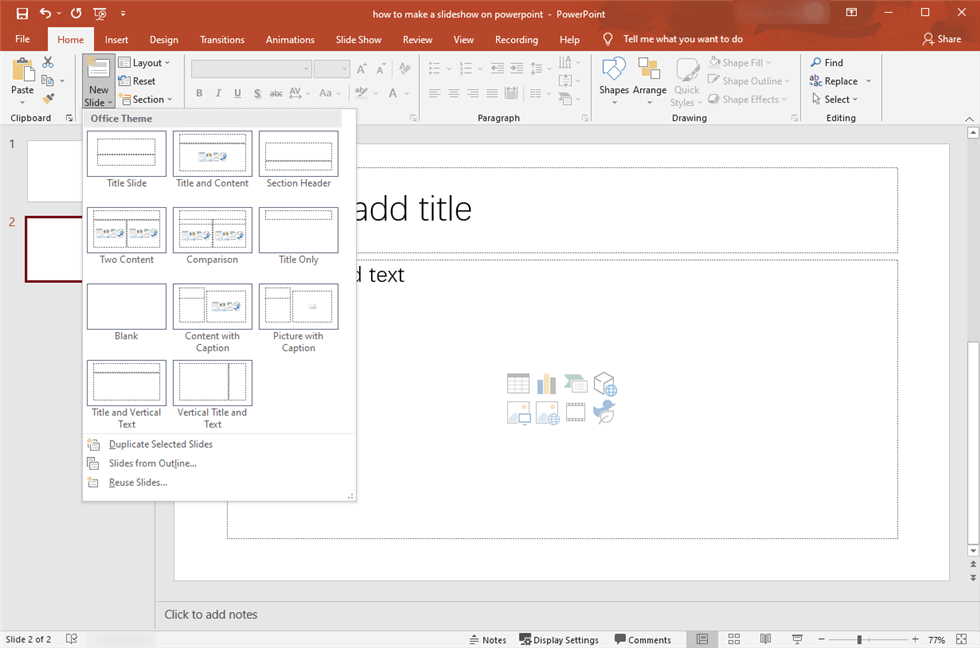
Choose a Different Format Slide
Step 3. Edit the Slideshow
A nice slideshow should contain animate text, subtitles, music, and suitable transition effects. Here in this step, you can learn how to add text, music, transitions to the slideshow on PowerPoint.
Text the Slideshow on PowerPoint
Add text to the slideshow will make the slideshow much easier to learn. So how to add text to the slideshow and how to animate the text? Just Go to Insert > Tap the Text Box > Directly Draw a Text Box on the slide or choose Draw Horizontal Text Box or Vertical Text Box.
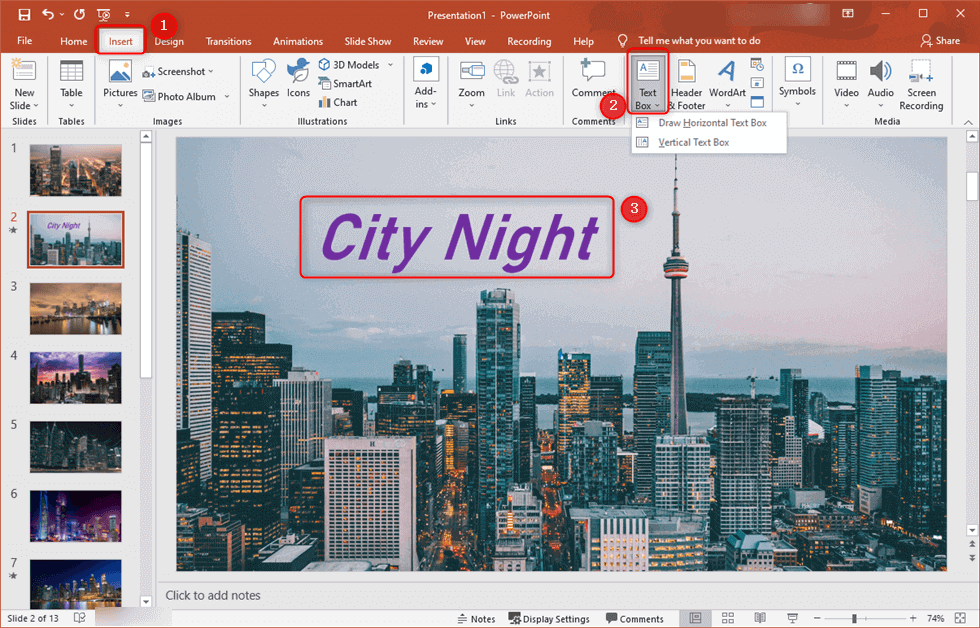
Add Text to Slideshow on PowerPoint
Insert the text you want to add. Then you can reshape the text and animate the text as you need.
Back to the Home option, here you can set the Text Font and draw the text style you want. The shape, color and the arrange of the text can be set in your own way.
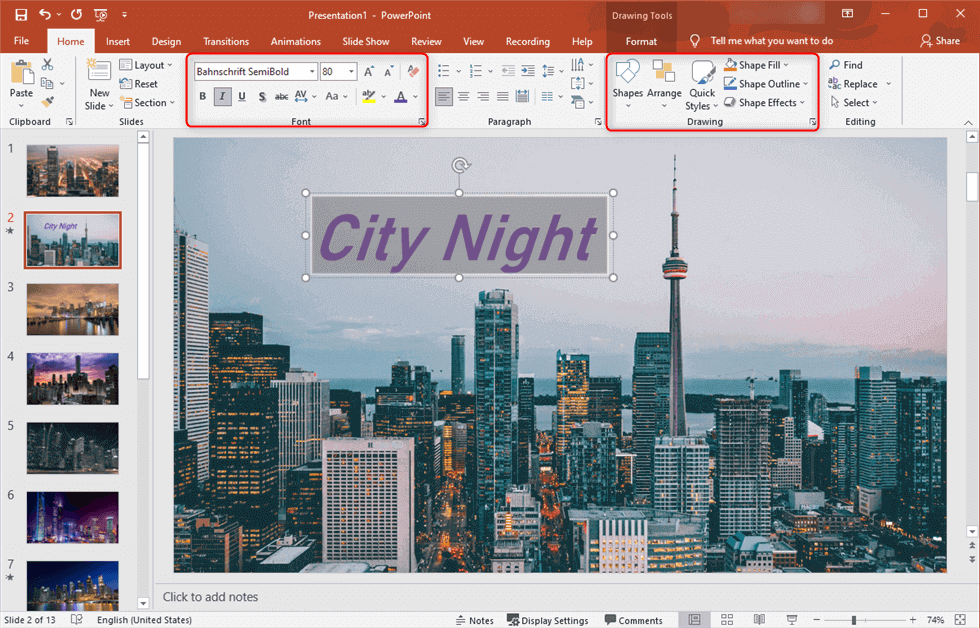
Edit the Text
Once you complete the Text adjusting, you can go to the Animations part in the 1 location. Here you will see lots of animations you can apply to the text you added to the slides. Then the Timing part can help you set the animation text Duration and Delay. Do them as you need.
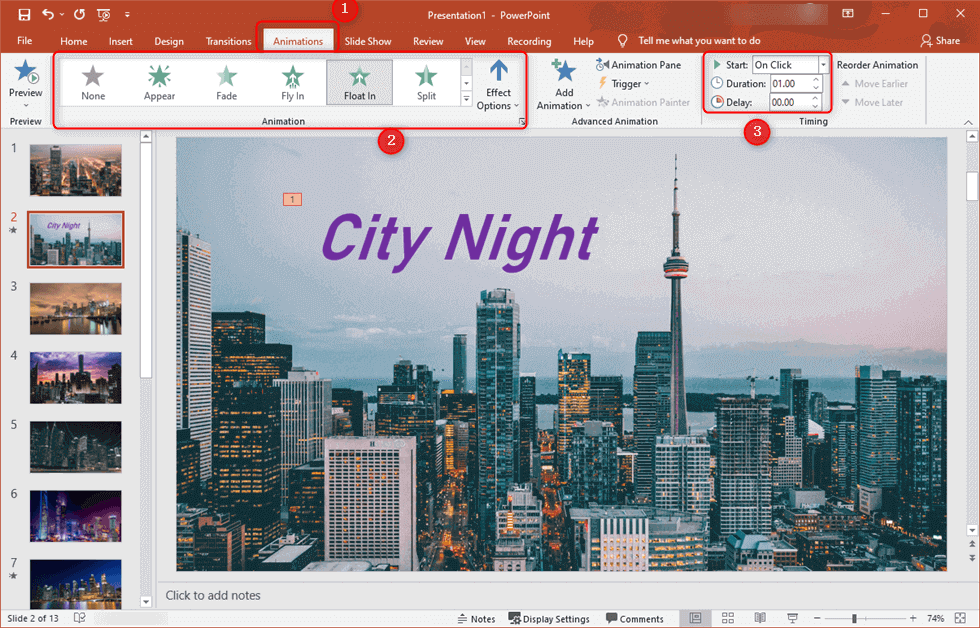
Animate the Text
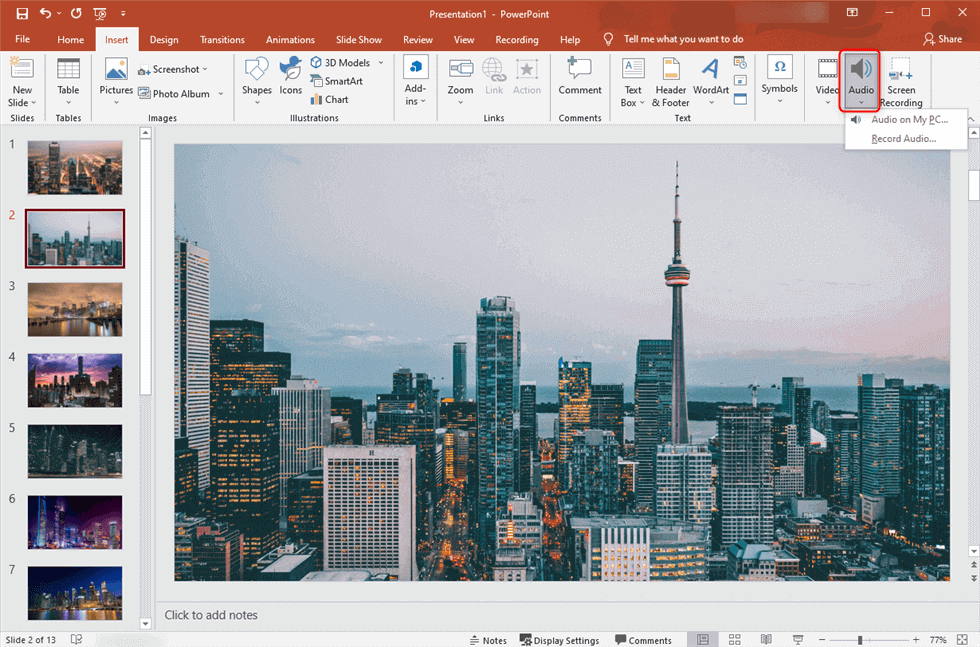
Add Music to the Slideshow on PowerPoint
Any slide which is less than formal warrants music to set the mood and create a vibe. You can add music to the PowerPoint slideshow within a few steps.
Hit the Insert tab > Select the Audio button > Tap on Audio on My PC… or choose Record Audio…
How to Add Music to Slideshow on PowerPoint
If you choose the button Audio from My PC, you will load your background music from your local computer. All you need to notice is to make sure the duration matches the PowerPoint presentation’s time.
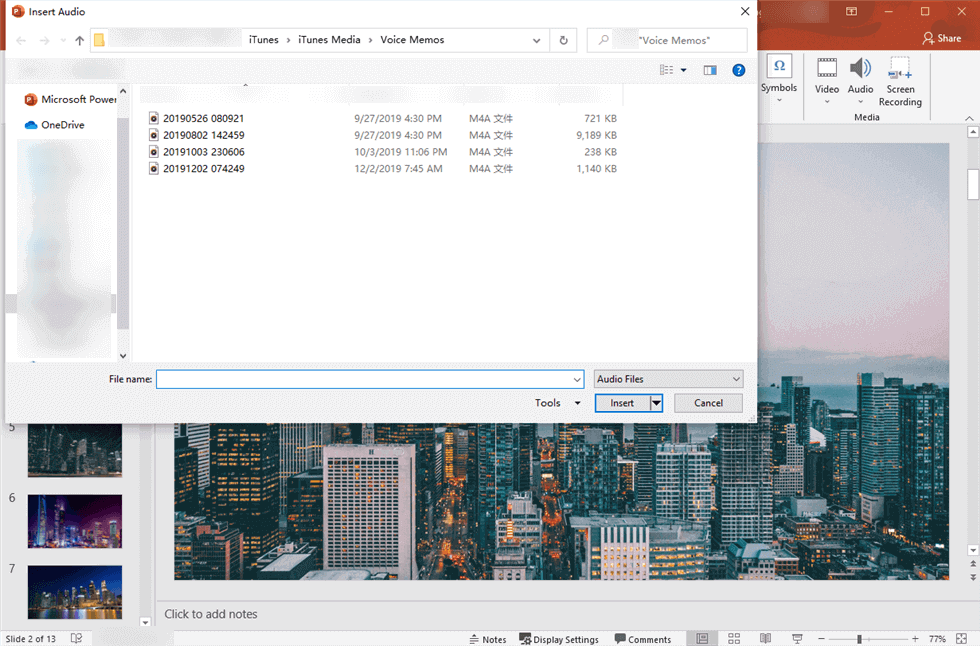
Add Music from PC to Slideshow
If you hit the Record Audio…, you need to record your audio yourself.
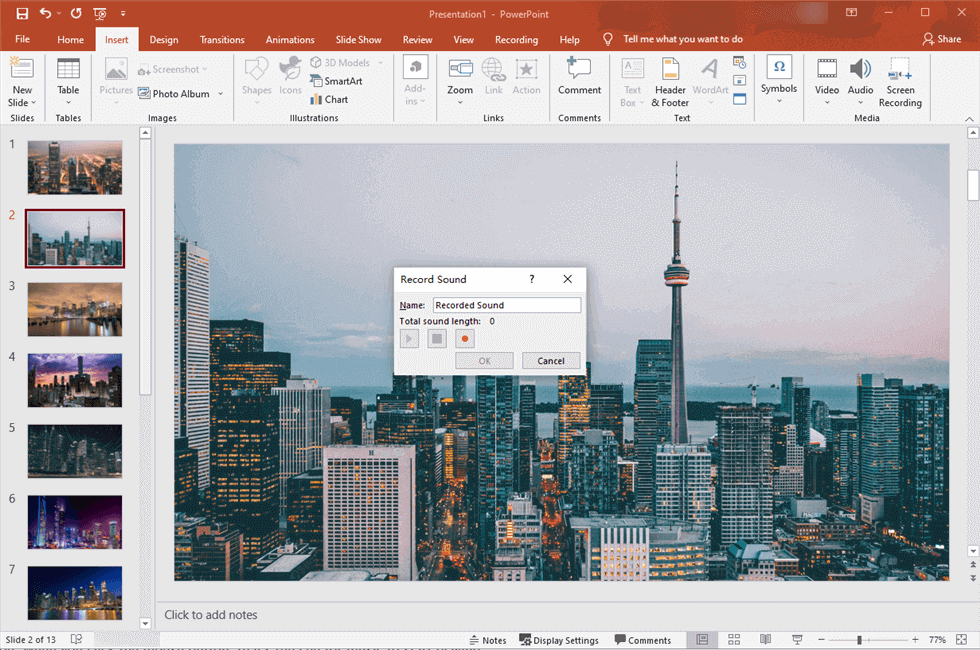
Record Audio Yourself
An audio play button will appear on the slide, and the playback menu will open up. Checklist for the Playback menu. It contains Preview, Bookmarks, Editing, Audio Options, and Audio Styles.
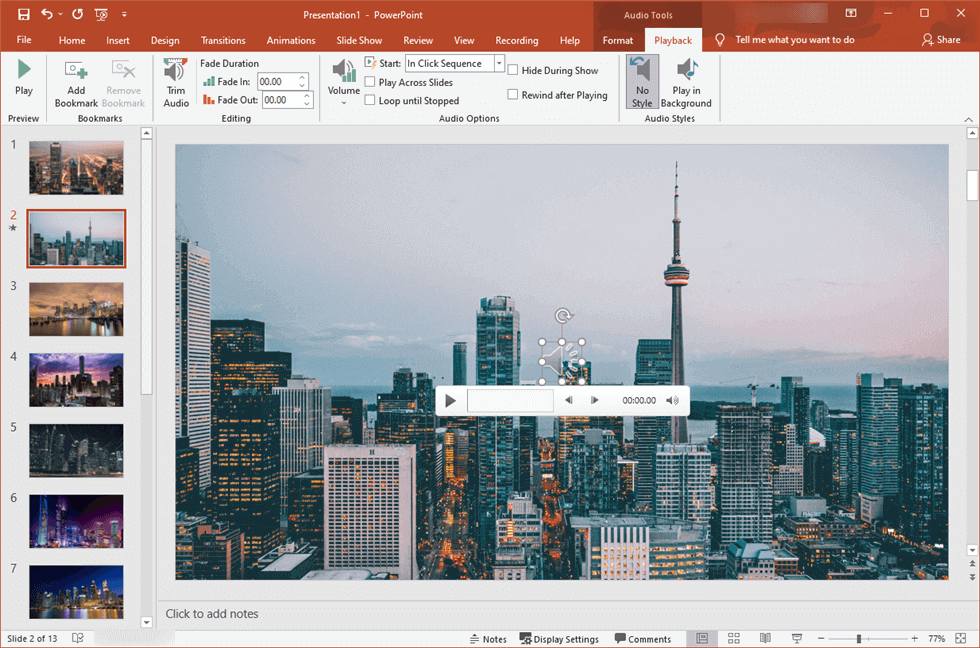
Adjust the Audio
Audio Options contain Start, Play Across Slides, Loop Until Stopped, Hide During Show. And they separately stand for:
- Play Across Slides: The audio will keep running while the slideshow plays.
- Loop Until Stopped: The audio will be played repeatedly and continuously when the active slide is shown.
- Hide During Show: It means the audio will be hidden on the slide when running the slideshow.
Audio Styles has No Style and Play in Background. Select the Play in Background option. This will keep the music playing in the background, irrespective of the actions happening in the slideshow.
In the Start sequence, select automatically. Sequences Explained:
- Automatically: The music will play by itself as the slideshow starts.
- When Clicked on: When you click the mouse button, that’s the cue for music to start playing.
- In Click Sequence: It is tied to the other actions set by a trigger. Such as animations. No literal clicks are required.
You must add music to PowerPoint slideshows in the acceptable formats, which PowerPoint supports.
Add Transitions between Slides on PowerPoint
Transitions add a segue between two slides without interrupting the flow. PowerPoint offers a plethora of transitions that can be set according to your needs.
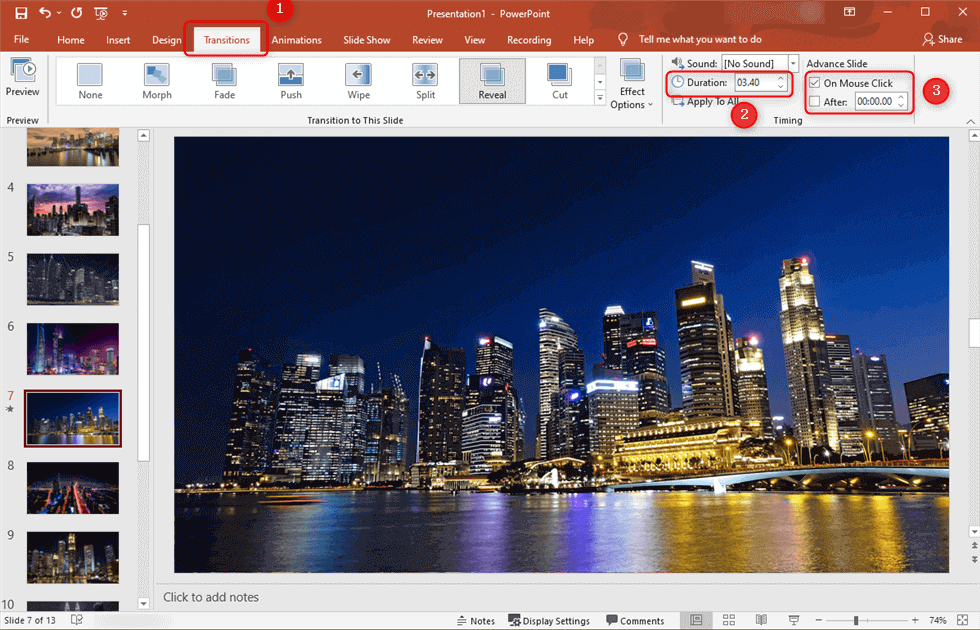
Head to the Transition tab > Select the transition of your choice > Set the Transition duration > Set the Advance Slide.
How to Add Transitions to Slideshow on PowerPoint
Then we move to the Timing section. Here it is better to discuss each option one by one.
- Duration: It denotes the time for which the transition will happen. In easier words, duration determines the speed.
- On Mouse Click: When you tick this box, the transitions for the slide will happen when the click happens. It acts as a trigger for the action of transition.
- After count: Mouse-click may not be available in some scenarios. You can set the duration for which the slide will appear before moving on to the next one.
- Apply to All: We can apply a single transition to all the slides to keep the uniformity.
In other cases, when each slide needs to have a different transition, you can do that as well. You can individually select each slide for different transitions and go through the previously mentioned options.
Once the music, photos, and transitions have been added, it’s time to preview the slideshow. Press F5 on your keyboard to start the slideshow.
Step 4. Save the Slideshow
Just tap the Ctrl+S or hit the Save button at the up-left corner. Set the slideshow a name, select a location on the computer and click the Save to export the slideshow.
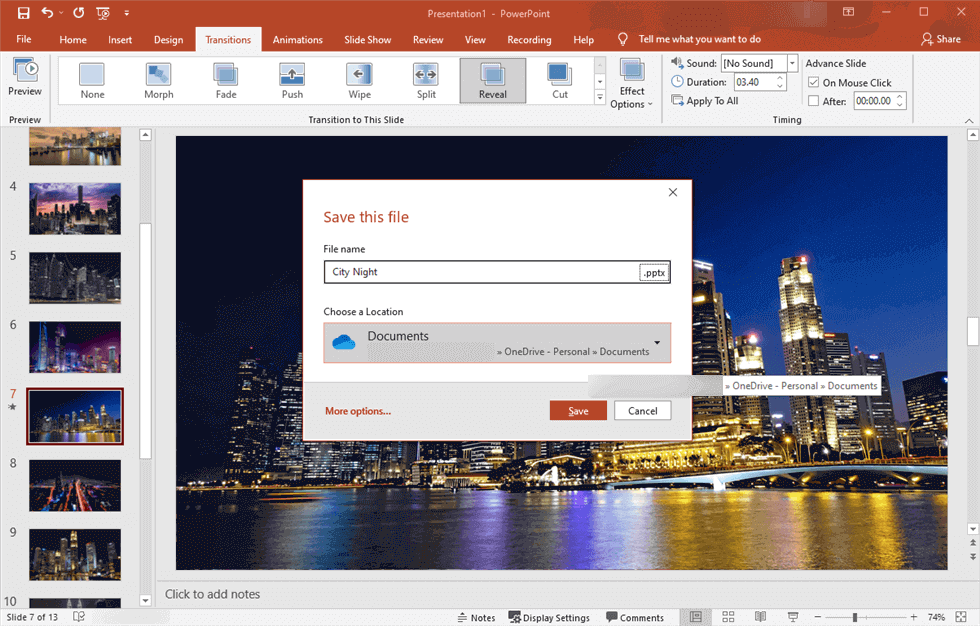
Save and Export the Slideshow
Conclusion
Getting started with the slideshow is incredibly easy. Make sure you select the suitable slide format. Photos can be added manually through the insert section as well. Adding music is moderately difficult when you want to sync time with the slides. Playing a piece of subtle background music is easier to manage and edit.
Applying the same transition across slides makes the job easier. Don’t forget to take advantage of the slider time “After Count” to ensure automatic slides change.
Except for the PowerPoint slideshow-making method, you can give a free video editor a try to make the slideshow with great ease on a PC.

Karen is a professional writer with a background in column writing who enjoys resolving complex topics and explaining them in interesting ways.
Related Articles

FilmForth - Free Video Editor
- Easy to use and no skill required at all.
- Export video to MP3 with one click.
- Add transitions, effects, filter, text to the video as you want.
- Remove, replace, record and edit the background audio easily.
- Change the speed, volume, and subtitle on video with ease.
- Stabilize, trim, rotate, and convert video in seconds.