How to Remove Background from Video with/without Green Screen
This post had introduced 2 solutions that can remove video background with or without a green screen step by step. The video tutorial on how to remove a video background reveals the steps as well.
Video is oftentimes recorded in the most unfavorable places. You may not have the choice for an ideal setup and background. As long as the audio and lighting feel right, it is GO time.
On other days, they are recorded in a studio with a proper setup, along with a greenscreen. For later, they are keeping in mind the potential of having different backgrounds, as and when required. The background can be changed later on in the post-production. A capable video editor can help remove the unwanted background and replace it with one of your choices.
We have two ways to go about it, both requiring the Chroma Key technique. It is a compositing technique, which involves the layering of video and images over each other, based on the color hues. And the good news is, Chroma key works on both green screens and without it.
Video Tutorial: How to Remove Background from Video
This video tutorial will show you how to remove backgrounds from videos in steps. You can’t miss it.
How to Remove Video Background with Green Screen
A green screen is essentially a colored screen that lets you drop any background in the video. There are many video editors that can remove the video background with a green screen using Chroma Key. But most video editors charge for the feature.
So in this part, let’s meet FilmForth, a free video editor which supports Chroma Key. The best part is FilmForth won’t charge a penny for this feature and won’t stick on a watermark.
But the accuracy of the removal will depend on the clarity of the objects in focus. Now let’s learn the detailed steps following.
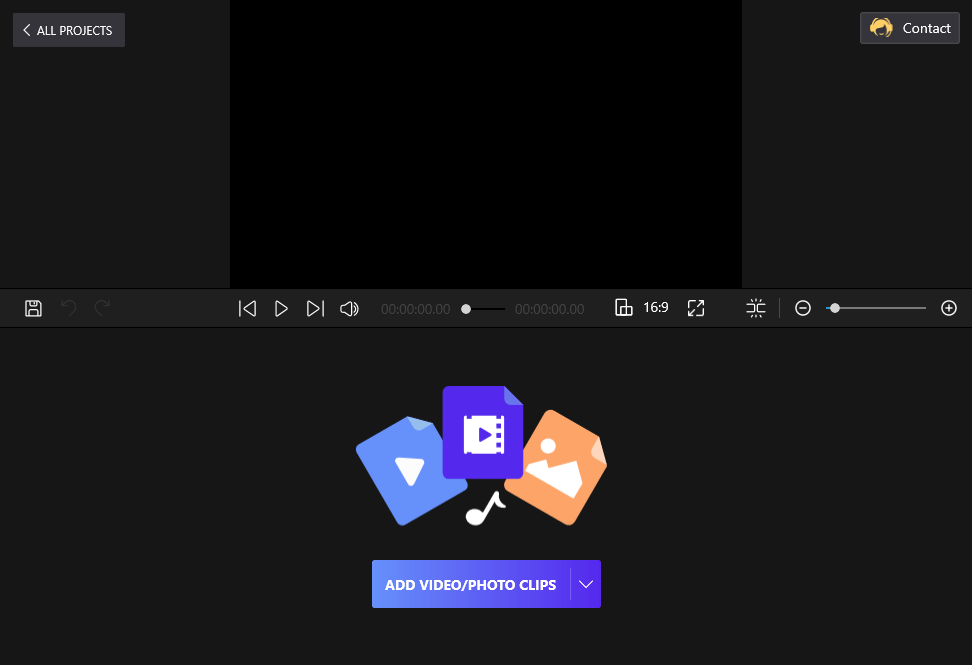
Step 1. Launch the Video Editor
Launch FilmForth after installing it from the Microsoft store. Then create a new project for the video. Click on the new project button to start to remove the video background with a green screen.

New Project on FilmForth
Here is a switcheroo for you. We will add the replacement background image first before adding the video. Take advantage of the Add Video/Photo Clips button for importing the desired background image. Do the same but faster using the drag and drop method.
Drag and Drop the Clips to FilmForth
Step 2. Select the Chroma Key Feature
In this step, we will use the Picture in Picture feature to add the video in question. Once the image is added, head to the Picture in Picture menu for the shortcut in the timeline. The traditional way involves going to the project’s home screen.
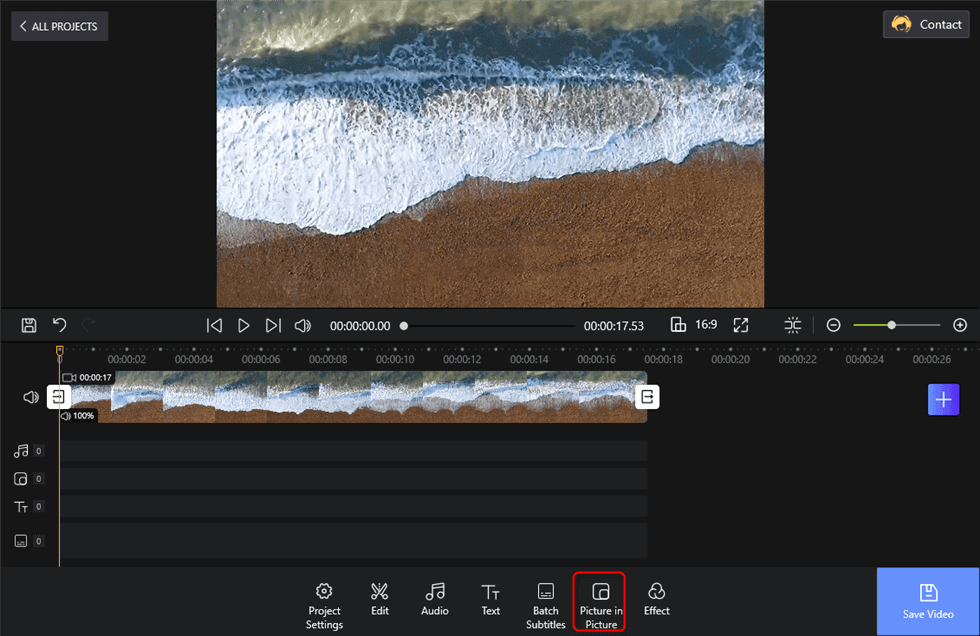
Tap Picture in Picture at the Toolbar
Find the Add Pic in Pic button at the bottom. Click on it and select the Upload video or photos option. That will open up the director, and that’s your cue to import the video whose background needs to be removed.
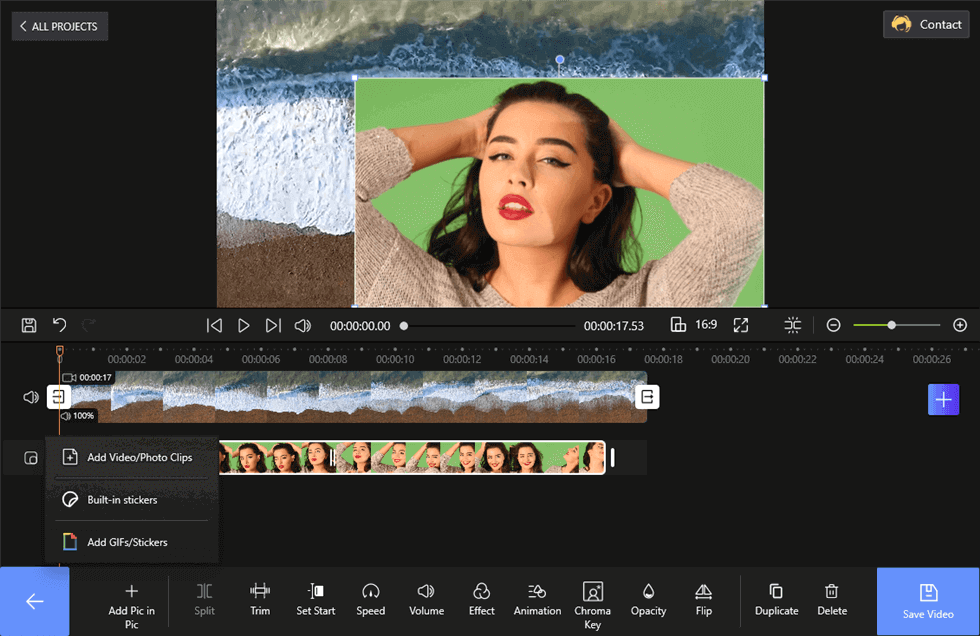
Upload the Video to Remove the Background with a Green Screen
Resize the video to fit the screen, using the size buttons given at the four borders of the overlay video. Select the video layer from the timeline, and pic in pic options will appear at the bottom. Head to the Chroma Key menu from there.
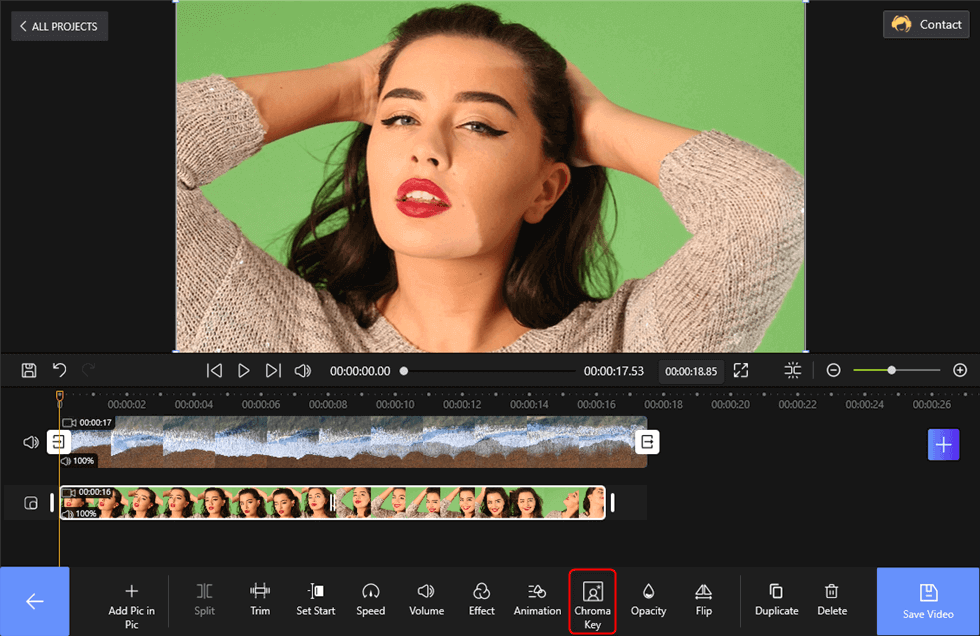
Resize Overlay Video and Select the Chroma Key
Step 3. Remove the Video Background
Enable the Chroma Key Effect button by sliding it to the right. Now, we will pick the shade of the green screen used in the video. Later, the level of removal will be decided by the tolerance level.
Click on the color picker, and the circular tool will appear in the video preview window. Move it around to get the exact color of greenscreen used. Move lower to increase the tolerance level of the Chroma key. Calibrate it to get the right amount of it without eliminating the objects in the video.
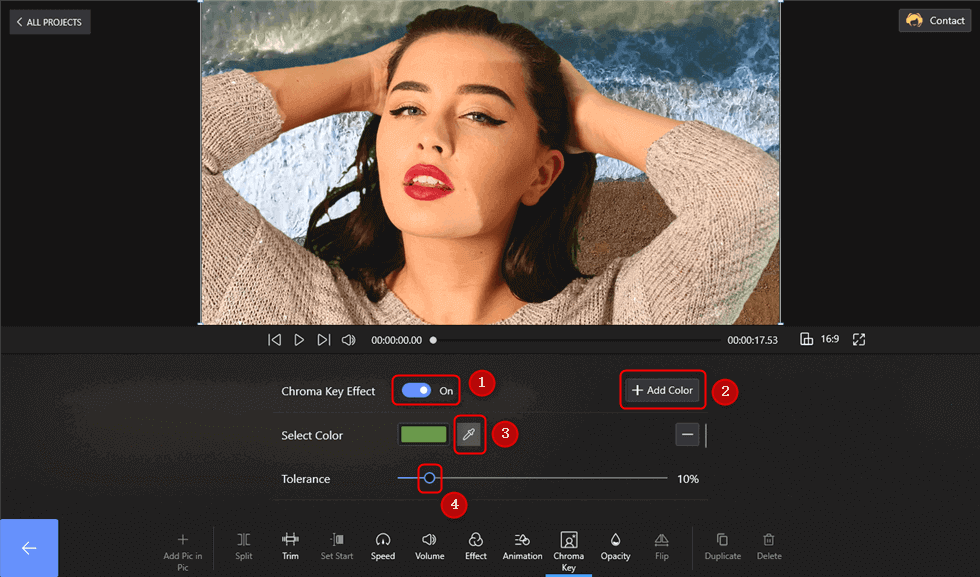
Remove the Green Screen
You Must Know – There can be multiple shades of green on the screen due to shadows and other reasons. Not an issue; use the Add color and add another Chroma key for that shade of the green.
How to Remove Video Background without Green Screen
Right about now, you must have developed the notion that a green screen is a must. The reality is the polar opposite. You can remove a video’s background, even without a green screen. The process is simple; you will create different instances of the Chroma Key for each of the colors in the background. It gets complex with more detailed backgrounds.
We have already learned to do the basics steps of project creation and adding images, videos. Let’s get straight to resizing the overlay video and consequently to the Chroma key.
Step 1. Upload the Video to the Editor
Resize and reposition in the video, preferably to the center. Once you have added the video without a screen, we head to the Chroma Key from the Picture in Picture menu. Don’t forget about the shortcut in the video timeline.

Upload Video to Resize
Step 2. Remove the Background by Using Chroma Key
Take a good look at the video and its background. You will notice that there are two shades of white. This means that we will need to create two instances of the Chroma Key, picking out the two whites using the color picker. Pick out the colors of different colors and get to set the tolerance level in the ideal range of 10-14.
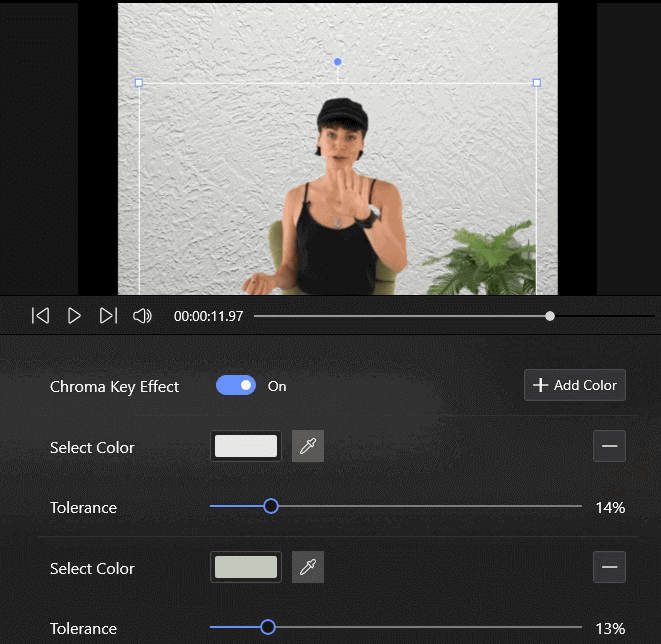
Remove the Video Background without Green Screen
Calibrate it according to the visibility and avoid going on the higher tolerance level. It will start removing the primary objects, people of the video. We left the plant for aesthetic reasons. You can remove it as well.
Conclusion
No matter you want to remove the video background with or without a green screen, FilmForth can make it with great ease by using the Picture in Picture feature. Just a few clicks then you can change the video background as you need. Isn’t it worth a try?

Karen is a professional writer with a background in column writing who enjoys resolving complex topics and explaining them in interesting ways.
Related Articles

FilmForth - Free Video Editor
- Easy to use and no skill required at all.
- Export video to MP3 with one click.
- Add transitions, effects, filter, text to the video as you want.
- Remove, replace, record and edit the background audio easily.
- Change the speed, volume, and subtitle on video with ease.
- Stabilize, trim, rotate, and convert video in seconds.