How to Resize Video for Instagram for Free
Do you still look for a method to resize the video for Instagram? No worries! In this post, you are going to learn the most effective methods to resize videos for Instagram in steps.
When I first started posting videos online, they were incongruous and felt out of place in weird sizes. Instagram came about and helped by providing padding in such videos, thus making them look a tad better. Instagram tries its best when we let it do its thing with the aspect ratio. Mostly it’s a failure and may adversely impact engagement on your posts.
Take back the control and resize your videos before posting on Instagram. Use editors like FilmForth to resize videos for Instagram within mins, from start to finish. It’s free, doesn’t make your pocket lighter, and there is no mandatory video editor’s watermark on the content either.
Aspect Ratio for Instagram Explained
Before we get to resizing videos, let’s take a pause and get ourselves acquainted with different aspect ratios for Instagram. Aspect ratios refer to the width of the video in respect to its height. And it’s expressed in a ratio.
1:1 (Square)
Recommended size: 1080px by 1080px
Ideal for: Skits, animations and Instagram ads
Instagram supports both vertical and horizontal videos. However, their square is popular amongst the users. It looks pretty in the profile grid, where each post appears as a cropped block.
Pros
- Compatible with all orientations of the display, whether vertical or horizontal.
- High definition resolution that is not reduced even with Instagram’s compression.
- Looks better as a thumbnail on your profile page.
Cons
- Less area for the video to showcase all its elements.
4:5 (Vertical)
Recommended size: 1080px by 1350px
Ideal for: Tutorials, vlogs, and single-hand recorded content
People hold their phones vertically for 94% of the time, according to a report of MOVR. It’s free real estate for the vertical videos. Takes up a significant portion of your screen while in the feed. Keep them up to 4:6 or 4:7, or Instagram will crop it down.
Pros
- Optimized for mobile viewing. Users can watch it with the slightest inconvenience.
- Better completion rate of over 90%, according to a study by Impact. TL;DR – Vertical videos are more watched till the end than other orientations.
- More screen space for the content creators with the extra pixels.
Cons
- Vertical videos create an unnatural viewpoint. Humans watch the world in portrait. It takes immense skill to balance the viewpoint of the verticals.
16:9 (Landscape)
Recommended size: 1080px by 608px
Ideal for: Group, scenery, and travel videos
Landscapes are evergreen; they look great on newer displays that boast higher resolutions with better aspect ratios. Couple it with 90/120hz refresh rate, and you are all set.
Pros
- Better optimized for landscape displays with higher resolutions.
- Does not need to crop and remove elements from the video.
- Takes less time to edit on the visual front without worrying about the viewpoint.
Cons
- Becoming an obsolete aspect ratio amongst the mobile majority.
Instagram Reels (9:16)
The new form of short content is best consumed vertically. You watch a reel, then swipe up or down to go to the next one. It’s only natural to go all vertical.
IGTV Videos (9:16 or 16:9)
We leave this one for you. Ideally, vertical is preferred, but some long-form content can benefit from the horizontal orientation.
For 9:16 verticals, the ideal size is 1080px by 1920px. And on the other hand, 16:9 horizontal works best with 1920 by 1080px, a resolution that is being increasingly offered on medium-range monitors and mid-segment tablets.
Instagram Stories (9:16)
This is a no-brainer; go vertical, no questions asked. The other way around looks blurry and significantly reduces the space for the content. And the ideal resolution would be 1080px by 1920px
Technical Specs to Keep in Mind
Maximum frames per second(FPS) – 30
Video length limit:
- IGTV : 15 mins(from mobile), 60mins(from web)
- Feed: 60 seconds
- Stories: 15 seconds
- Reels: 30 seconds
How to Resize Video for Instagram for Free
Once you have nailed the video shooting part, it’s time to resize videos for Instagram. We have taken a sample video and are going to resize it for a Reel. Remember to download FilmForth from Microsoft, and be careful when downloading from third-party platforms.
 After successfully downloading FilmForth, a video tutorial is in place for your guide.
In short, the tutorial can be concluded into 4 easy steps:
Step 1. Create a New Project and Import the Video
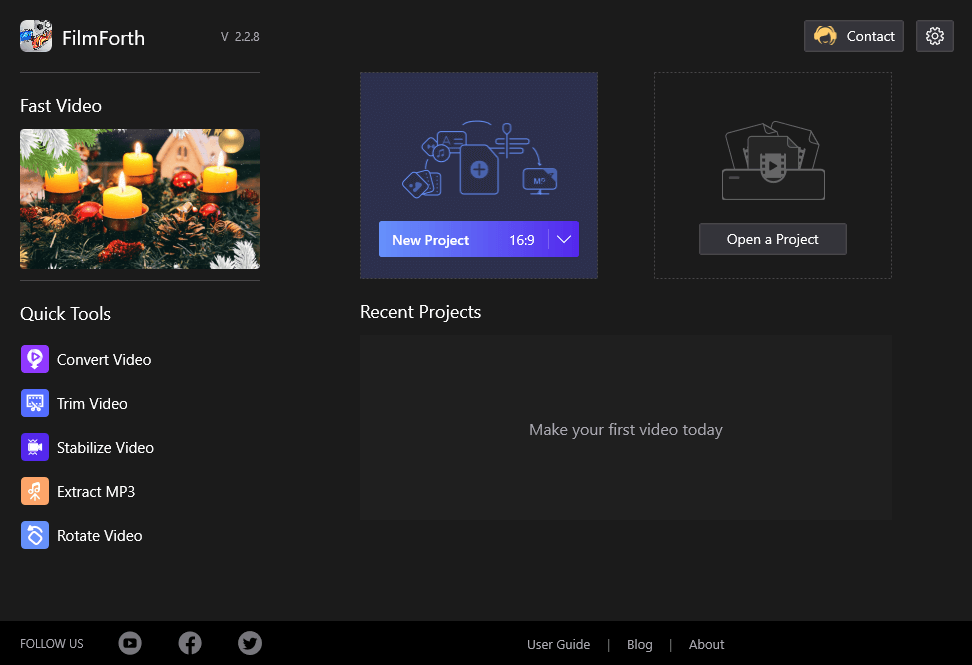
Launch FilmForth, click on the New Project button to start a project for the Instagram video, and import a video by dragging and dropping one onto the timeline. The traditional Add Video/Photo clips can do the same.

New Project on FilmForth
Step 2. Enter Aspect Ratio Menu via Shortcut
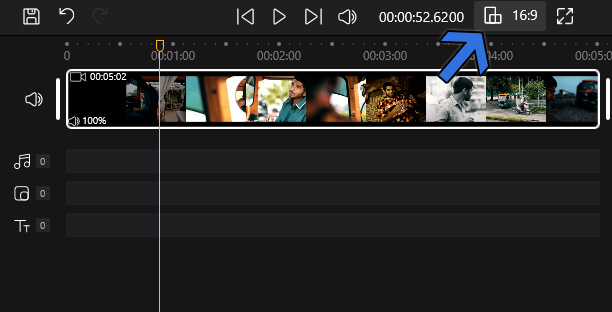
Look above the timeline, and you will see an aspect ratio button. Click on it to access the menu. The other way to access it is from the project settings located in the project’s home screen.

Aspect Ratio Shortcut
Step 3. Select the Aspect Ratio for the Instagram Video
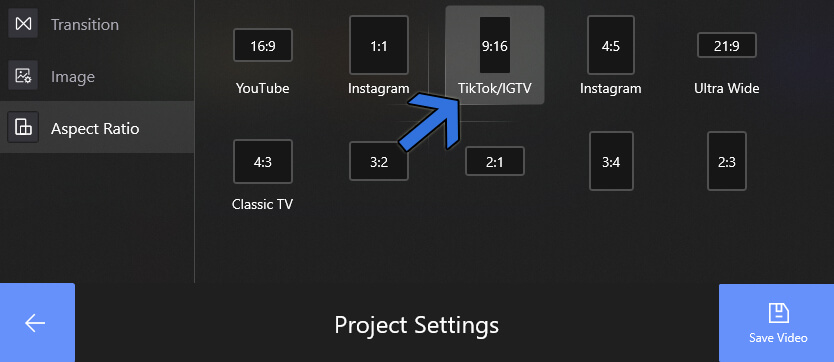
Now, we land in the aspect ratio menu. Select the 9:16 ratio meant for IGTV/TikTok since we are resizing the video for a reel. Press the back button to access the main video edit menu.

Aspect Ratio Menu
Step 4. Transform the Video with the Scale Slider
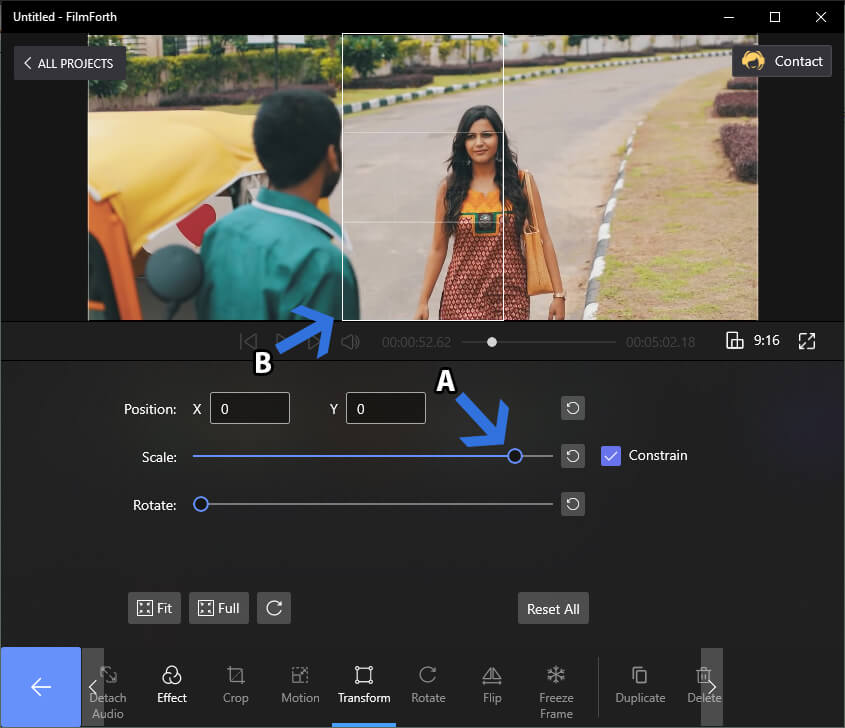
Head to the Transform menu from the dashboard and move the Scale slider to the right until the screen’s vertical box is filled. The default value of the slider is 1.000 After that, use your mouse pointer to place the main elements inside the vertical box for inclusion in the video.

Video Resizing
Finally, head back to the main menu and click on the Save Video button for exporting the Instagram video.
Tips About Making Best Instagram Videos
Everything looks good but keep these things in mind while making your next Instagram video.
- Chase the natural light for the videos. All the cameras struggle on their level. Don’t let that throw mud on your efforts. Artificial light sources can also do wonders when done right, keeping in mind the contrast. So light up and let your camera take it from there.
- Focus on the subject and don’t let it be blurred. Tap on your phone’s camera to focus on the face, and tap right or left to take out the focus from them.
- First impressions can be your last impression. People scroll past the content all the time. You need to entice them with a thumbnail that intrigues a play on your post. Add a thumbnail through the cover tap and select the frame that will likely result in more taps and views.
- Keep it short so that viewers don’t doze off. The ever-decreasing attention cannot be held for an average of 3-10 seconds. Get to the point in that window to see a better completion rate.
- Upload the video in the highest quality possible. Instagram tends to compress the videos for saving on bandwidth and increasing accessibility to users of different demographics.
Bottom Line
Over to you, now it’s your turn to experiment. Find what works for your audience and what belongs in the bin. It will take some effort to find the right nerve, but the organic engagement and conversion outweigh the hard work.
Instagram doesn’t auto crop the video anymore, leaving it in an awkward ratio inside the accepted dimensions. Hence, it is better to do it before uploading using FilmForth. Easy, doesn’t cost a dime, and gets the job done within a couple of minutes on a first try.
Related Articles
FilmForth - Free Video Editor
- Easy to use and no skill required at all.
- Export video to MP3 with one click.
- Add transitions, effects, filter, text to the video as you want.
- Remove, replace, record and edit the background audio easily.
- Change the speed, volume, and subtitle on video with ease.
- Stabilize, trim, rotate, and convert video in seconds.


