How to Add Subtitles to YouTube Video
In this post, you will learn 3 basic methods to add subtitles to a YouTube video. Keep on reading and get the best for you.
YouTube videos are coming from all around the world. Maybe you barely understand the accent of no speaking English countries. But you can get what the video talking about via its subtitles. That’s the typical reason for adding subtitles. Also, clear and easy-to-learn subtitles can make the video easy to follow, doesn’t it?
So, how to add subtitles to YouTube videos? This article reveals 3 simple methods to add subtitles to YouTube videos, even if you are a novice. Starting with the most versatile way, we have a free video editor named FilmFort, followed by YouTube’s inbuilt options.
Add Subtitles to YouTube Videos for Free
FilmForth is a free and incredibly easy-to-use video editor that can add subtitles with a dedicated text menu. On top of that, we get text animation that can both appear and disappear at your whim.
Animated texts carry a wide variety of options to choose from. Therefore, you will never run out of typography options with an extensive library of fonts, along with system support.
Step 1. Run Free Video Editor on Computer
Download FilmForth directly from the Microsoft Store. Click on the New Project button to create a new project for your YouTube video.
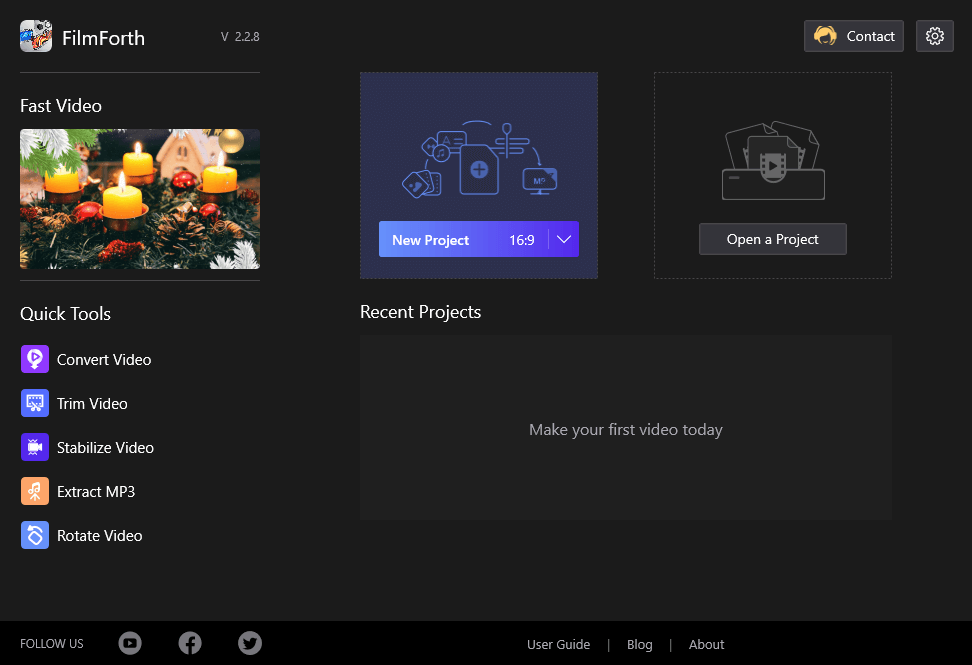
New Project on FilmForth
A blank project window will appear. You can import the YouTube video on which you want to add subtitles. The fastest and easiest way is through drag and drop. Drop any video into the timeline, and it will be imported in no time.
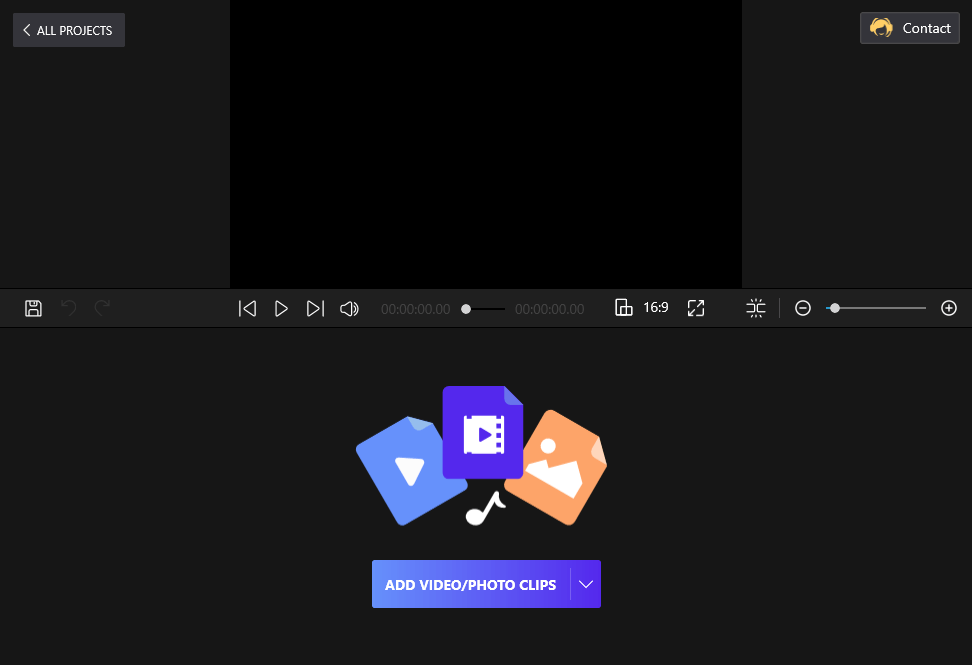
Drag and Drop the Clips to FilmForth
On the other hand, the traditional way to import is by using the Add Video/Photo Clips button.
Step 2. Add Subtitles using Batch Subtitles
FilmForth has a Batch Subtitle option. It offers an easy way to add subtitles while following the video timestamps. This is similar to what you want on YouTube’s very own subtitle menu.
Find the Batch Subtitles shortcut. It is located in the video timeline. Another way is through the project’s home screen, where the batch subtitles button is present.
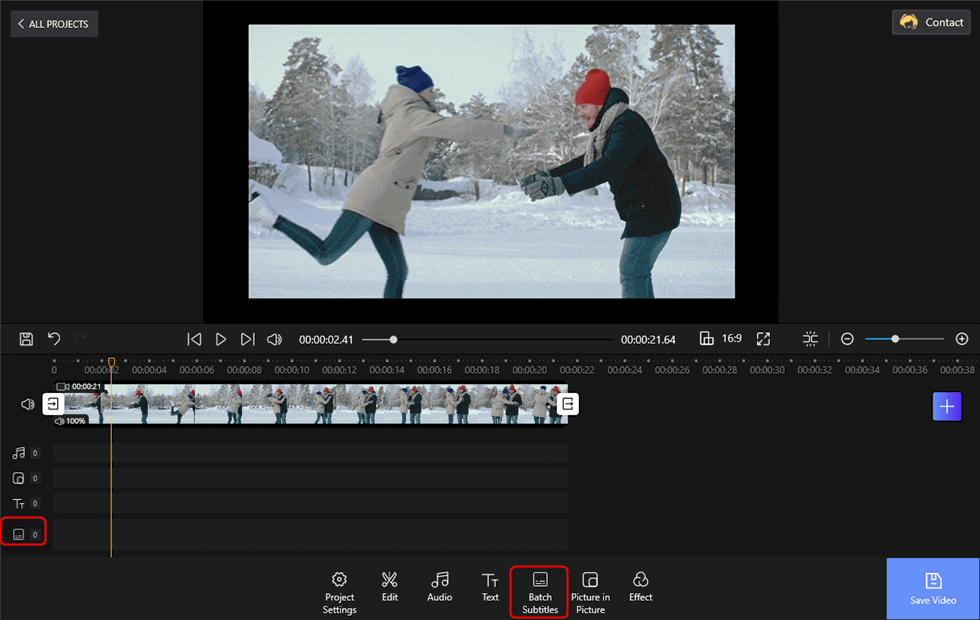
Tap Batch Subtitles
Once inside the batch subtitles to add captions, we take things one step at a time.
First, you seek the frame from which you want to add subtitles relevant to the context. You can use the preview player to be your guide.
Then, click on the blue button which says Add from the current frame.
Finally, put the subtitles in the text box. Accompanied by start and end timestamps which determine the duration for which the subtitle will appear on the video. You can set it manually if you have the timestamps planned out.
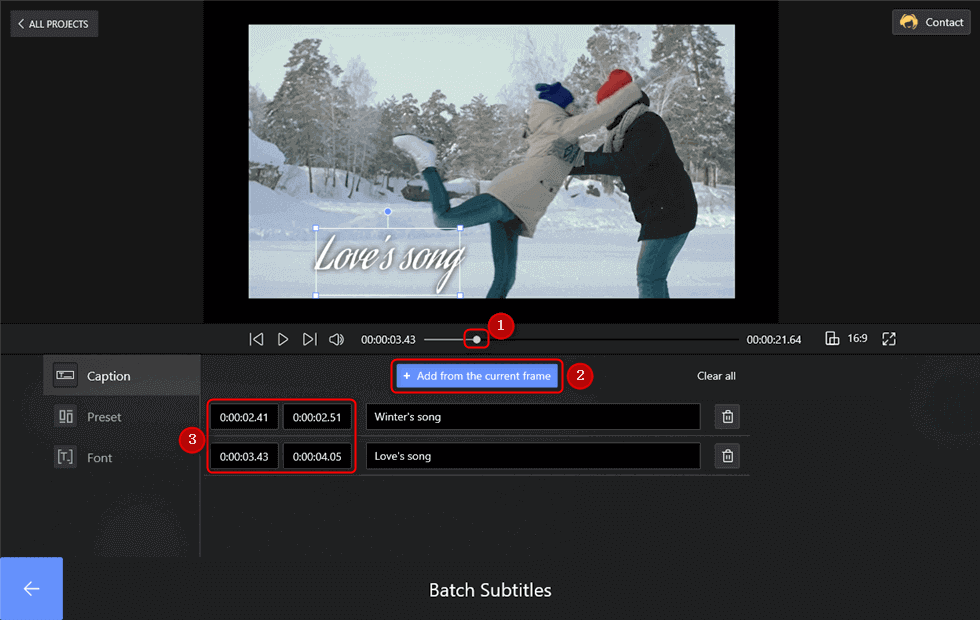
Add Subtitles to YouTube Videos
Here you can see the Preset and Font settings. From the font menu, you can set the fonts. You can use the in-app fonts or rely on the system-installed fonts.
There are a variety of options such as alignment, strike-through, and underline, amongst other things. On top of that, your text can have a shadow, black stroke, or an opaque background behind the text.
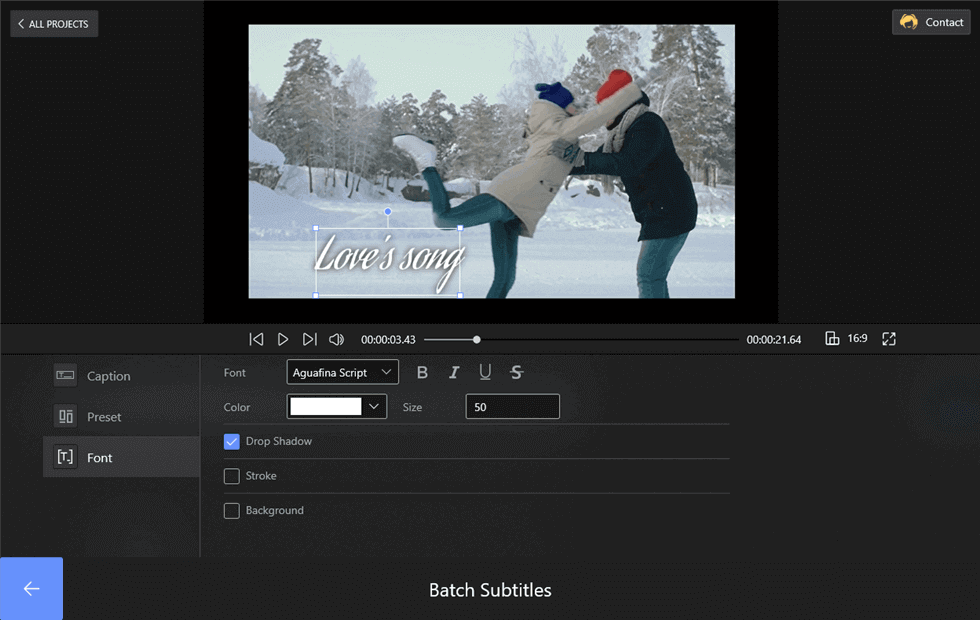
Set Subtitles’ Font
Step 3. Save and Share the Video to YouTube
Now you can tap the Save Video button to export the video to your computer. Then set the video resolution, video quality, video frame rate, and watermark. Hit the Save button to export.
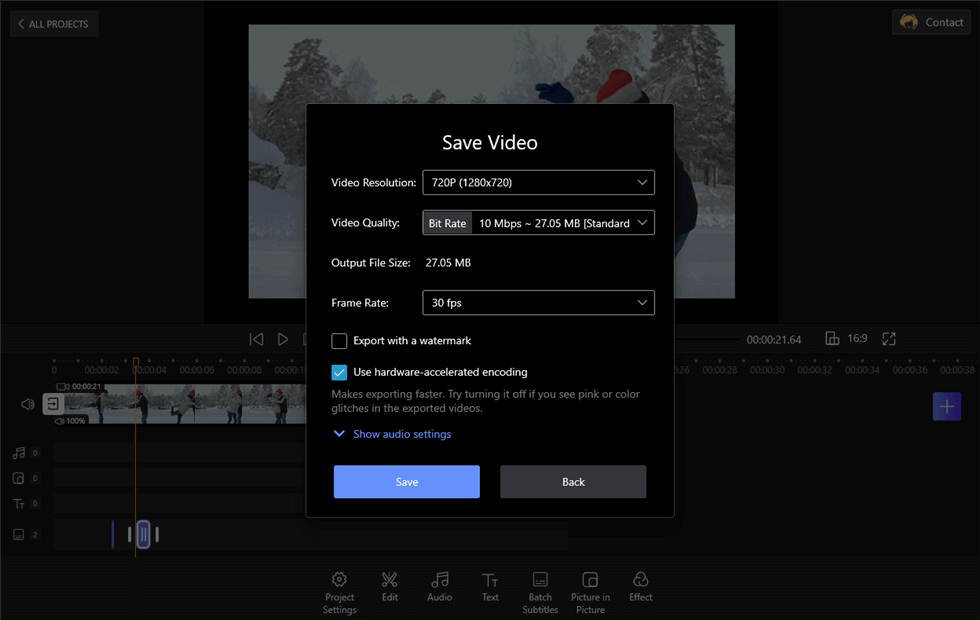
Save and Set the Video
Now you can see the Exported successfully note. You can tap the YouTube button to upload videos to the YouTube channels directly.
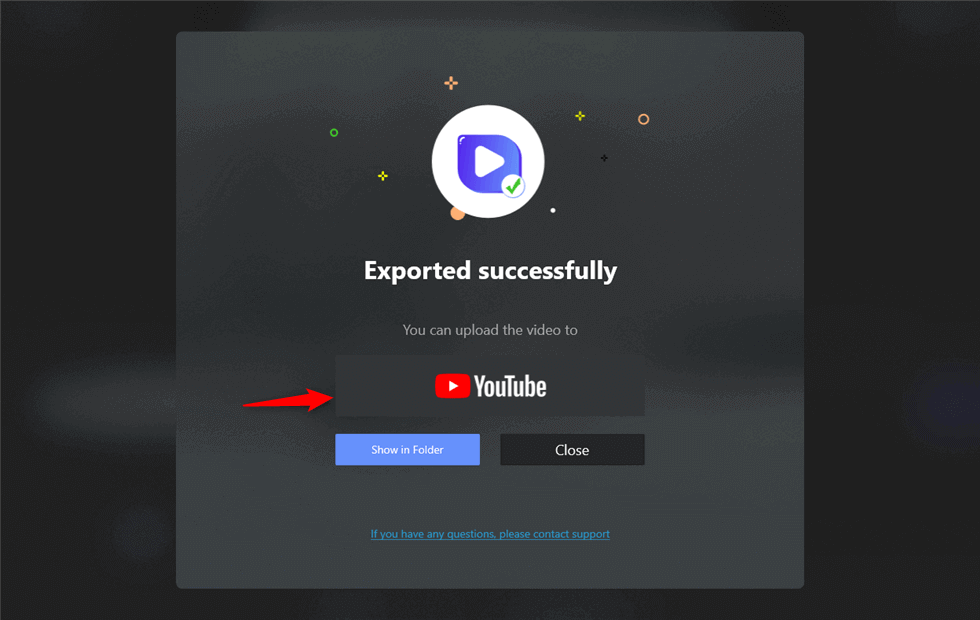
Share Video to YouTube
Here is a video tutorial to teach you how to add subtitles to Your YouTube video.
Add Captions to YouTube Video via YouTube Video Manager
If you already uploaded your YouTube video, you can directly import your video to YouTube and use YouTube’s video editor to add subtitles to the video. While uploading the video, access the subtitle menu and start adding them right away.
Step 1. While uploading a video via the YouTube Studio, head to the Video Elements tab of the upload wizard. Click on the Add button, given right next to the Add Subtitles.
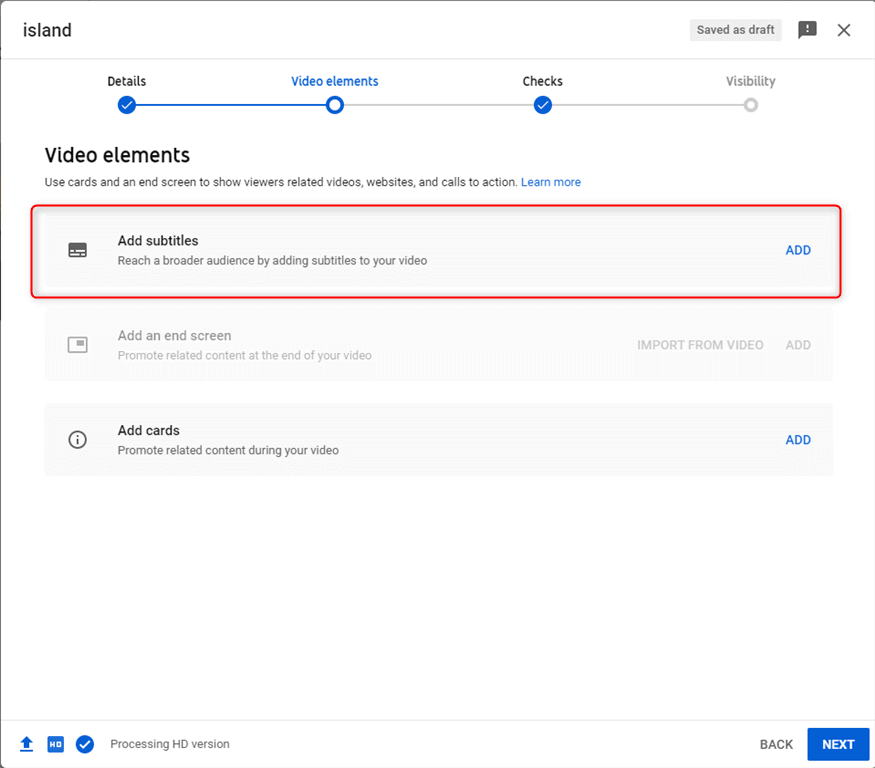
Tap the Add Button to Add Subtitles
Step 2. Inside the subtitle menu, we have three ways to add subtitles to YouTube videos. Find the Type Manually option. This is similar to what we did in Batch Subtitles on FilmForth. However, it lacks advanced test options such as fonts, and animations compared to the free video editor.
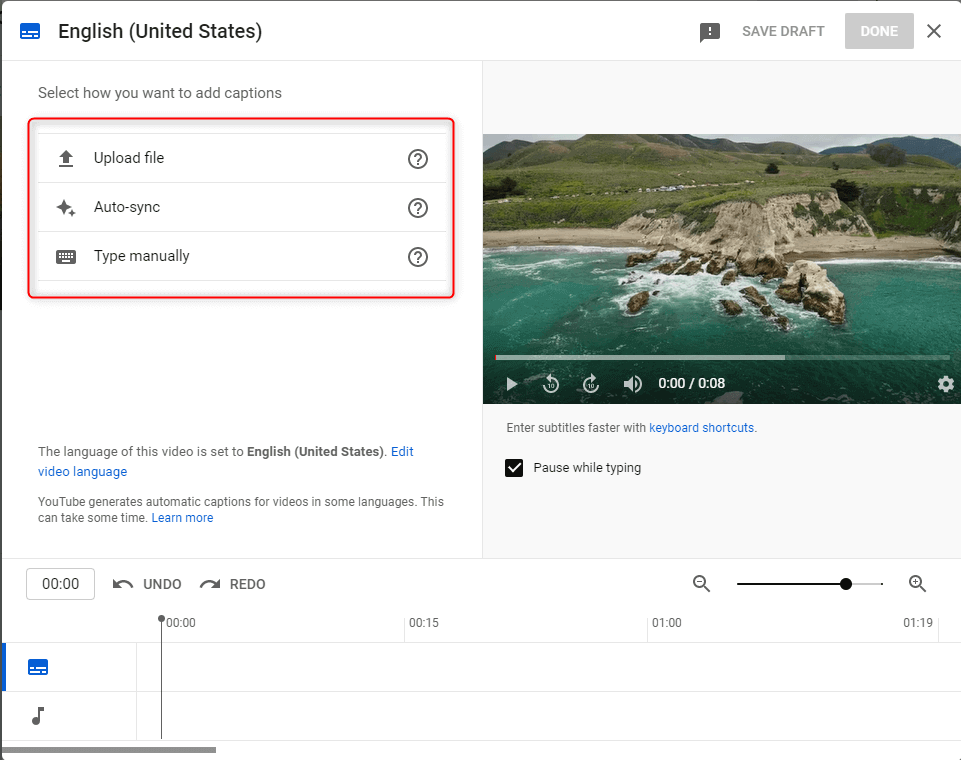
Manually Add Subtitles
Step 3. Seek the frame and then start typing regarding the timeframes given next to you. You can calibrate them according to your choice. You should know, to add each subtitle, click on the “+ Caption” button at the top left corner.
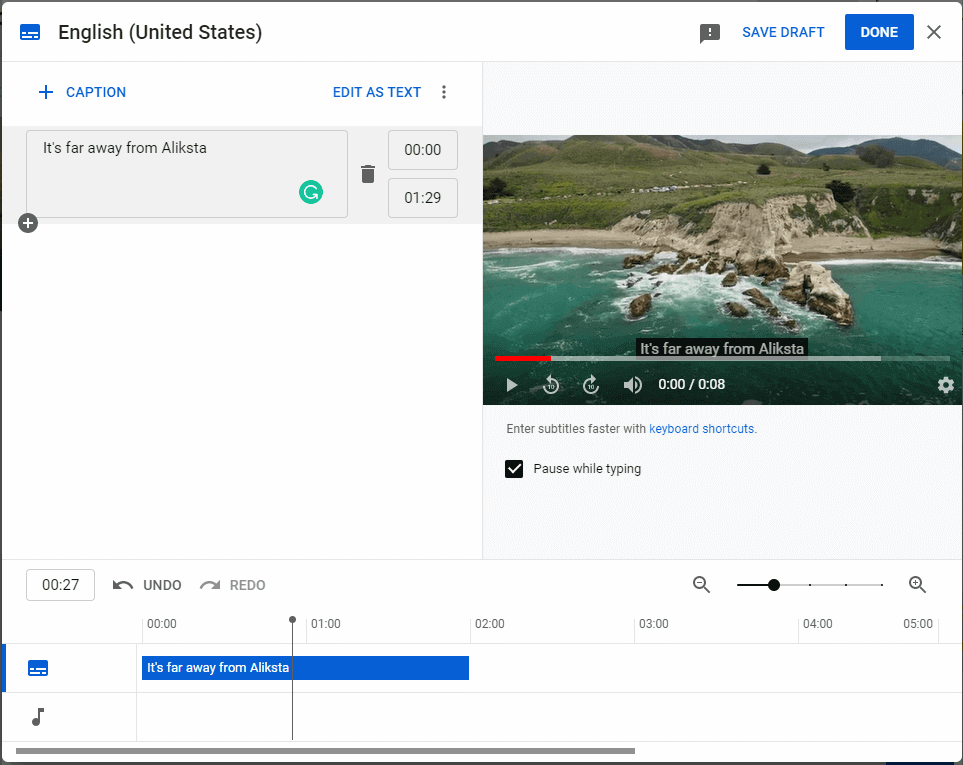
Add Subtitles to YouTube Video
Once done, click on the Done button located in the right corner of the upload wizard. You can carry on with other formalities of uploading the YouTube video.
You can upload either With Timing, meaning with the timestamps, or Without Timing, sans the timestamps. Once uploaded, they will appear with timestamps. You can arrange them through the timeline as well. Supported basic subtitle formats: .srt, .sub, .sbv, .mpsub, .lrc,etc.
Using YouTube Automatic Captioning
Adding subtitles can be a tedious task, especially when footage of several hours is involved. Take advantage of YouTube’s automatic captioning. It relies on AI to determine what is being spoken in the video and displays the captions automatically. No need to add subtitles from your side.
To increase the accuracy of the automatic captioning, we will need to set the language for the video. Here is how you do it.
Step 1. Head to the subtitles section of the YouTube studio and select the video which needs automatic captioning.
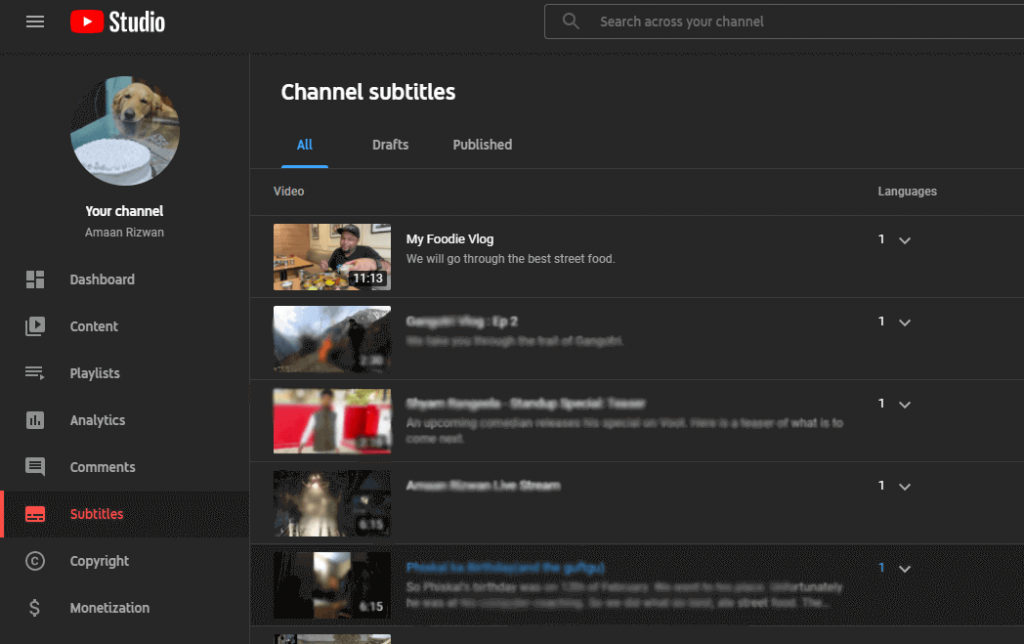
Add Subtitles to YouTube Video
Step 2. Select the language from the drop-down menu and click on confirm. Your language for the video will be configured.
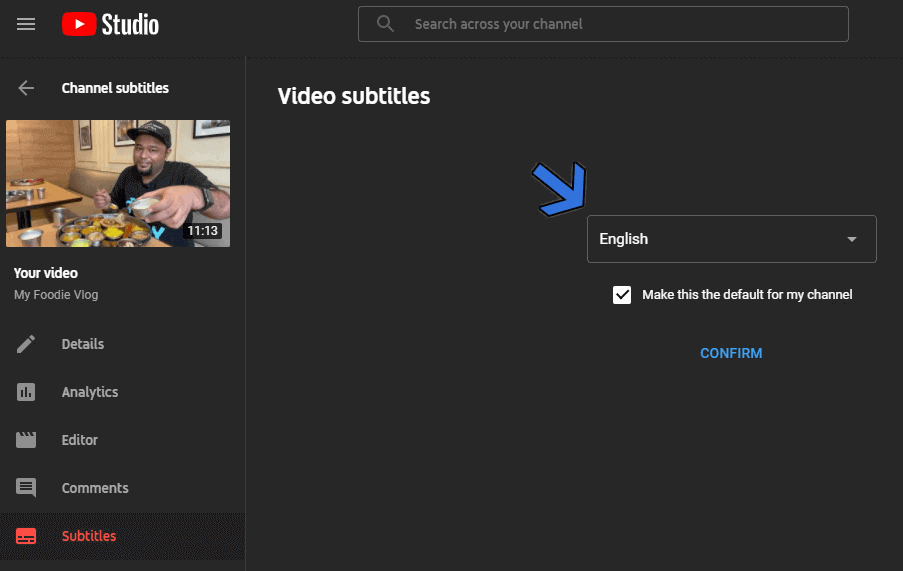
Add Subtitles to YouTube Video
The next time a viewer enables captions, the automatic captions will be turned on. It will display subtitles to the best of its abilities.
Conclusion
YouTube studio has a decent subtitle-adding feature. However, it lacks text formatting options. You can give FilmForth a try and add subtitles in a more inclusive manner. Online tools do not possess reliability and can fail without giving a hint. Use YouTube captioning when adding subtitles is not on the itinerary.
Related Articles
FilmForth - Free Video Editor
- Easy to use and no skill required at all.
- Export video to MP3 with one click.
- Add transitions, effects, filter, text to the video as you want.
- Remove, replace, record and edit the background audio easily.
- Change the speed, volume, and subtitle on video with ease.
- Stabilize, trim, rotate, and convert video in seconds.


