How to Record Skype Calls on Windows and Mac
There are three ways to capture a Skype call in HD quality on your Windows or Mac computer, check these methods to find the one that works best for you.
Skype is a web-based instant communication tool with the features of text chat, voice call, and video call. With high-quality video calling, you can stay in touch no matter where you are. maybe to record a happy moment chatting with your family or to record an important presentation.
The addition of a screen recording feature to Skype has greatly enhanced the user experience. But for additionally those who need to record Skype calls without the knowledge of other participants, third-party screen recording software is the best option for you. Therefore, you should be concerned about how to record a video call on Skype. Here you need all the information under the sun.
Do not miss: How to Record Facebook Video Call,How to Record A Discord Call, How to Record Omegle Video Chat.
How to Record A Video Call on Skype
Skype also has a built-in recording feature that allows you to capture any video call without the need for third-party software. Skype call recording is cloud-based, so you don’t have to worry about device performance or storage space when recording.
Step 1. Start recording Skype call
Open the Skype software, find the “Call” taskbar, select a contact and create your video call. Once the call is connected, click the “+” sign or ellipsis icon and select “Start recording” to start recording.

Start Recording A Skype Video Call
Step 2. Stop recording Skype call
You can switch the video screen on both sides of the call to record according to your personal needs. When you are done recording, tap on the”Stop recording” button on the top left corner
Or click the “+” or ellipsis button again and select “Stop recording” to end the recording.

Stop Recording
Step 3. Save to downloads
Since the recorded video in Skype can only be saved for 30 days, you can only save the recorded content permanently by transferring it locally.
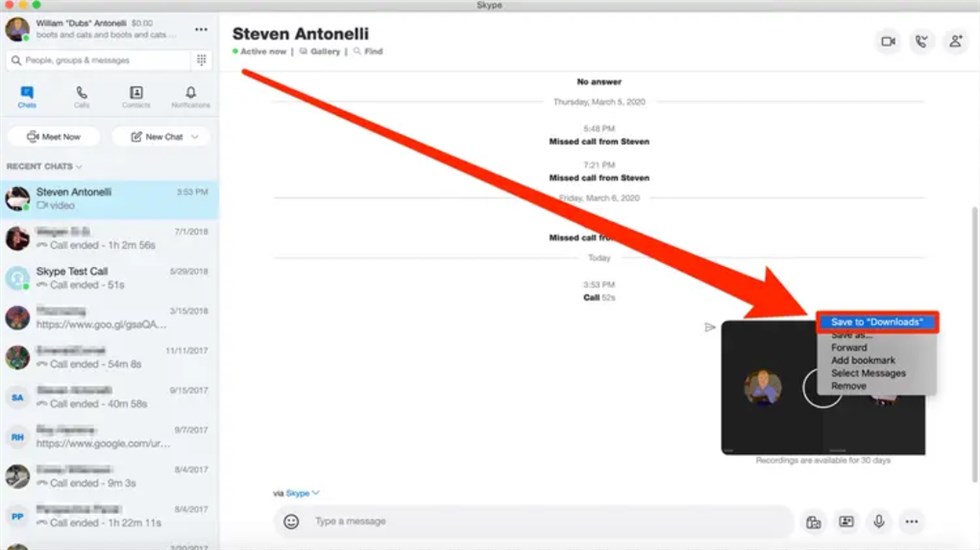
Save to Downloads
The recorded content will be saved directly in the chat dialog between you and the contact. After the call, please go to the chat and click the three dots next to the recording and click Save to “Downloads”.
How to Record A Skype Video Call on Windows 10
Using Skype’s own screen recording feature is convenient, but the recorded video can not be saved directly locally. Once you start recording, all the people involved in the call will be notified that it is recording. Here’s an alternative way for you to capture video calls that happen on Skype on Windows 10 without the participants knowing about it.
Step 1. Setting up for screen recording
Download and install RecForth on your PC, then double-click the icon to enter the main page. Now you can start to set up the recording area, support to choose Full-Screen mode and Area mode.
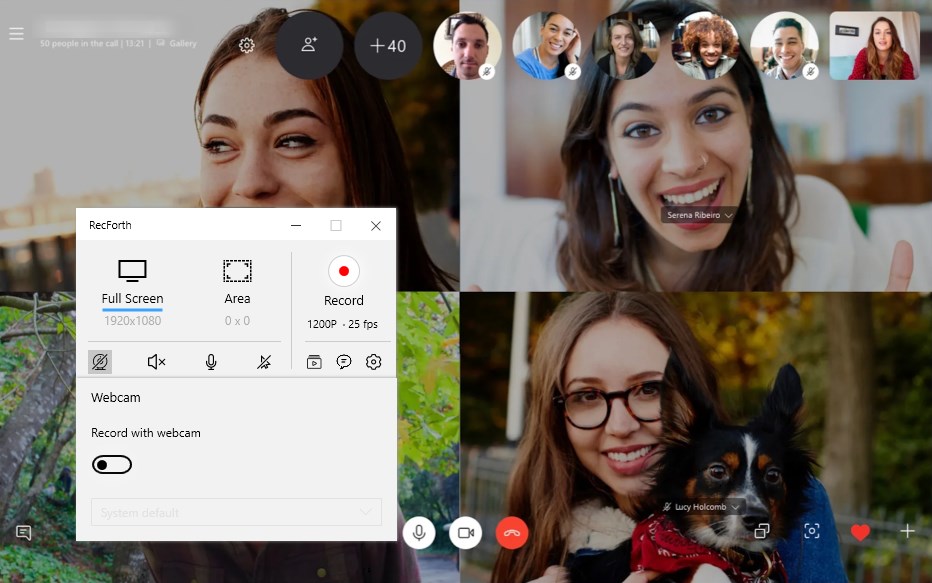
Set Up for Screen Recording
Turn on the Speaker option to capture clear internal system sound. This Webcam option will capture your face and add it to the recording, and this Microphone option is used to add your voice to the recording. You can decide whether to enable these two options as needed.
Step 2. Capture a Skype video call
Create a new video call in the Skype application and click the red Record button to start recording the Skype call.

Record the Skype Video Call with RecForth
RecForth will start capturing the Skype call immediately and other contacts will not receive any notification about the recording.
Step 3. End the screen recording
You can pause or continue at any time during the recording process, and click the small square Stop button in the recording box when you are done. The recorded video will be saved in MP4 video format to the path you initially set.
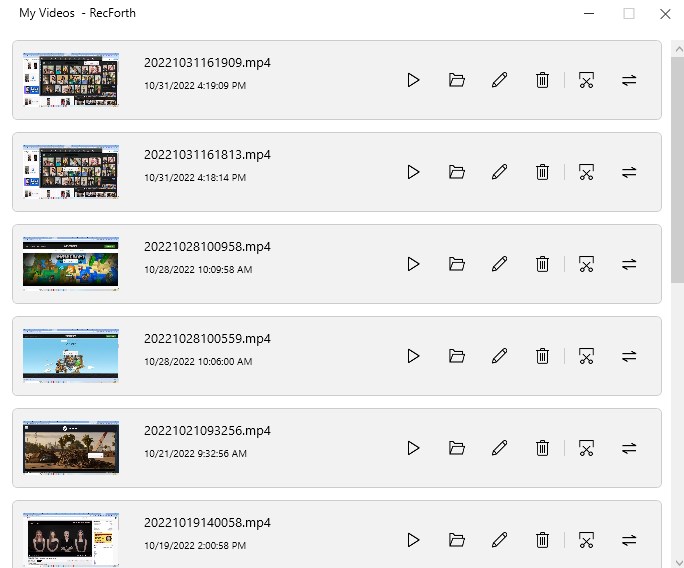
Check the Recording Files on RecForth
Or you can click on the folder icon at the bottom and all the recorded files will be in there.
How to Record Skype Video Calls on Mac
If you want to easily record Skype conversations on your Mac, the preinstalled QuickTime Player is the way to go. With its ability to capture your Mac screen, you can rely on it to record video and audio calls for you on Skype. However, Skype call recordings can only be saved as MOV files. If you need to play the recorded files on other devices, you need to convert them to MP4 format.
Record Skype Video Call with QuickTime
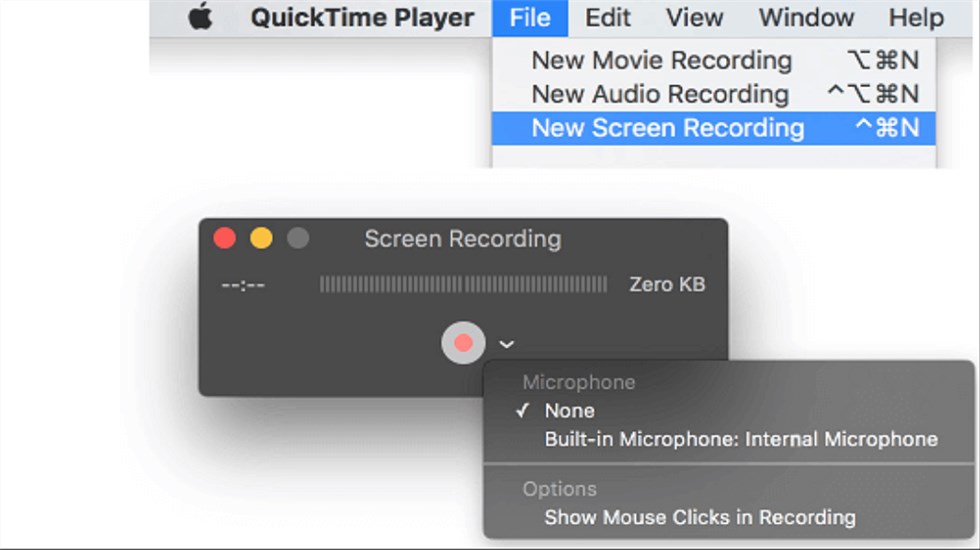
Step 1. Open QuickTime on Mac
Find QuickTime Player from the Applications folder, and then launch it on your Mac. Click the “File” button on the left side of the menu bar to open the screen recording window. In the drop-down menu, select “New Screen Recording” from the three recording modes
Step 2. Record your Skype video call
Go to the Skype program and start a new video call, tap anywhere on the screen to start recording the entire screen.
Or, drag to select the area you want to record, and then tap the “Start Recording” button within that area.
Step 3. Stop to record the Skype call
Tap the Stop button in the menu bar to stop recording, or press Command+Control+Esc on your keyboard at the same time.
After you stop recording, you can choose to play, edit, or share the recorded file.
The Conclusion
Whatever the reason you need to record Skype video calls, the three methods mentioned above will work for you. the built-in recording tool on Skype is a good choice if you don’t suggest some of its limitations. For Mac users, QuickTime Player offers you the great convenience to record video calls on Skype. Also, when using third-party screen recording software such as RecForth, you need to be careful about the legality of the recorded calls.

Karen is a professional writer with a background in column writing who enjoys resolving complex topics and explaining them in interesting ways.
Related Articles
RecForth - Free full-featured screen recorder for all
- Free and easy-to-use
- One-click to exported videos without watermark
- Customized the size and color of the pointer to highlight important content
- Allowing webcam overlay to capture the action
- Record system sound and voiceover
- Free set up automatic stop recording