How to Screen Record PowerPoint with Audio
No matter what you need to record the screen on Microsoft PowerPoint for, this article can give you a hand. Check the three methods of recording PowerPoint described below, and find the one work best for you.
The core essence of Microsoft PowerPoint software is to deliver information more efficiently, and we often use it in our work and study. When you are using PowerPoint to make a product presentation, you need to record the process. In addition, PPT lectures are also a very common way of teaching in modern times, especially when recording micro lessons.
If you have technical questions about PowerPoint screen recording, then you have come to the right place. There are three ways how to turn your presentation document into a video to deliver it to your audience in a more visual way. Without further ado, let’s dive into them together.
How to Record Screen with Audio on Microsoft PowerPoint
A screen recording feature that comes with Microsoft PowerPoint makes screen recording easier. If you don’t have a high demand for screen recording, PowerPoint is one of the best choices. You don’t need to download any software, you can finish the screen recording task directly in Microsoft PowerPoint. If you don’t quite know how to use the PPT recording feature, we have a detailed solution for you here.
Step 1. Open the Screen Recording Option
Open PowerPoint software and click on the “Insert” tab.
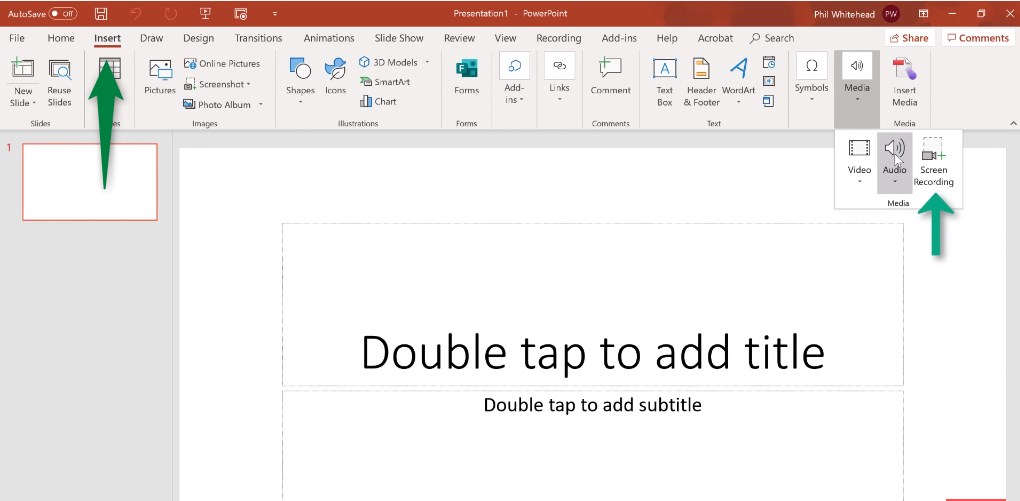
Select the Screen Recording Option on PowerPoint
Click the “Screen Recording” option in the Insert tab, this will call a screen recording window.
Step 2. Select the Screen Recording Area
A recording tool will pop up at the top center of the screen after you click Screen Recording, and then you need to set the recording area.
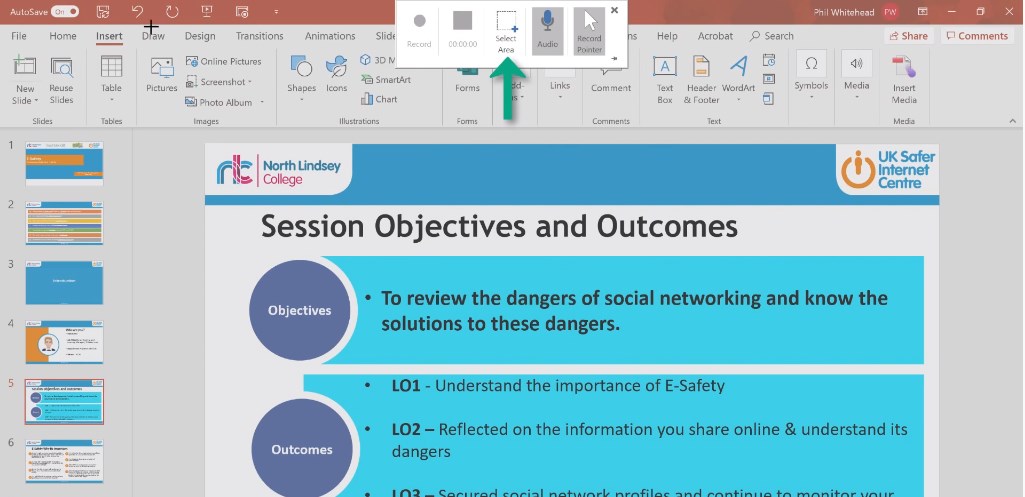
Select the Recording Area
Click to select the area, the mouse pointer will turn into a cross, press and hold the left mouse button to select the area you need to record the video.
Step 3. Start to Capture PowerPoint
After the region is selected, select the “Record Pointer” option to record the mouse pointer.

Start to Record on PowerPoint
Then click the “Record” button, and a countdown timer and operation prompt will pop up on the screen. (Recording will start after 3 seconds countdown)
Step 4. End the Screen Recording
Press Windows+Shift+Q to stop the recording, which will automatically return to the PowerPoint interface. You will now see the recorded video in PPT, click Play to view it.
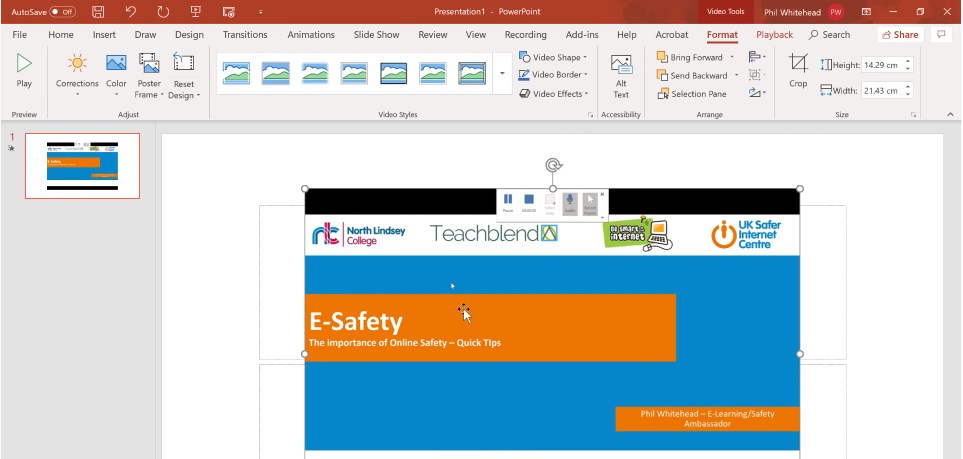
Preview the Recording File on PowerPoint
For simple editing operations, select the video and then click on the “Play” tab.
How to Record PowerPoint with Webcam and Audion on Windows
If you are more demanding in recording screen presentations, you can consider RecForth. The program offers a high-end screen recording experience, and is compatible with Windows 10 and later. You can turn on the microphone button to record system sound while adding voiceover to the PPT recording. In addition, you can also record yourself via the built-in webcam. Before you start, you can click the following button to download RecForth from Microsoft Store.

Step 1. Open RecForth Application
Find RecForth in the search box at the bottom left corner of your computer screen and launch it, click the Settings button in the floating panel to enter the settings ribbon.
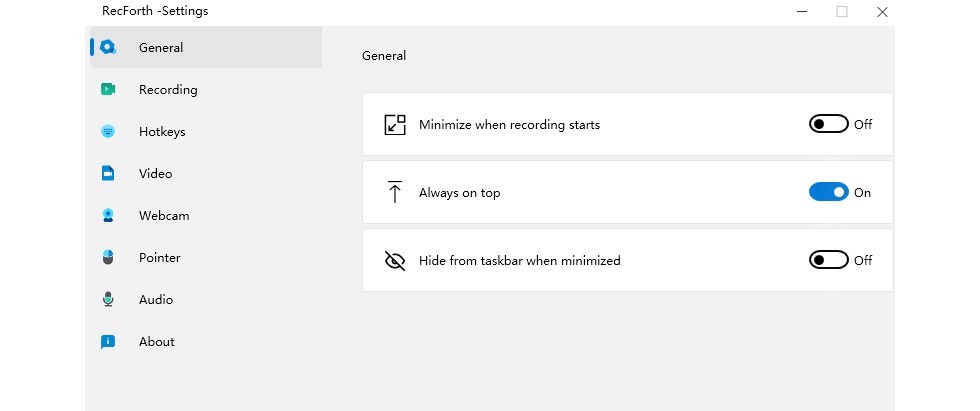
RecForth Setting Page
Preset the output file and a three-second countdown, don’t forget to turn on the Pointer button to set a highlight color for your mouse cursor.
Step 2. Select the Recording Mode
Open the presentation that you want to record on your desktop, and then set the recording area. Choose to record the whole screen or a specific area, or record a single window.
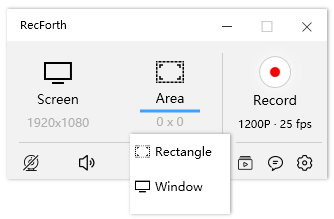
RecForth Recording Modes
After customizing the recording area, turn on the microphone button in the bottom toolbar, which can help you add narration.
Step 3. Start to Record the PPT
Click the red Record button when everything is ready, and the screen recording will start after a three-second countdown. You can pause or continue recording at any time during the process of capturing PowerPoint in RecForth.
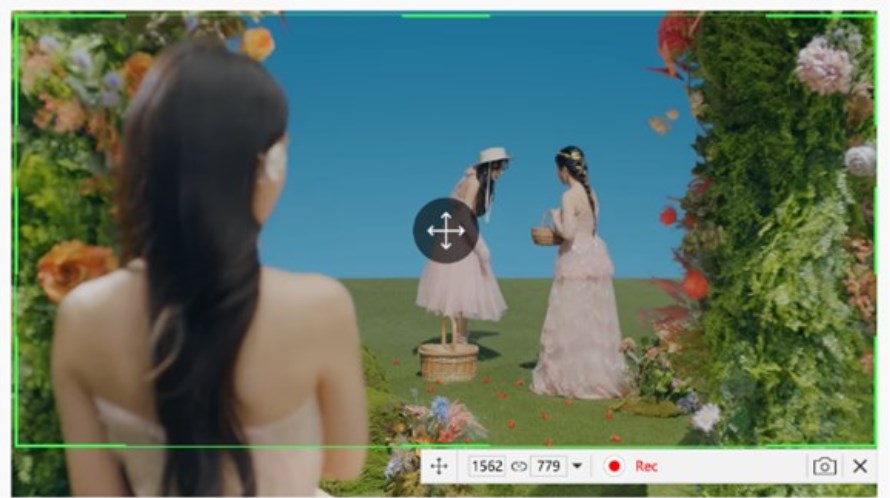
Start to Record PPT with RecForth
To end the recording of the PPT, click the red Stop button. The recording file will be saved in the specified location.
How to Screen Record Powerpoint with Audio on Mac
To record a PowerPoint presentation on your Mac, you can make use of the QuickTime Player program pre-installed on your Mac. As a program that comes with the system, QuickTime is mainly used for playing videos and recording screens. But the only drawback of this program is that it doesn’t support recording the internal sound of the system.
Step 1. Create a New Screen Recording
Open QuickTime Player on your Mac, and then click “New Screen Recording”. Type in the target presentation you want to record.
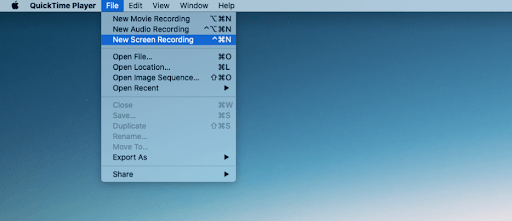
Create a New Screen Recording on QuickTime
In the screen recording bar, click the round red dot button to start recording.
Step 2. Select the Recording Area
QuickTime Player only supports two recording modes, so you should choose according to your own recording needs. Click anywhere on the screen to capture PowerPoint in full-screen mode, or drag the mouse to select the area where you need to record PowerPoint.

Customize QuickTime Recording Settings
Click the drop-down arrow next to the record button to turn the microphone on or off.

Start to Record FaceTime on Mac
Step 3. Save the Recording File
To finish recording, click the “Stop” button in the menu bar.
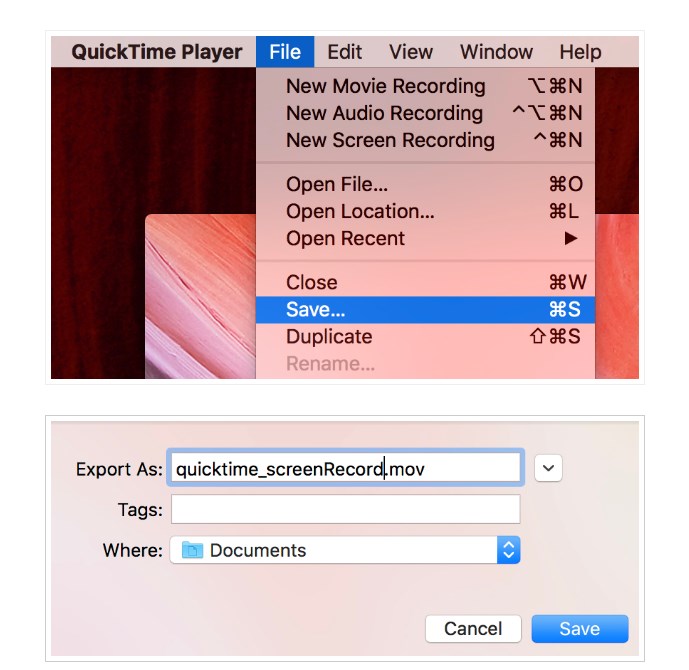
Save the Recording File on Mac
Generally, the recorded file will be automatically saved to the desktop for you to view directly. Or you can go to the File menu to save the output file anywhere you want after recording.
The Conclusion
Well, we have discussed 3 easy ways how to record PowerPoint above. Which method you choose depends on your own screen recording requirements. The built-in screen recording feature in Microsoft PowerPoint is one of your best choices. If you want to experience personalized screen recording, you can give RecForth a try.
More Related Articles
Related Articles
RecForth - Free full-featured screen recorder for all
- Free and easy-to-use
- One-click to exported videos without watermark
- Customized the size and color of the pointer to highlight important content
- Allowing webcam overlay to capture the action
- Record system sound and voiceover
- Free set up automatic stop recording


