Top 5 Free MKV Video Editors in 2023
This article introduces Windows MKV video editor and how to edit MKV video.
Have a look at the best Free MKV video editors available right now. Editing software such as FilmForth and OpenShot provides the bridge between your needs and end goal. Matroska file extension, dominantly known as .mkv, has been around for a long time. Being a free, open-standard format, MKV made its presence among users more than companies ever pushed any format.
When you have MKV files that could use some polishing, that’s where free video editors can come in. Whether it is trimming the video due to its overwhelming length or adding some transitions between different scenes, a good MKV editor can do the job without a flaw.
The market is full of expensive editors that make tall claims on paper but short in practice. The key is to find the best MKV editor with tools that fulfills your requirements without burning a hole in your pocket.
Best Free Video Editor – FilmForth
Are you looking for a free MKV editor? Then FilmForth is your destination. A capable editor offers several hands-on quick tools such as a video stabilizer, MP3 extractor, video converter, and more.
When you go into the crust of editing, several audio editing features are apart from the tool’s dashboard dedicated to video editing.
The Main Features FilmForth
- Edit MKV Videos Swiftly
- Be it MKV or any other leader format, FilmForth supports a large variety of video container formats. On top of that, several audio formats, both obsolete and trending, are supported by the editor.
- Extract Audio from the Video
Often, we come across background music, a song, or a symphony that feels good to hear. Take it from the video and add it to your music library.
Use the Extract MP3 tool to take audio out of any video and extract it in MP3 format. Just select the video file, give your audio file a name, and your audio will be ready within a few seconds.
Steps to Edit MKV Video via FilmForth
Check-list before editing MKV Videos
Step 1. Get FilmForth from Microsoft Store. Avoid downloading and installing files from third-party sources. Launch FilmForth and create a fresh video project by clicking on the New Project button.

Step 2. The new project has been created; kudos on that. Now we import the MKV video, which needs to be edited.
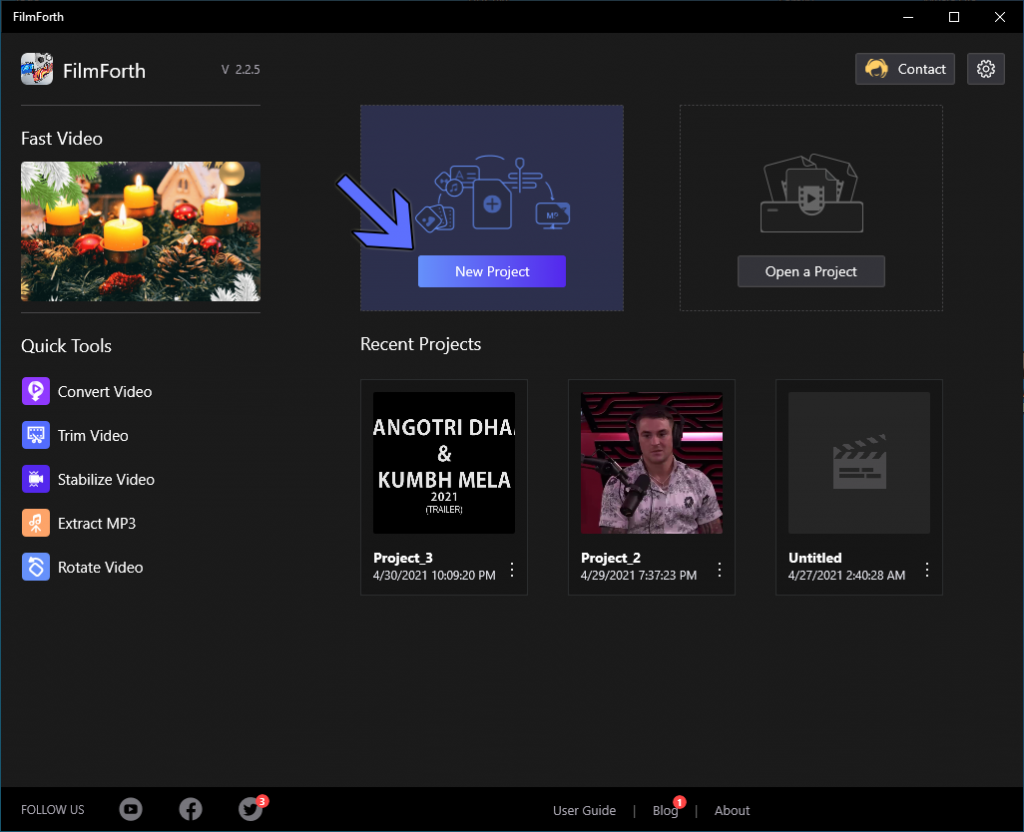
Create New Project Using FilmForth
Step 3. After the video has been imported, it’s our cue to perform the required edits.
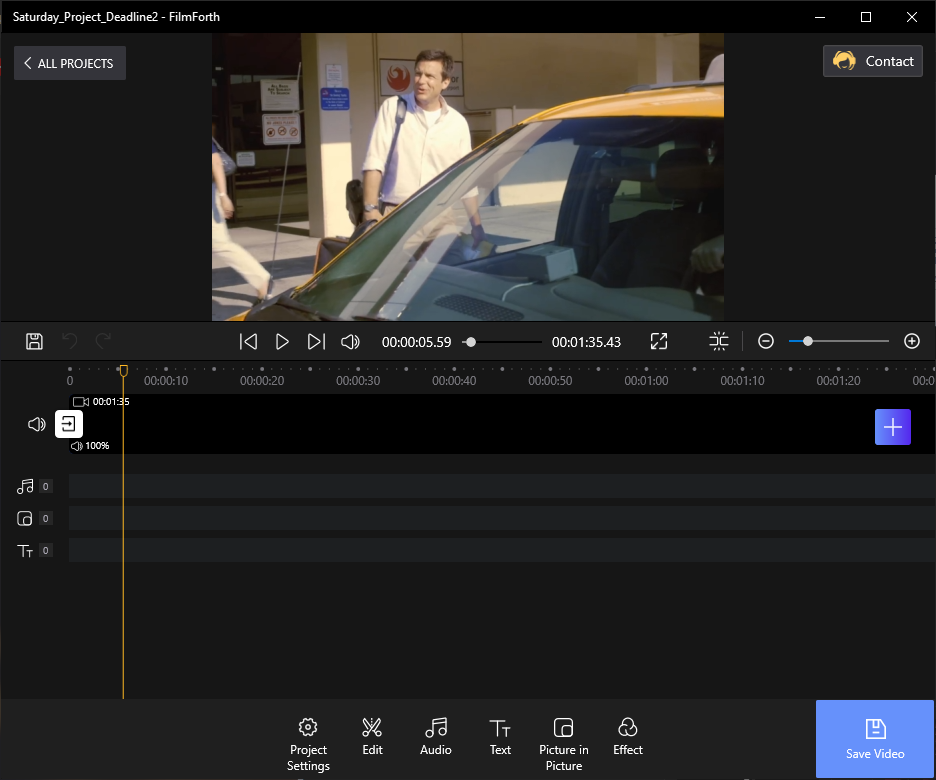
Add Video
- Trim the Video
Let us start with the basics. You have raw footage in your hand and immediately need to eliminate unwanted parts. Start with trim that lets you remove the parts from the start and end of the video.
Step 4. Select the video from and timeline feed, and head to the trim menu from the dashboard of the tool.

Trim Video
Slide the handlebar at the start for trimming it from the start. Similarly, slide the handlebar given on the end to the left for trimming it from the end of the video.
The trimmed part can be reverted to the original form of the video. Slide the buttons in the opposite direction as you did earlier, and make sure there are no grey bars left in the video feed of the trim.
You can trim scenes from the middle of the content by splitting the video into smaller parts. Then trim the start and ends as we did earlier.
The trimmed part can be reverted to the original form of the video. Slide the buttons in the opposite direction as you did earlier, and make sure there are no grey bars left in the video feed of the trim.
- Add Time-lapse
It’s about time we fast-forward the part that would otherwise take a long time to show. Time-lapse amps up the professional quotient of the content while keeping the viewers involved in the entire process.
You Must Know: Split the video part which you want to use in the time-lapse. Or else the entire video will become a time-lapse.
Step 5. First, single-click on the video clip from the timeline to select it, and then head to the speed menu from the tool’s dashboard.
Step 6. Secondly, slide the speed button to the right, higher than 1x. Experiment with the speed according to your liking.
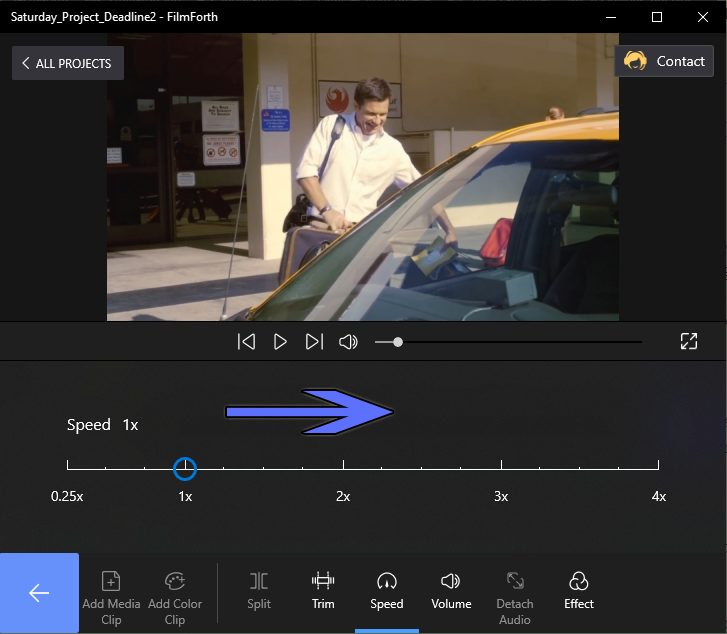
Make Time Lapse
The sweet spot for many time-lapses appears as between 1.25x to 2x.
Best 4 Free MKV Video Editing Software
Moving onto the other MKV video editors offering a bouquet of features and reliability. Give them a try when you feel like exploring more options.
#1. OpenShot Video Editor
OpenShot is an open-source video editor that is free to use in any capacity. Use the friendly UI-based video editor to polish your videos.
- Features
Cross-platform support enables users to switch between different computer platforms. Teams who are working on different platforms can bank on it for collaborative work.
Is English not your first language? Not a problem. OpenShot is available in over 70 languages.
Clips Preset menu that provides a head start on a project. You wouldn’t need to start from zero.
- Free Frame with OpenShot
Step 1. Add a video by dragging and dropping it into the timeline.
Step 2. Using the red seek bar, head to the frame which you want to freeze.
Step 3. Right-click on the video in the timeline feed. A menu will appear; head to Time > Freeze > 6 seconds.
You can set the duration between 2 to 30 seconds, similar to the 6 seconds set by us.
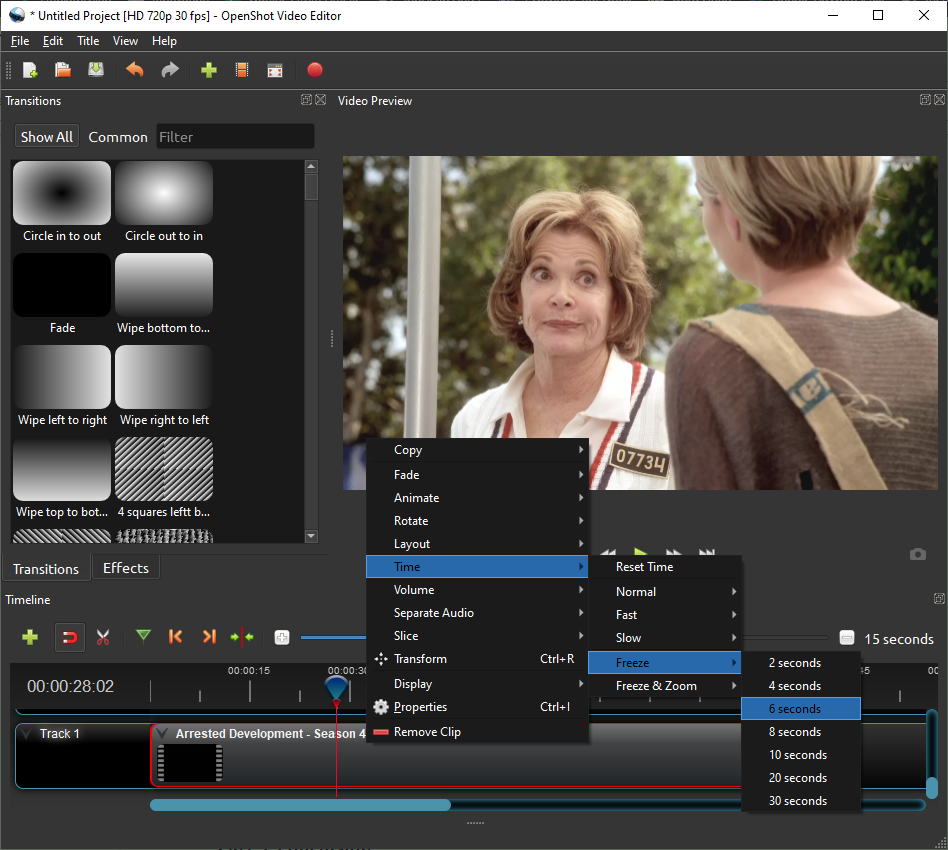
OpenShot Video Editor
#2. BeeCut
Diving into the premium/paid segment while also offering a free version. BeeCut makes the cut in our list of MKV video editors.
- Features
BeeCut is available for both PCs and mobile platforms. Go mobile when out, and don’t miss the editing deadlines.
Record your screen and edit it right with the in-built screen recorder. Online classes have a separate menu for this very purpose.
A comprehensive library of elements to add to the video.
- Add Opening Screen
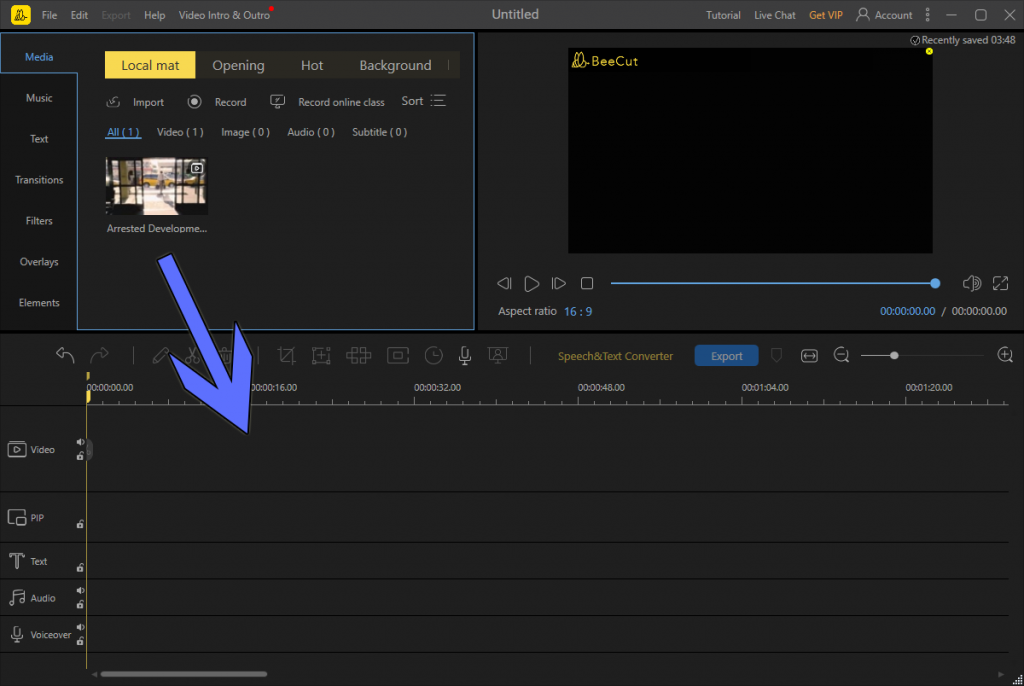
Step 1. Drag and drop your video to the Local mat.
Step 2. After that, click on the plus sign next to the video to add it to the timeline.
Add Opening Screen
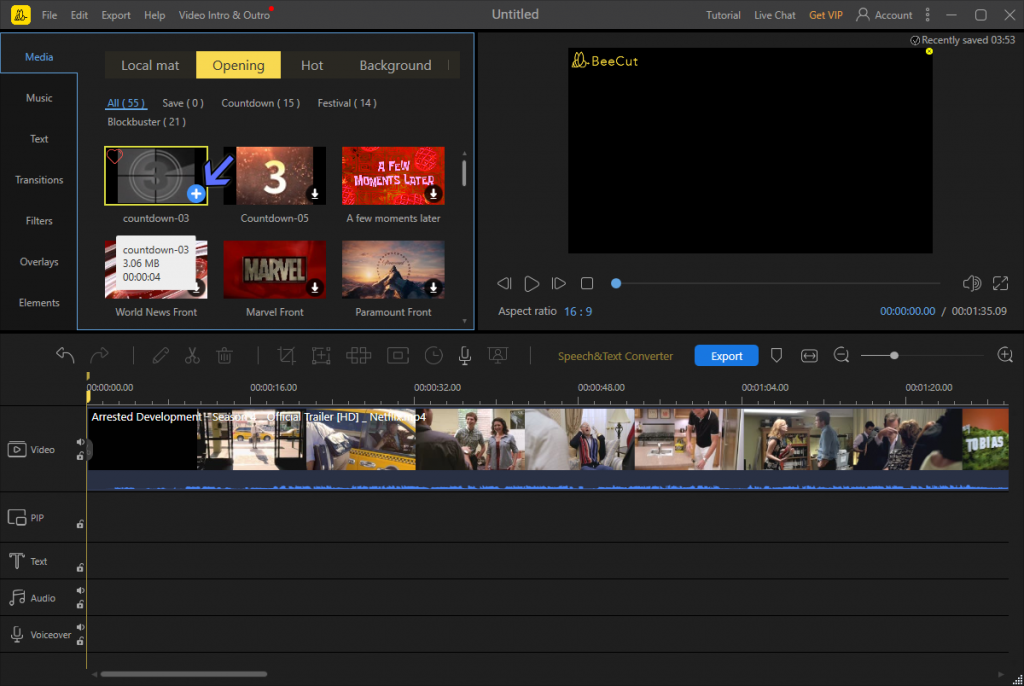
Step 3. Head to the opening tab, which is located above the Local mat.
Step 4. In the opening menu, you will find over 55 different opening clips for your video. Click on one of the openings you fancy, and it will take a moment to download it from the servers.
Step 5. Now, click on the plus button on the opening video which you have just downloaded. It will be added to the start of the video.
BeeCut
#3. Kdenlive
Dial back to open-source video editors as Kdenlive tick all the right boxes—an advanced MKV editor built on the KDE and Qt framework libraries.
- Features
Support virtually all formats, with the help of FFmpeg libraries. No format is out of bounds for Kdenlive.
Customize the layout according to your needs and workflow.
Proxy editing helps save time in editing higher-resolution files in less time.
- Add Guides to the Video
Step 1. Add video to the dashboard, and then drag it to the timeline feed.
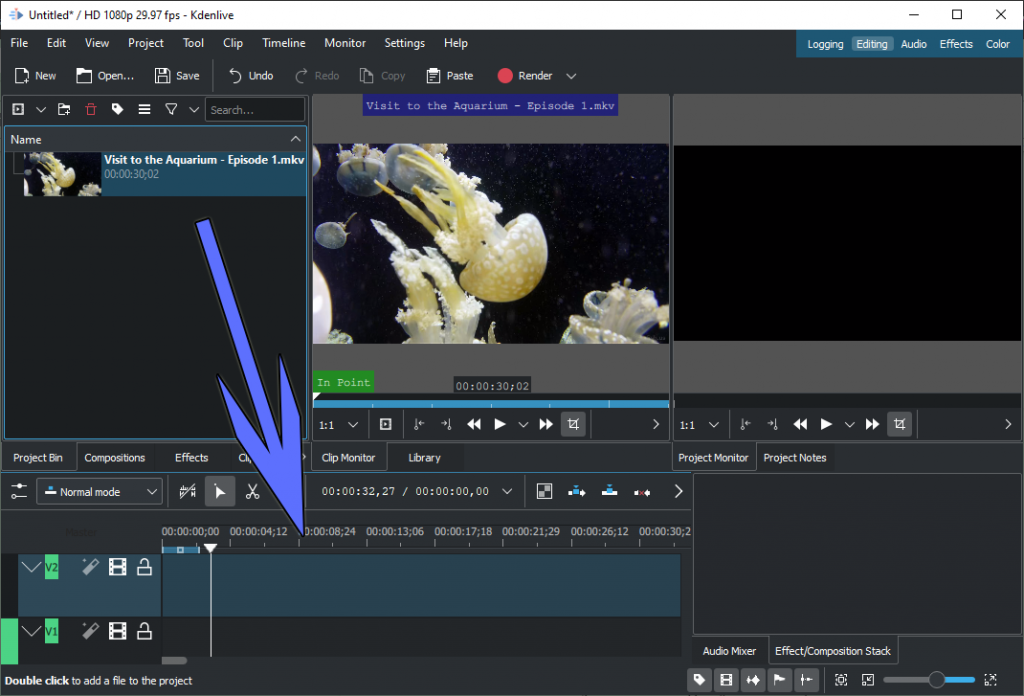
Kdenlive
Step 2. Take the seek bar to the place where you want to add a guide.
Step 3. Press the G button on your keyboard, a shortcut for adding guides.
Step 4. Single-click on the pink box in the right preview window. Start typing your text and press enter.
#4. VSDC Video Editor
VSDC is a non-linear video editor which offers both free and pro versions. You get the full editing suite in the free version, apart from some extra features that don’t make a difference for an average user.
- Features
Intermediate grade 360-degree video editing.
Custom export profiles for different devices.
Works on most of the outdated, slow PCs.
- Crop the Video
Step 1. Add video directly to the timeline feed through the drag-and-drop feature.
Step 2. Right-click on the video either in the timeline feed or the preview window.
Step 3. Head to the following in the menu – Crop tools > Custom region.
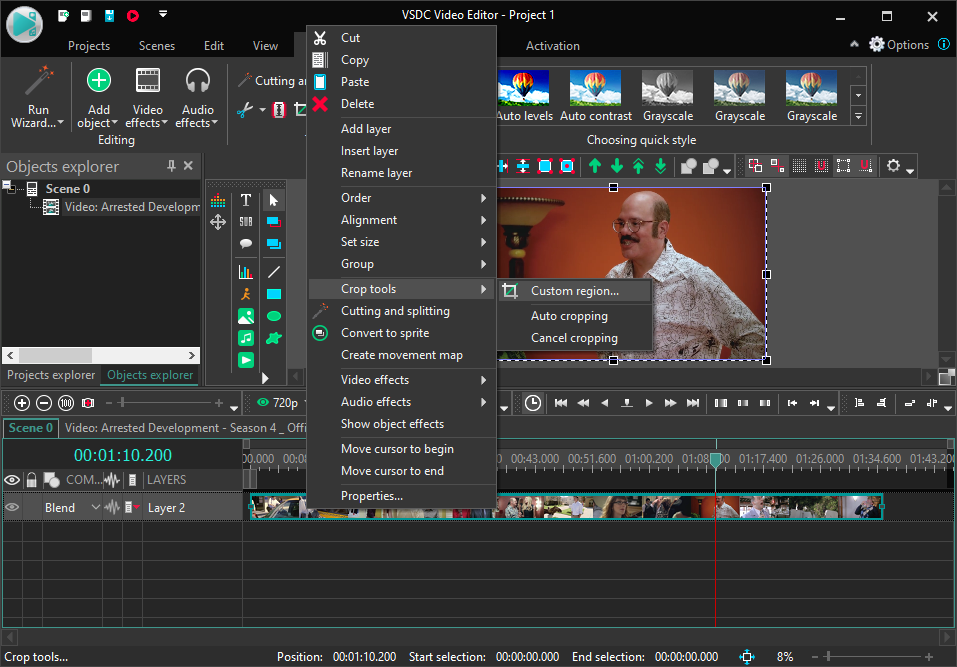
VSDC Video Editor
Step 4. Use the eight buttons given on the boundaries and edges of the video. Resize them according to your choice for cropping the video.
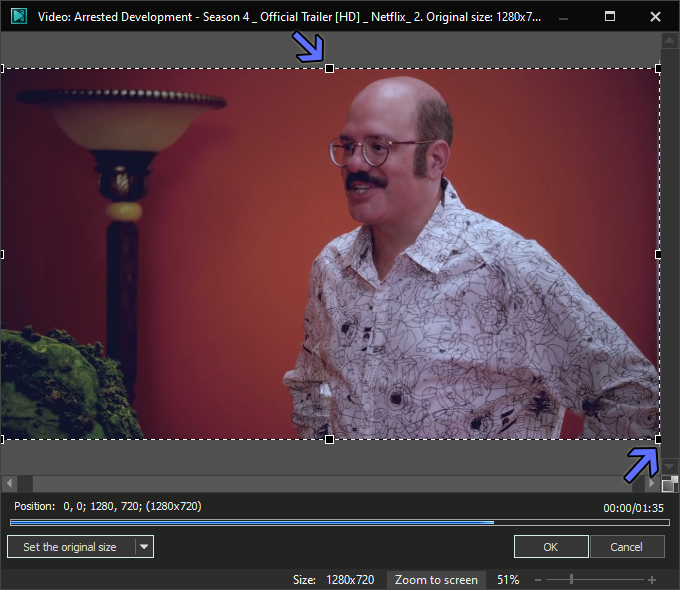
Crop The Video
Conclusion
MKV is a popular media format amongst users. They use it for producing and sharing videos of different genres. FilmForth can help fast track the process as it provides essential editing tools that save time, energy, and effort.
Editors such as Kdenlive, OpenShot, and VDSC provide essential options for users to decide from. You can try any of them without a second thought, as all of them offer the same generic features for standard editing purposes. The level of accessibility, however, varies on the editors, so it’s up to your individual preferences to decide.

Karen is a professional writer with a background in column writing who enjoys resolving complex topics and explaining them in interesting ways.
Related Articles
FilmForth - Free Video Editor
- Easy to use and no skill required at all.
- Export video to MP3 with one click.
- Add transitions, effects, filter, text to the video as you want.
- Remove, replace, record and edit the background audio easily.
- Change the speed, volume, and subtitle on video with ease.
- Stabilize, trim, rotate, and convert video in seconds.