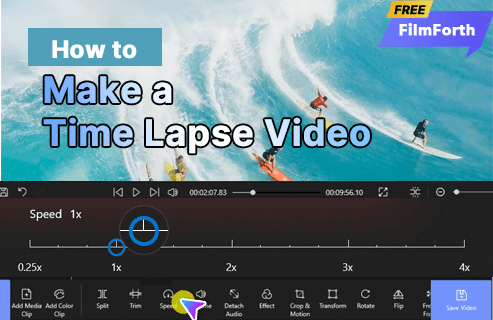
How to Make a Time Lapse Video on Windows 10
In this article, you can find the best time-lapse video makers, features, and steps on Windows 10.
Whether you are creating niche content or recording something mundane, capturing moments, a time-lapse video is a remarkable way to showcase a point of time.
Creating a time-lapse video requires a somewhat larger duration of video footage. The longer the footage, the more the duration of the time-lapse video. Guess what? You can create such a video by yourself, without requiring a professional’s service or the tools used by them.
The Best Time Lapse Video Maker on Windows 10
A free timelapse maker for Windows 10 is available, which goes by the name of FilmForth. You can create as many time-lapse videos as you like on a demanding scale. Let’s take a look at its features.
- Easy to create time-lapse videos – Add the video, and start creating time-lapses using the speed feature on the editor. It’s that simple to make. You can set the speed of the time-lapse as well according to your needs.
- No watermarks – No one likes obtrusive, permanent watermarks of the editor used for editing a video. FilmForth provides you with the option to remove watermarks while publishing the video.
- Easy to use – With its simple user interface, you can rely on it for various video editing needs without compromising on your vision.
Make a Time Lapse Video with FilmForth for Free
Learn to make a time-lapse video with FilmForth editor, which is for free. Download and install FilmForth from the Microsoft store. It is currently available for Windows 10.

Step 1. Launch FilmForth and click on the New Project button.
When you are looking to make a time-lapse out of an older video, refer to an earlier project. Refer to the Recent Projects section, or browse projects using the Open a Project button.
How to Make a Time-Lapse Video on Windows 10
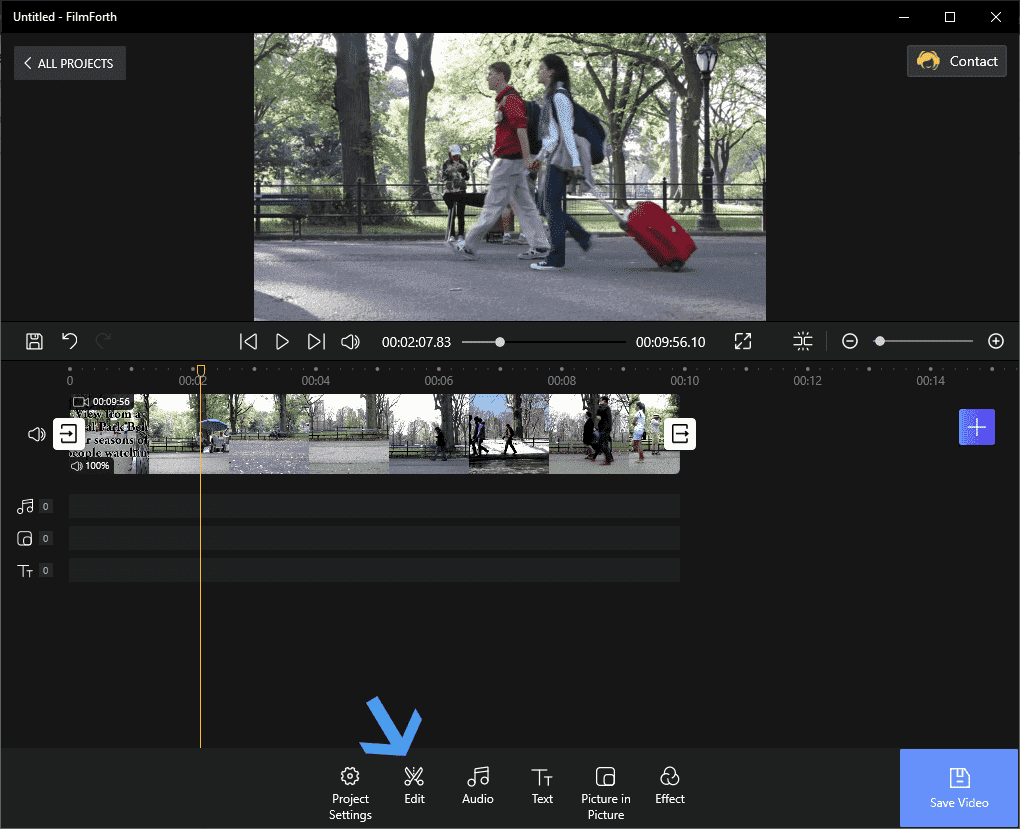
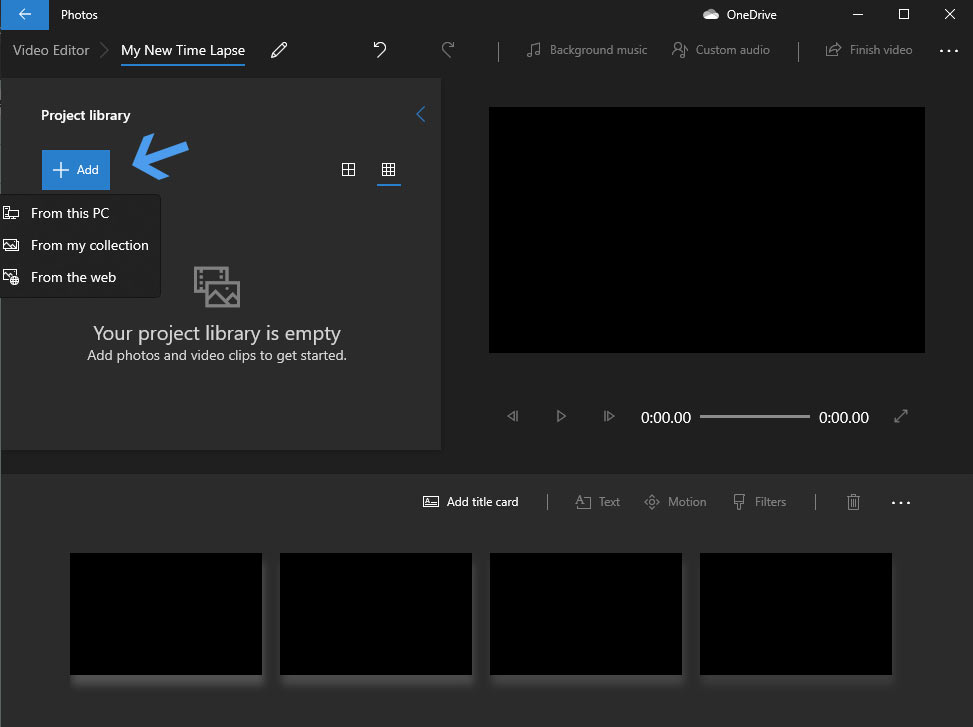
Step 2. Add the video in question. You can either use the ADD VIDEO/PHOTO CLIPS button or drag and drop to add a video.
Generally, the editing tools dashboard appears at the bottom when you add a video. In any case, if it does not, then select the video from the timeline feed. The other way is to click on the Edit option from the dashboard, which will display all the available editing tools.
Edit Tools Options
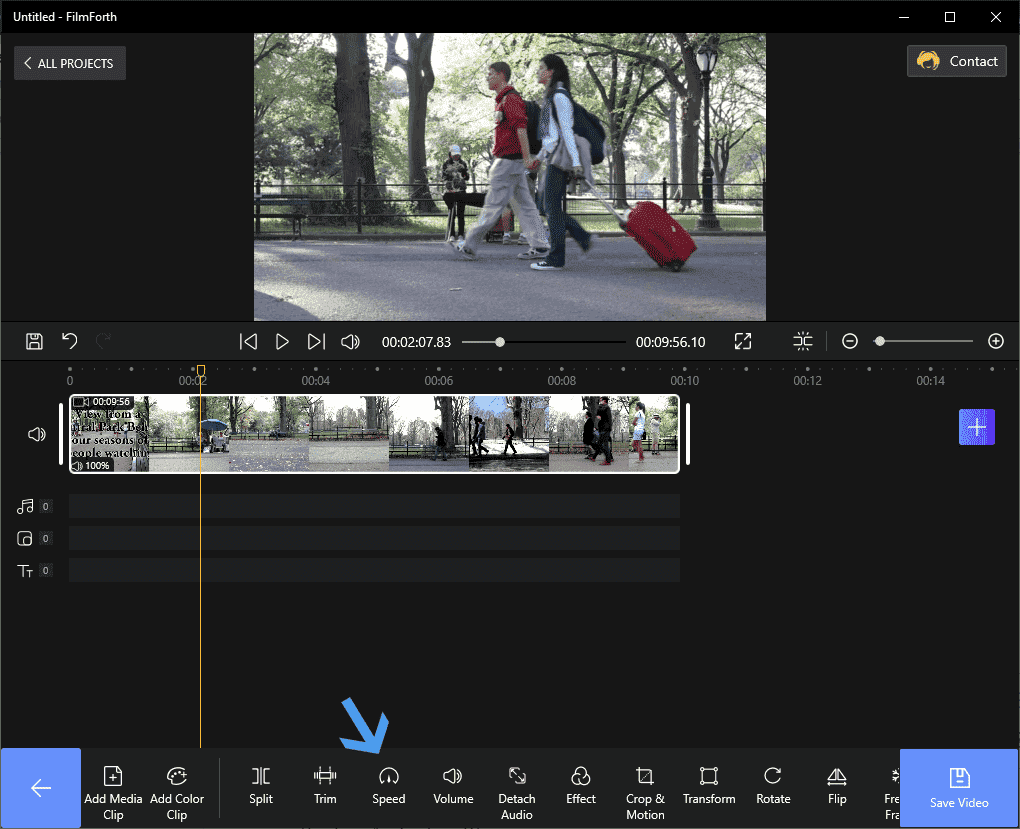
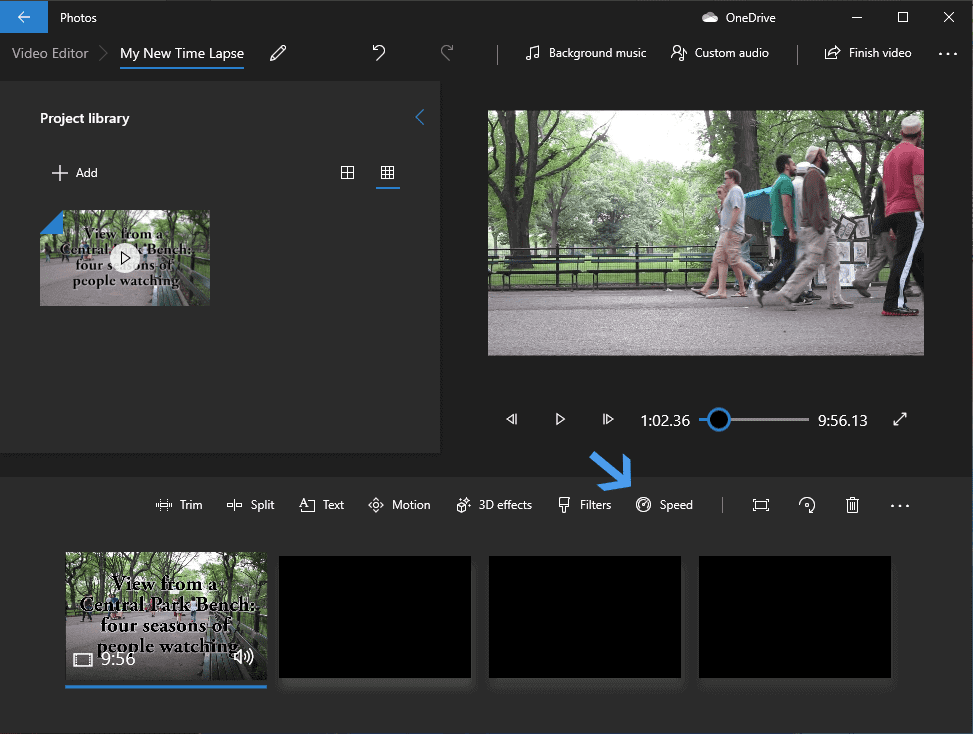
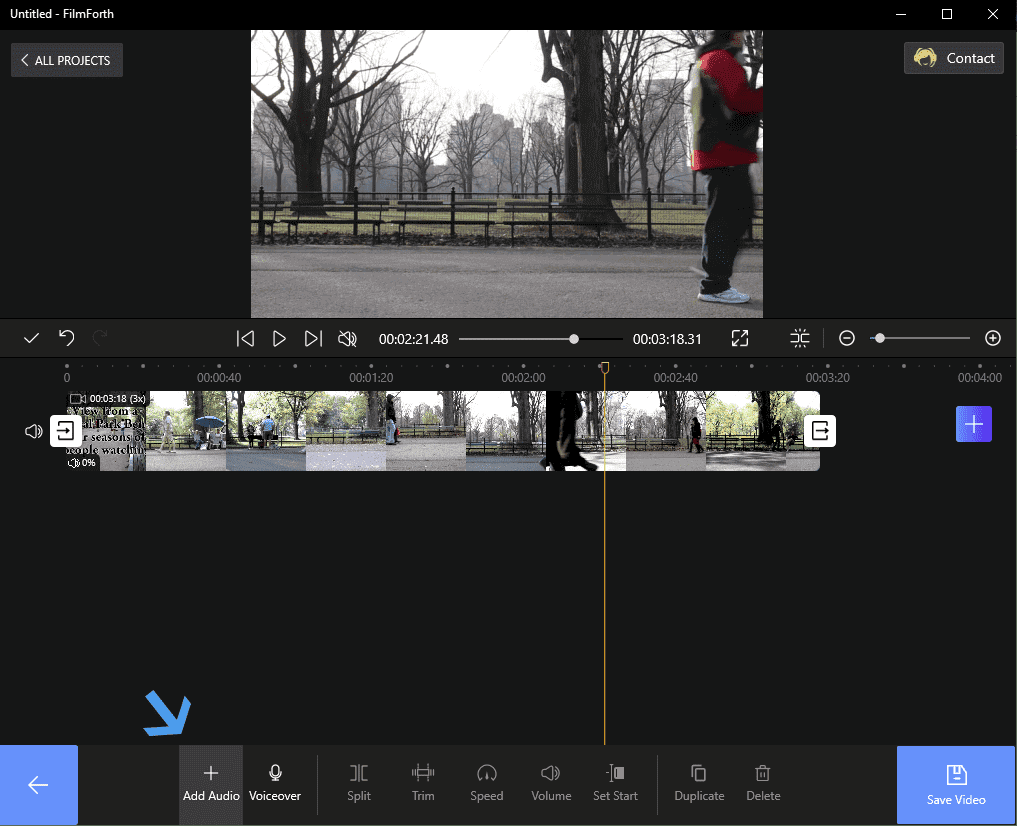
Step 3. Now, you have all the editing tools at your disposal. Click on the Speed option as given in the dashboard at the bottom of the window.
Edit Tools at Your Disposal
Why are we heading to the Speed feature?
There are dedicated modes on professional cameras and several smartphones for recording time-lapses. Not everyone has access to all the devices.
The other way is to use a regular video and speed it up. After all, time-lapse is all about increasing the speed of the video. It does that by reducing the frames over a period of time. This is the opposite of what we see in slow motion videos with increased FPS.
Step 4. Slide the Speed button to the right to increase the speed of the video. Take it slow and increment it 1x at a time. Play the video and see if it fits your needs. Click on the blue-colored back button, given at the left bottom corner of the window.

Speed Time Lapse
You have successfully created a time-lapse video out of your stock footage. And before we forget, you should know that the time-lapse can be reverted/edited by accessing the speed feature.
Other Time-lapse Video Editors for Windows 10
You don’t need to look elsewhere for a time-lapse video editor. The in-built Video editor in the Photos app with Window 10 does the job pretty well.
- Free of Charge – Coming as a bundle with the Windows operating system, it is free of charge and has been the same for the OS’s previous installments.
- Minimalistic UI – Keeping in line with the philosophy of Windows 10, the video editor has a modern and minimalistic approach in the UI department.
- Multiple Editing Instances – Edit multiple videos in one instance by adding them to different storyboards.
Create time-lapse with Video Editor of the Photo Apps
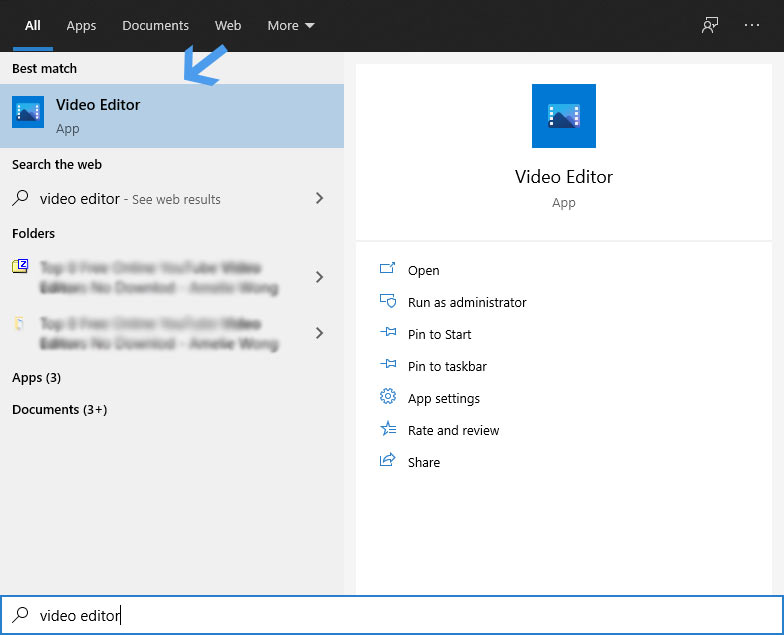
Step 1. Head to the Start Menu search and type Video Editor.
Check Your Video Editor
Step 2. Create a new project by clicking on the New Video Project button. Click on the plus button to add a new video.
Add a New Video
Step 3. Drag the video to the storyboard for editing. Click on the Speed option, and a dialogue box will appear.
Check Your Video Speed
Step 4. Slide the button towards the right to increase the speed. You can speed the video by up to x64. Once sped up, click elsewhere on the editor, and the new speed settings will be saved up. Save the video by clicking on the Finish Video option.
Bonus Tip – Fixing Audio of the Time Lapse Video
While creating a time-lapse on an editor, often, the audio gets chopped up. Speeding up audio is never a good idea. The best thing to do is remove and replace it with another audio that fits the video’s theme.
Detach Audio from the Time Lapse Video via FilmForth
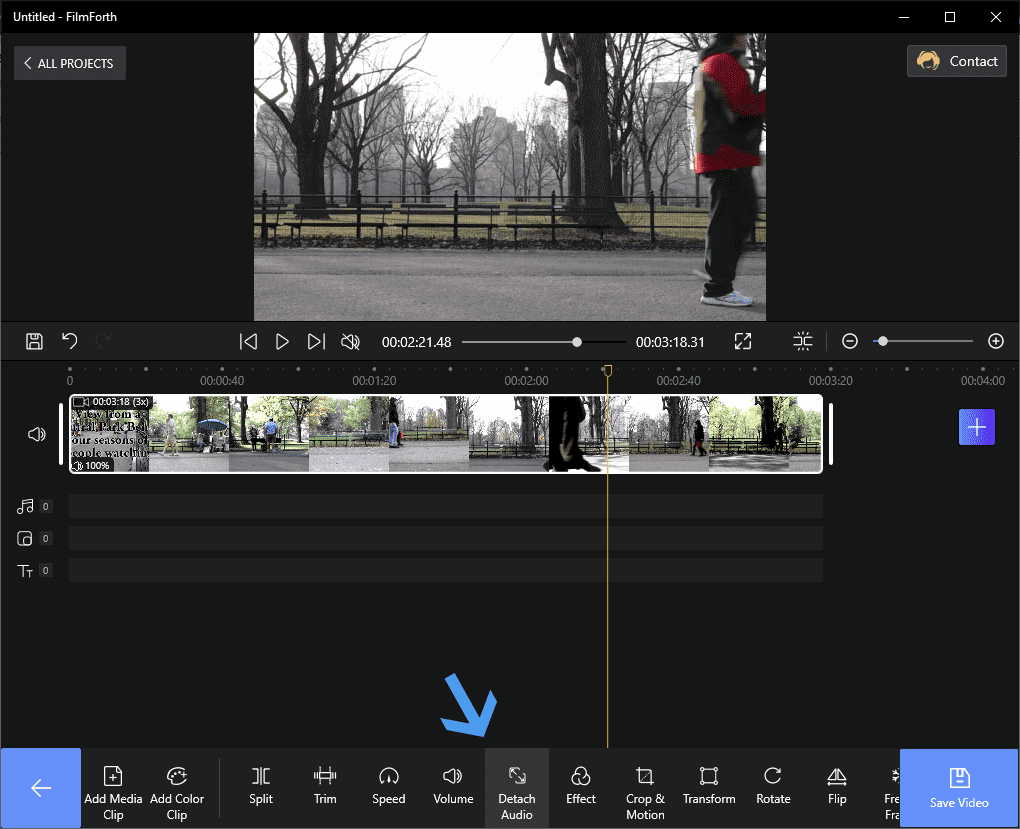
First of all, we will remove the audio using the Detach Audio feature.
Step 1. Select the video from the timeline feed. And then click on the Detach Audio option from the dashboard. It will take a couple of seconds to minutes for the process to be completed.
Detach Audio Option From The Dashboard
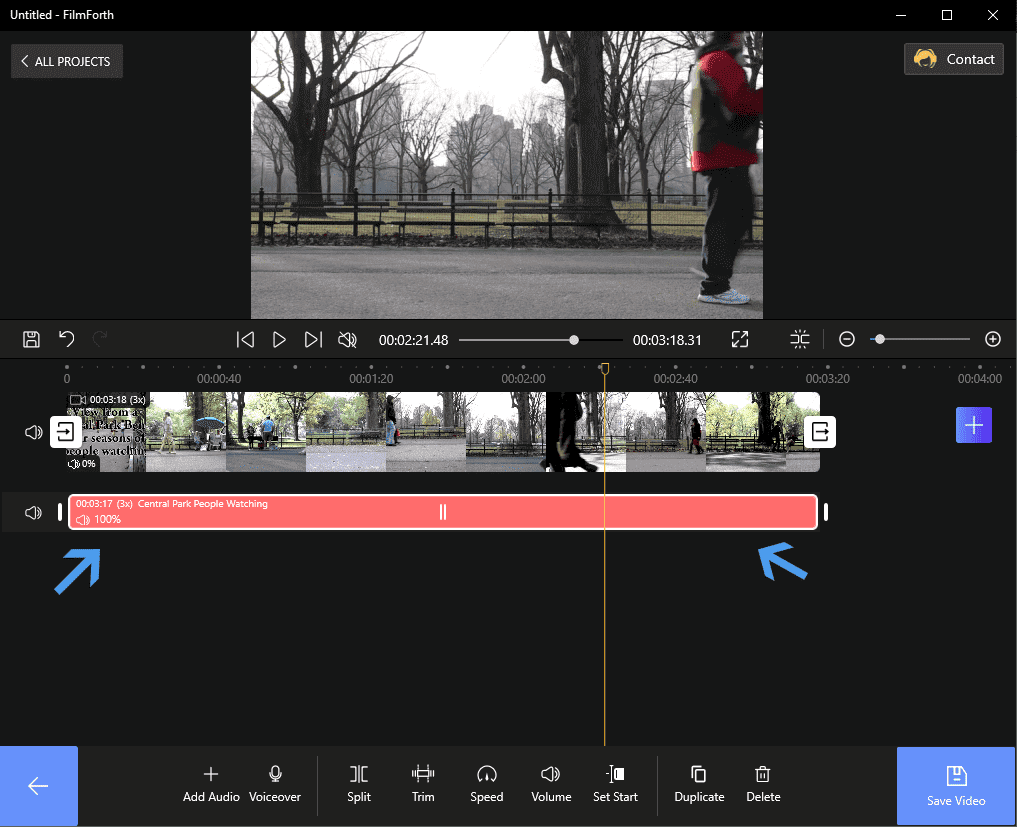
Step 3. Select the red bar, which is the detached audio. Then delete the audio by either pressing the Delete button on your keyboard or the one given in the editor.
Detach Audio with FilmForth
Add Audio to the Video Now
Let’s add audio of your choice to the time-lapse video.
Step 1. Head to the home screen of the project and go to the Audio section. After that, click on the Add Audio button.
Click on Add Audio Button on FilmForth
Step 2. Now, click on Add a local audio file to add the audio you have in mind for the video. Alternatively, you can use the suggested music as well.
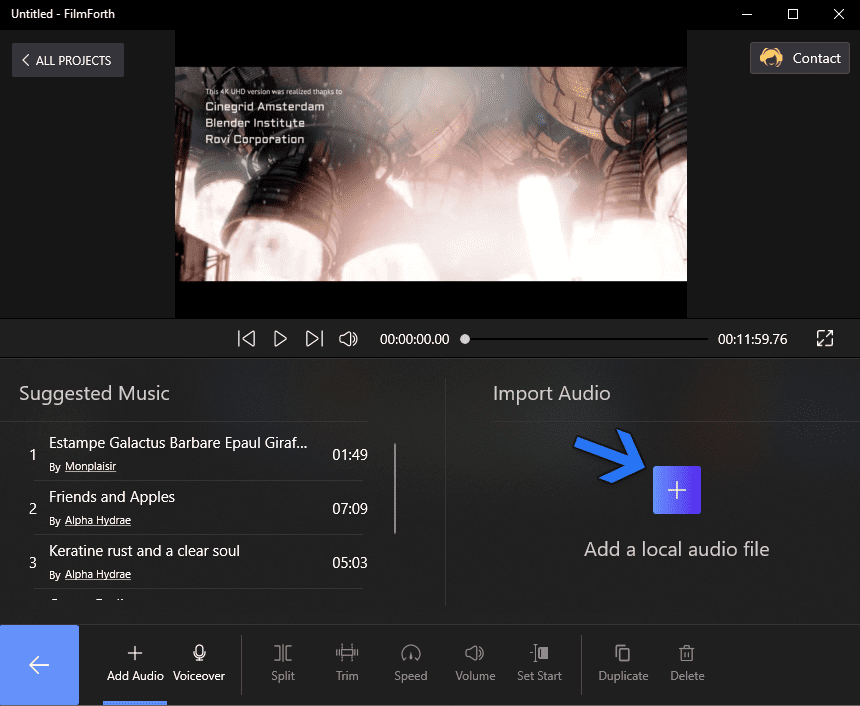
Add a Local Audio File
Conclusion
For recording time-lapse worth footage, you should use a tripod or a stand-in order to avoid shaking the camera while it’s capturing the video.
Good quality cameras coupled with feature-rich editors such as FilmForth make it easy to produce high-quality time-lapse videos. In addition to the above functions, if you want to make your video longer, you can read this method.

Karen is a professional writer with a background in column writing who enjoys resolving complex topics and explaining them in interesting ways.
Related Articles
FilmForth - Free Video Editor
- Easy to use and no skill required at all.
- Export video to MP3 with one click.
- Add transitions, effects, filter, text to the video as you want.
- Remove, replace, record and edit the background audio easily.
- Change the speed, volume, and subtitle on video with ease.
- Stabilize, trim, rotate, and convert video in seconds.