How to Create Zoom Through Text Effect for Free
This post tells you detailed steps to make a zoom through text effect for free with FilmForth.
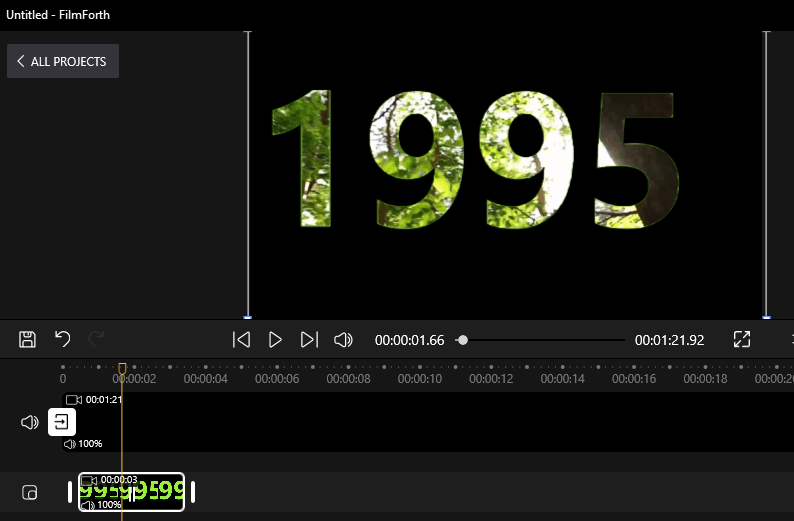
If you consume a lot of content, you must have come across the zoom through text effect. It’s when the text appears on the screen, and then it gets larger, turning transparent. The video starts emerging from the text and takes the whole screen. Followed by text vanishing from the screen.
That’s where FilmForth comes into the picture. A video editor with the Chroma key feature can be used for the zoom through text effect. Unlike other free editors, it does not force their watermark on the video. All major video formats are supported. And if you have a peculiar format at hand, take advantage of the bundled format converter. Download FilmForth from Microsoft for free now.
 Getting down to business, the following video is about how to use the Chroma Key feature. Also, how Chroma Key enables us to create a zoom through text effect with FilmForth.
In simple words, creating zoom through text effect can be divided into three major steps:
Step 1. Create Masked Text With Color Clip
Install and launch FilmForth and create a new project using the New Project button.
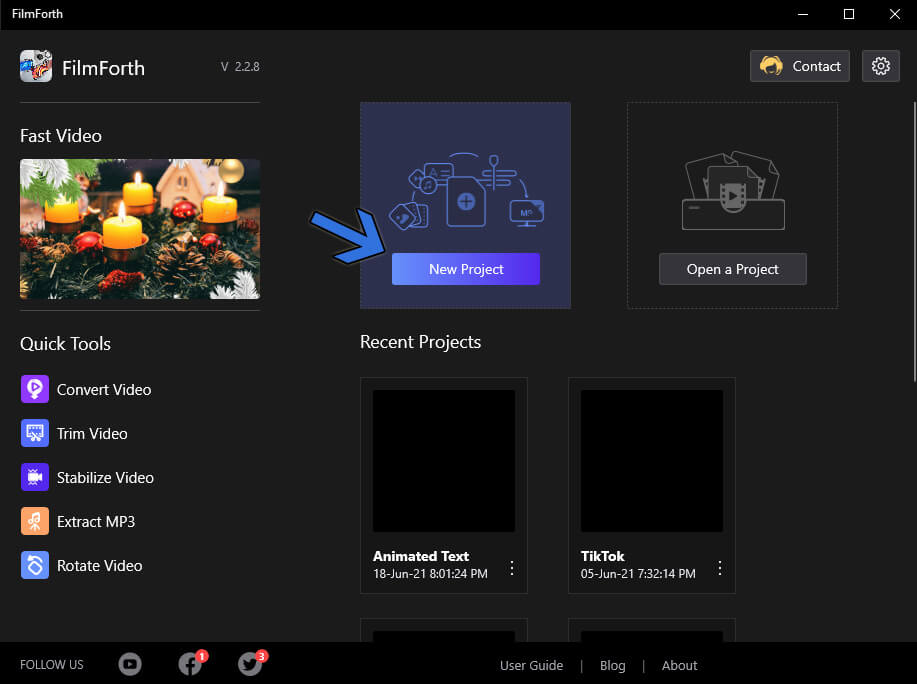
Create New Project
Add a color clip as the background of your video. Click on the arrow given on the right side of the Add Video/Photo Clips button.
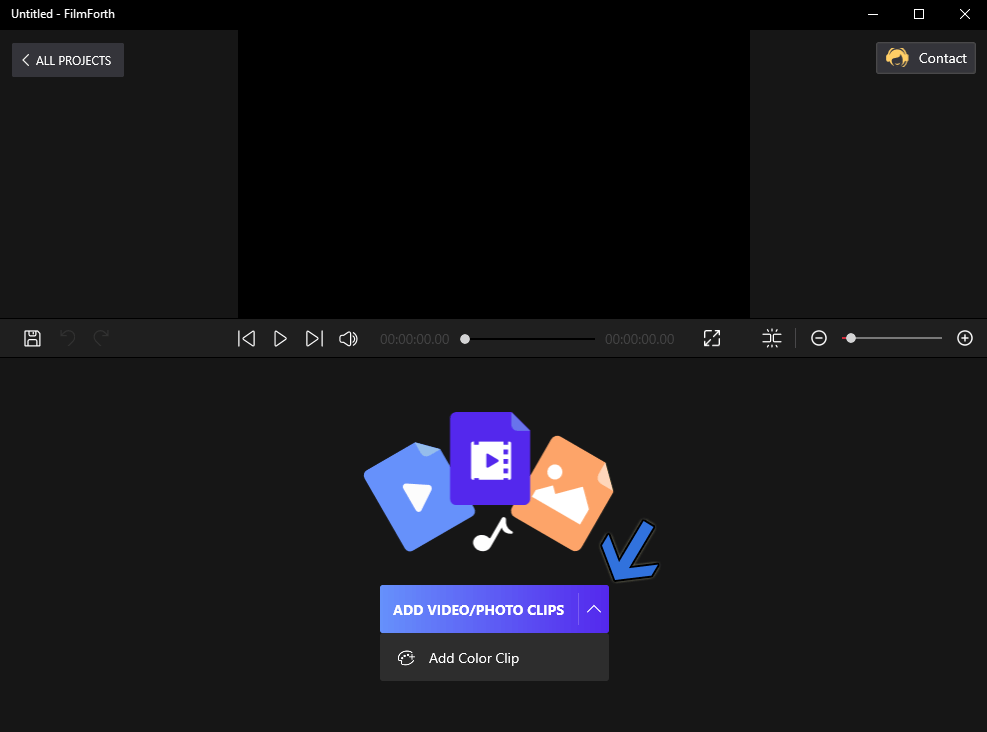
Add Color Clip
Head to the Edit Color section. Set the color to Solid from Gradient. Choose the color black from the below palette, as it is visible on different backgrounds.
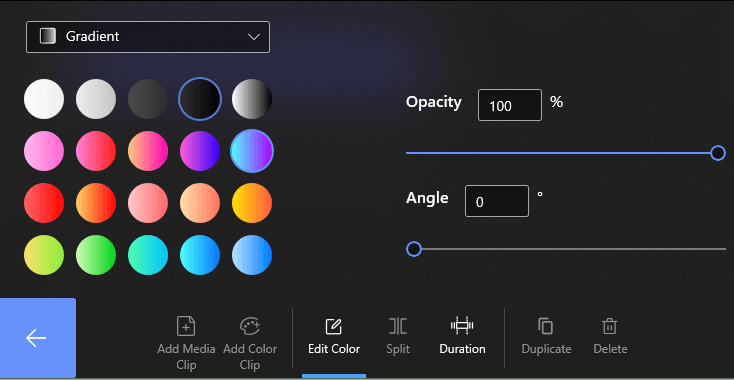
Choose Color Black
Now, we go back to the home screen of the project. From there, head to the text menu using the button in the dashboard. Click on Add Text in the next screen to reach the text menu.

Text Menu
A text box will appear on the video preview screen. You can double-click it to access the text edit menu. Another way is using the traditional Edit Text button.

Edit Text
Inside the text menu, we have three key things to modify.
- Arrow A: Change the color of the text to green for ease with the Chroma key effect.
- Arrow B: Resize the font to fit the screen. You can manually stretch the text box to increase the size as well.
- Arrow C: Enter your text in the textbox. Make sure it is short and snappy that will fit the screen.
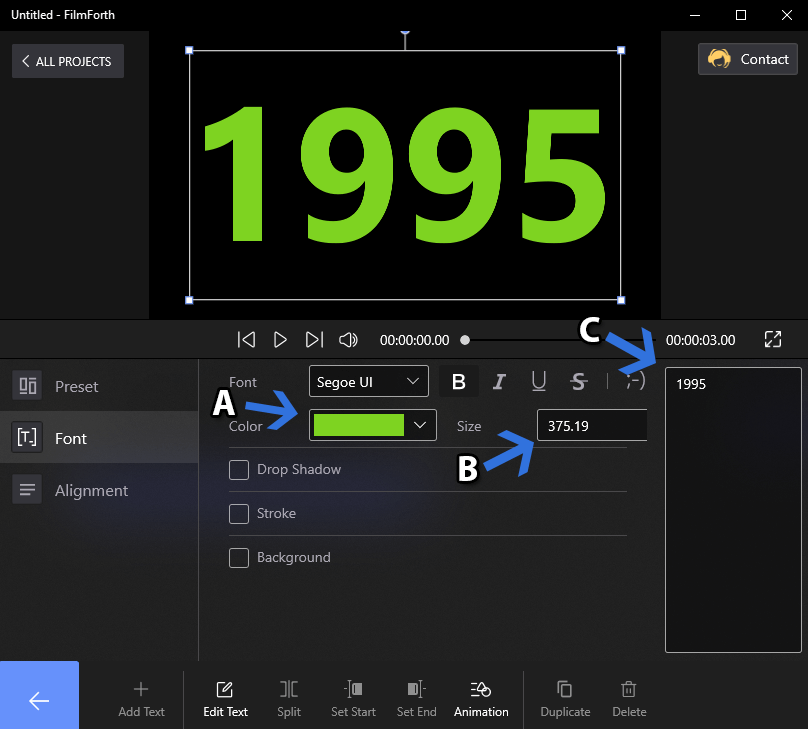
Enter and Adjust the Text
For writing many lines, divide the text into many parts. Then, repeat the above process and arrange the text in the following way on the timeline feed.
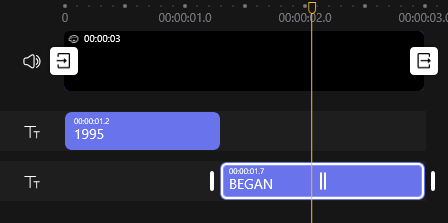
Add Multiple Text
Then we go to add the zoom in animation to the text. Head to the Animations menu after selecting the text from the timeline feed.

Animation Menu
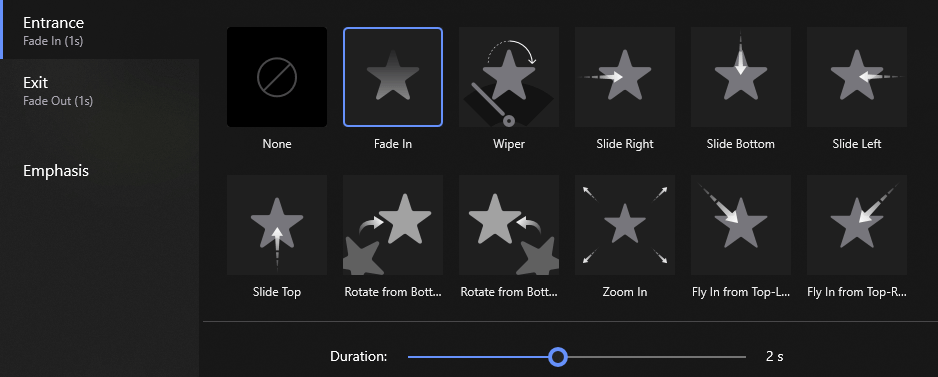
Scroll down the Entrance section of text animation. Select the Zoom In animation and also set the duration for it.
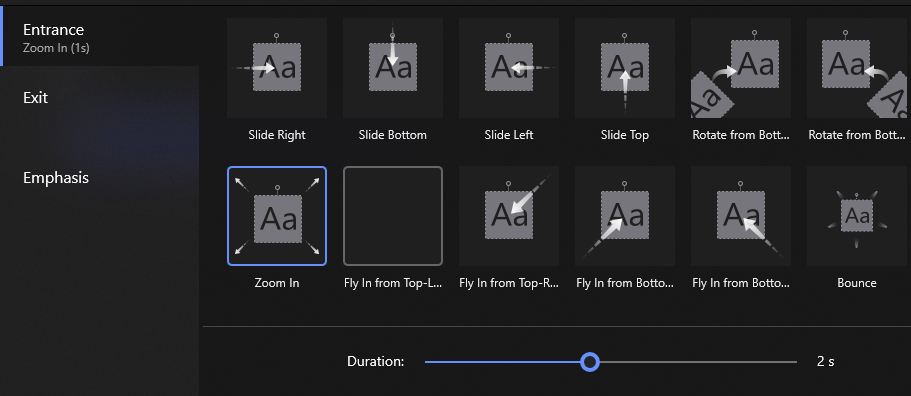
Zoom in Entrance
Finally, export this text video in the same settings as your original video.
Step 2. Add Text With Chroma Key
Import the original video upon which you want to apply the zoom through text effect. Drag and drop or use the conventional import button.
When the video has been imported, head to the Picture in Picture menu. You can find it on the project’s home screen.
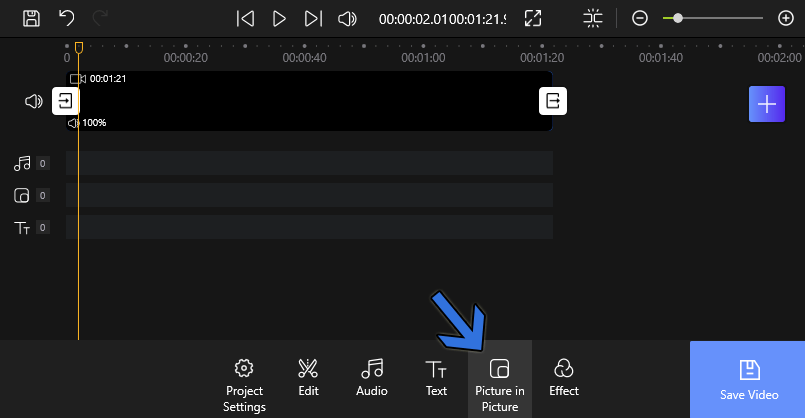
Picture in Picture Menu
Once inside, click on the Add Pic in Pic button for importing the earlier creating a video clip. The video clip will be added as a PiP layer.

Add Picture in Picture
Access the Chroma Key by clicking on the button located in the tools dashboard.
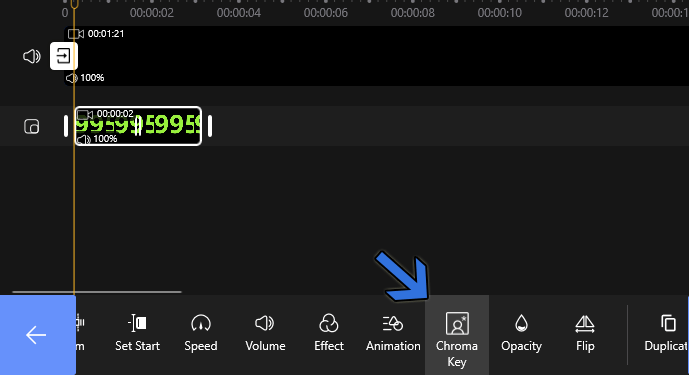
Chroma Key
Enable Chroma Key and select the color of the text in the PiP video using the color picker. Calibrate the tolerance level by sliding it either way. Keep the level at a point where the text becomes transparent, leaving no inward traces of the color.
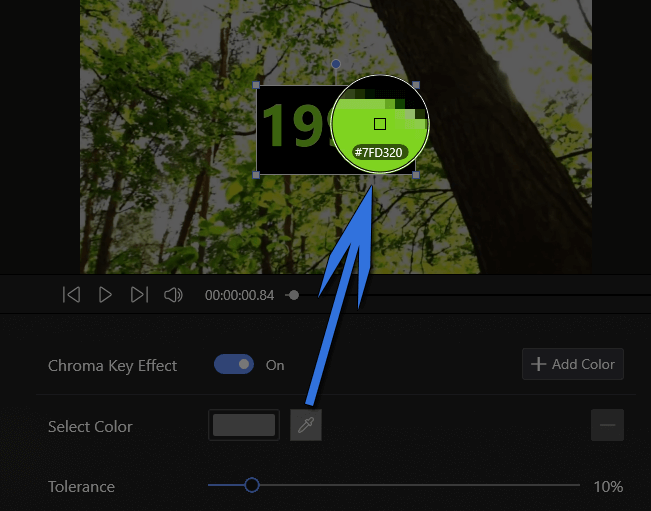
Adjust Tolerance
Resize the text box on the preview player to cover the entire screen.
Resize the Text Box
Step 3. Adding Fade In Effect
In this segment, we will give the final touches to the video. By adding the fade in animation, the zoom through text effect will become more prominent.
- Select the PiP video from the timeline feed and head to the Animations from the tool’s dashboard.
- Choose the Fade In animation in the Entrance section. Set the duration for this as well, as we discussed earlier.
Fade In Effect
- Click on the back button and play the video in its entirety. You will see the zoom through text effect in the video. The effect can be positioned anywhere in the video by shifting the PiP video to any part of the content.
- Export the video using the Save Video button. Select the best settings for your video, keeping in mind the resolution and the FPS.
Conclusion
Initial impressions of this tutorial may make it appear complex. But that’s far from the reality. First, you create a blank video with your text and then add it to your original video using the Chroma key. The zoom in animation on the video helps imitate a zoom through text effect. You can experiment to find out which animation works the best for you.
So why not give FilmForth a shot!

Karen is a professional writer with a background in column writing who enjoys resolving complex topics and explaining them in interesting ways.
Related Articles
FilmForth - Free Video Editor
- Easy to use and no skill required at all.
- Export video to MP3 with one click.
- Add transitions, effects, filter, text to the video as you want.
- Remove, replace, record and edit the background audio easily.
- Change the speed, volume, and subtitle on video with ease.
- Stabilize, trim, rotate, and convert video in seconds.