How to Record A Video on Google Chrome
Dig into this article if you want to find a way to capture video on Google Chrome. This article introduces how to use the computer’s built-in screen recording tool, third-party screen recording software, and screen recorder extensions to record videos.
Want to record video easily on your Chrome browser? Maybe you’re a streamer who needs to generate a video tutorial, a marketer who needs to record a screen for a presentation at work, or a video on Google Chrome to publish as a YouTuber. Windows and macOS give you built-in tools to capture video on the Chrome browser, but you can also use screen recorder plugins and third-party screen capture apps. The following content provides you with different ways to capture video on the Chrome browser, let’s dive into it together.
Xbox Game Bar for Windows
Step 1. Please enter “Xbox Game Bar” in the search box of “Enter what you want to search here” on the taskbar at the bottom of the computer screen and click to open or install Win+G on the keyboard at the same time to activate the program. For those who are using the Xbox Game Bar for the first time, a small box will pop up after activating the program, you just need to select “Yes, this is a game” in the checkbox.

Open the Xbox Game Bar
Step 2. When the Xbox Game Bar is activated, the floating panel will pop up automatically, and then you can click the corresponding button on the operation panel to perform related setting operations.

Xbox Game Bar Panel
Step 3. If you need sound, you can turn on the microphone when recording. There is an audio option in the operation box, you can click to select it. There are options for Mix, Voice, and more.
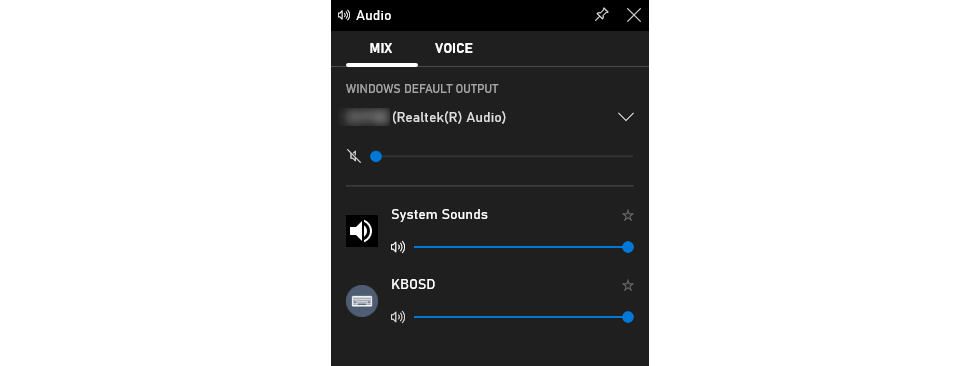
Xbox Game Bar Audio Setting
Step 4. There is a Capture button like a camera on the strip-shaped operation interface, click to open and then click the small dot above to start recording.

Start Capturing Screen
During the recording, there is a small box to show you the capture status, and there are two buttons on it to help you achieve different operations. One button lets you click to stop recording, and the other lets you turn the microphone on or off at any time.
Step 5. After the recording is over, the “game clip recorded” box will pop out automatically, you can click it to open your recording file. Or go back to the main interface and click “show all captures” to see the recorded video.

Game Clip Recorded
QuickTime Player for Mac
Step 1. On your MAC computer, find the QuickTime application from the menu bar. Then click the “File” option on the right of the “QuickTime Player” column in the upper left corner of the screen, and select the “New Screen Recording” menu item.
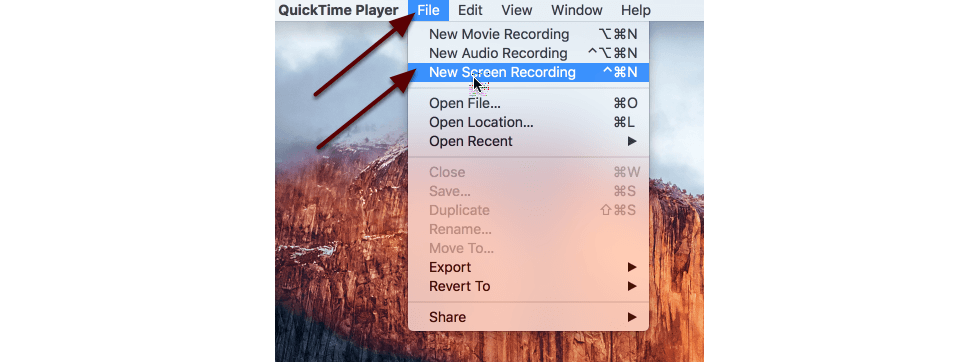
Open QuickTime Player
Step 2. Click the down arrow to the right of the record button and select the Microphone and Cursor option. You may want to confirm the microphone selection and test it by clicking on MAC System Preferences/Sound.

Choose Microphone Setting
Step 3. Once done, open the content you want to record on Google Chrome. Then the screen recording window interface that appears, click the Record button. Then, a text box pops up about screen recording: “Tap to record full screen. Drag to record part of the screen. Tap the stop button in the menu bar to end recording”. Click with the mouse in this text box, and the screen recording will officially start.

Click to Start
Step 4. If you want to end the recording, click the Stop button in the menu bar, then a video playback interface will pop up, and you can use the playback controls to preview your recording file. You can click the “Save” button after renaming the recorded file and customizing the save location, and the recorded video will be saved.
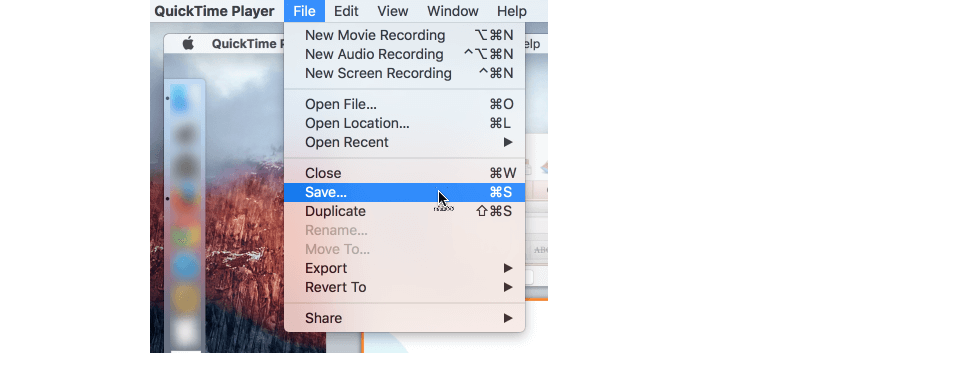
Save the Video
Third-Party Software
Step 1. For security reasons, it is not recommended that you download RecForth from third-party sources. You can click here to download the software directly from the official website or click the button below to download the software directly from the Microsoft Store.

After the download is complete, wait for it to install on your computer, then double-click the software icon to open it.

Open RecForth
Step 2. After opening Google Chrome, click the tool icon in the bottom taskbar to summon the RecForth floating panel. If you choose “Screen” mode, it will help you to capture everything on Google Chrome in full screen. If you choose “Area” mode, you can record a specific window or customize the recording area.

Screen and Area Modes
Step 3. If you want to record a picture with sound, check whether the microphone is turned on in advance by clicking the small icon at the bottom. But by default, the microphone is on, helping you capture computer system sound and add voice comments. If you want to create a picture-in-picture effect by recording video through Webcam, click the camera button in the bottom toolbar to open Webcam.

RecForth Tool Bar
Step 4. When everything is ready, please click the red Record button to start recording. You can pause or continue recording at any time during the recording process. After you stop recording, a window will automatically pop up to show you the recorded file.

Preview the Video
Google Chrome Extension
Step 1. Type Screen Recorder in the search box to go to its related website, then click Add extension to Chrome. After clicking to enter, you can see that the extension provides users with two recording modes (Only Screen and Only Camera), and temporarily does not support simultaneous recording of Screen+Camera.
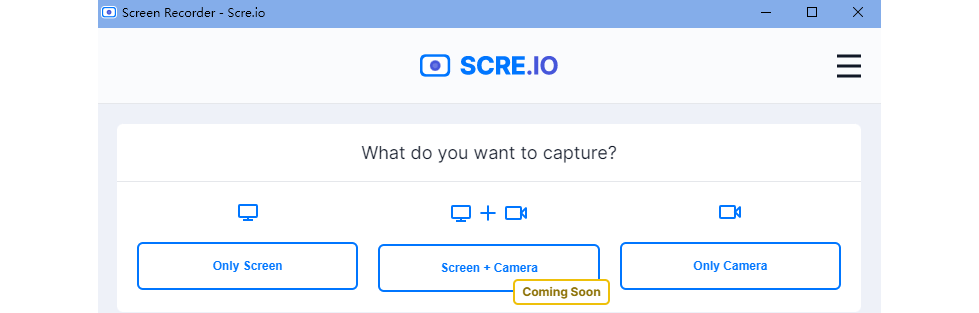
Recording Mode of Screen Recorder
Step 2. After selecting the recording mode, then Set the audio below. You can choose to record only the mic or the system, or both. You can choose to record the screen without sound.
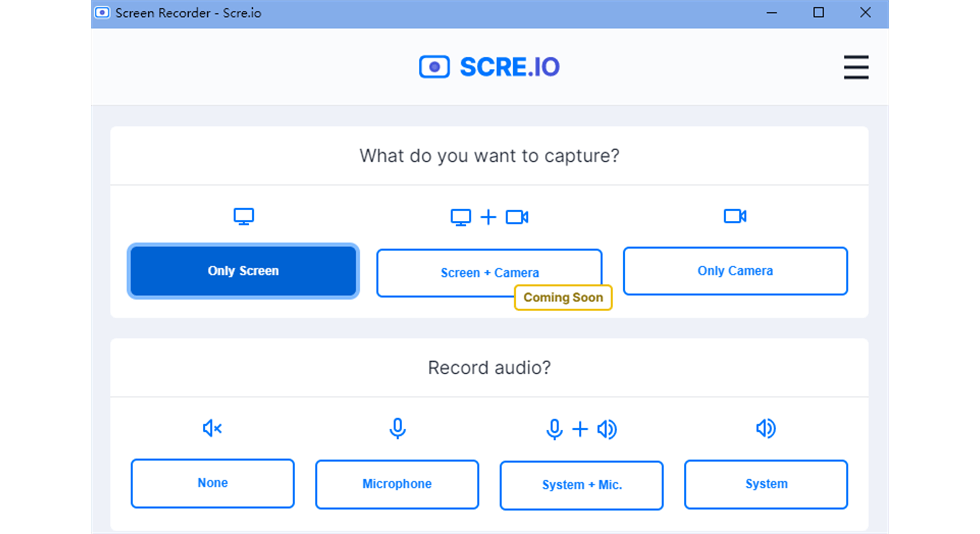
Record Audio
Step 3. After completing the settings, click Start Recording at the bottom to select the object you want to capture. This tool can help you easily capture the entire screen, specific program windows, and tabs.
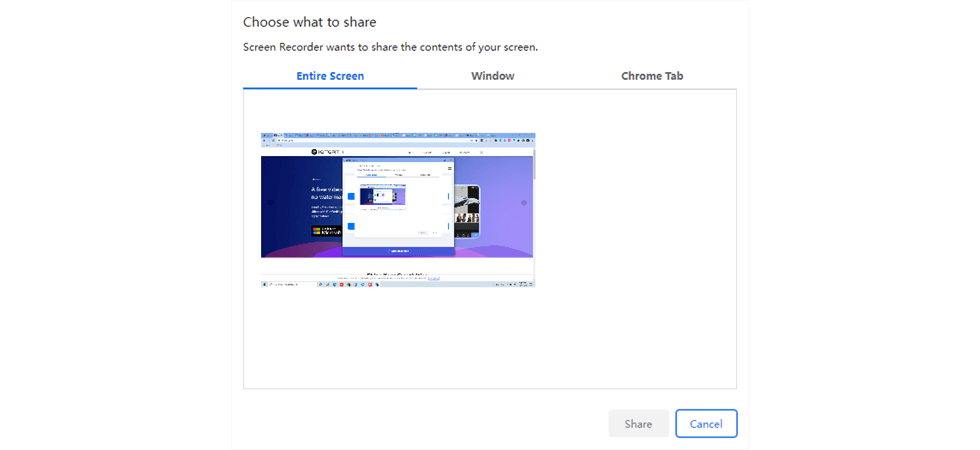
Choose the Share Screen
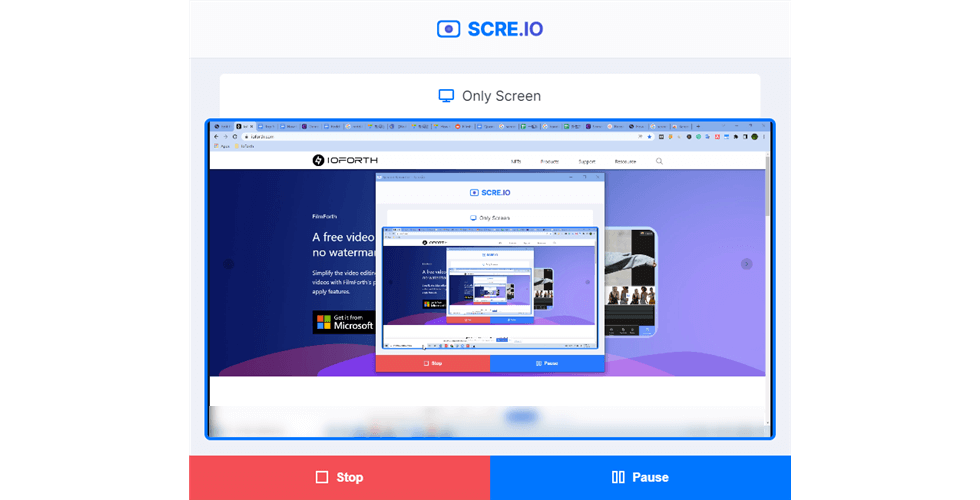
Step 4. During recording, the buttons at the bottom allow you to pause or resume recording at any time. After stopping record, you can click the Save button to save your recording.
Stop Capturing
Final Words
When approaching the conclusion of the article, it is not difficult for me to conclude that choosing a screen recorder suitable for recording the Chrome browser depends on the operating system of your computer. If you want the most efficient way to record video on the Chrome browser, RecForth is a smart choice. For some non-technical people, the friendly interface and simple steps included in RecForth will make it easy for you to use it. Hopefully, the information above is more than enough to help you get what you’re looking for.
More Related Articles
- How to Record A Video and Upload it To Youtube
- How to Record Zoom Meeting Without Permission
- Screen Recorder for Online Teaching-5 Steps
- Top 5 HD Screen Recorders

Karen is a professional writer with a background in column writing who enjoys resolving complex topics and explaining them in interesting ways.
