How to Record Zoom Meeting Without Permission
There are several drawbacks to using Zoom’s build-in screen recorder to film a meeting or lesson. This tutorial will show you how to record zoom without asking permission.
The recent global coronavirus pneumonia pandemic has seriously affected people’s life, work, and study. For safety, working from home and studying through online courses are on the rise. In this case, people started using Zoom meetings as an important way to work from home and study.
Zoom is an online video chat app with high-quality screen sharing. It is an important tool for smooth communication between colleagues or between teachers and students, reducing the distance between people during the pandemic. When using Zoom for a video conference or class, we need to record meetings to re-watch important content or review the course.
How to Record the Meeting in Zoom
Step 1. Start Recording in Zoom Meeting
In the Zoom meeting, click “Record”. By default, only the host has the right to record a meeting. The participants have no right to record a meeting. You can use the recording function only after the host grants the recording permission.

Start Recording Zoom Meeting
After you start recording, you can pause or stop recording. After the recording starts, a message “Recording” is displayed in the upper left corner of the meeting screen.
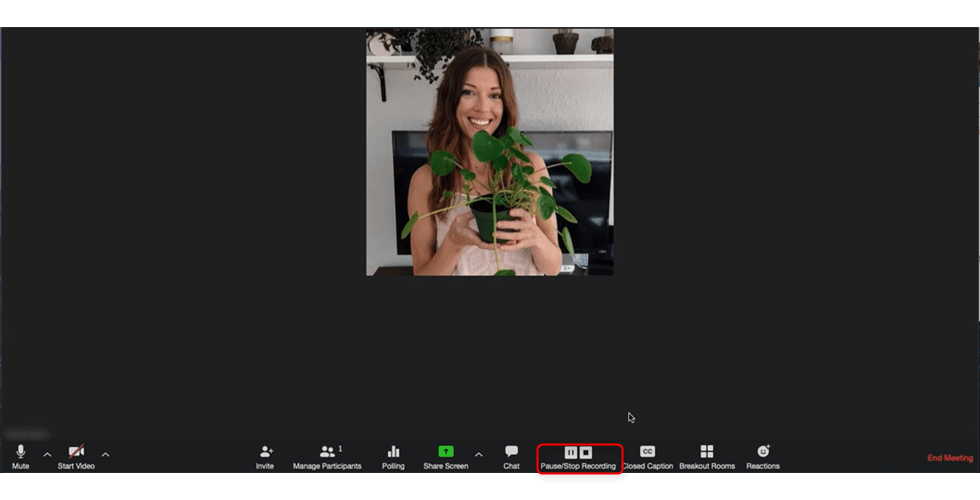
Pause and Resume
Step 3. Click to Convert Meeting Recording
After the recording is complete, manually click Stop Recording to end or exit the meeting. After a meeting ends or exits, a message is displayed asking you to Convert the meeting recording file.
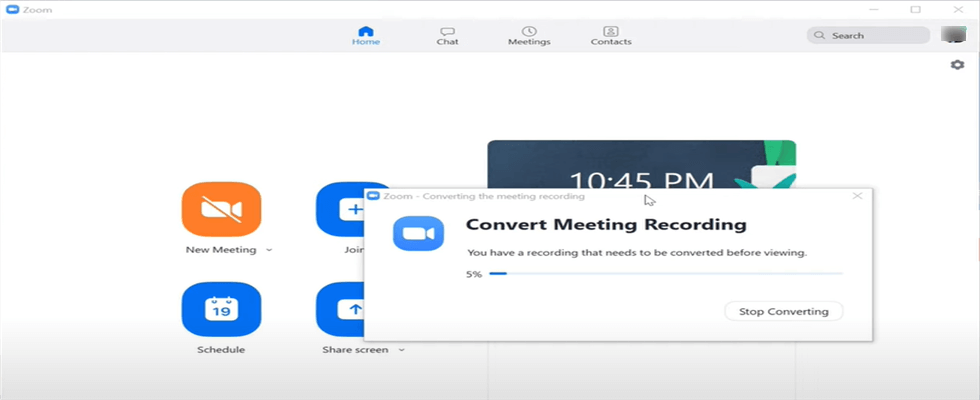
Convert Meeting Recording
Do not close the window until the conversion is complete to generate a correct recording file. Otherwise, the recording file may be damaged. In addition, the conversion time will be determined by the length of time the meeting was recorded.
Step 4. View the Recorded Meeting Video
After the conversion is complete, a final video file is generated. You can view it from Meeting to Meeting Recording on the client. The video saving path can be viewed or modified in Settings on the client.
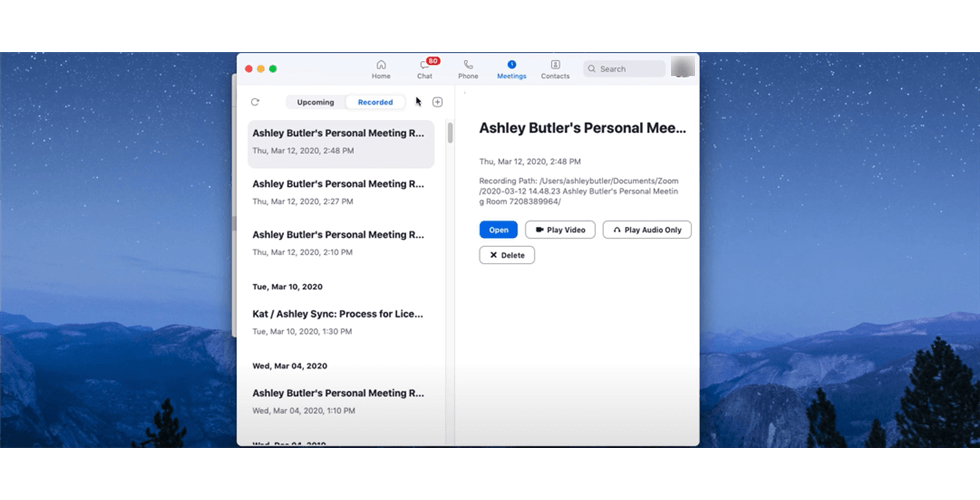
View the Recorded Meeting
The Best Alternative to Record Zoom Meeting
As we all know above, video recording on Zoom is authorized and requires the consent of the host. Therefore, if we want to achieve free recording, we need to use the help of third-party tools. RecForth is a free screen recorder that allows you to capture full or partial screens in HD. After recording, you can output a video clip without watermarking with one click.
Step 1. Get RecForth for Free
If you are new to RecForth, download the software from the Microsoft Store and install it on your computer.

Step 2. Select the Recording Mode
RecForth provides you with three recording modes. Screen Mode helps you capture your computer Screen in full-Screen Mode and supports webcam coverage. Rectangle mode allows you to customize the recording area, focusing on the object you want to capture. Window mode allows you to record a particular Window, and anything outside that Window will not be captured by the screen recorder, which is a great way to protect your privacy.
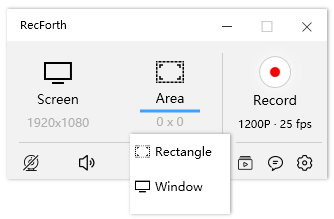
RecForth Recording Modes
Step 3. Configure the Parameter
After selecting the recording mode, you need to customize the parameters. If you want to record a Zoom meeting or a class with sound, click on the microphone. RecForth has a toolbar at the bottom of the main screen that allows you to do advanced Settings, you can open Webcam, Microphone, Speaker, Pointer with one click.
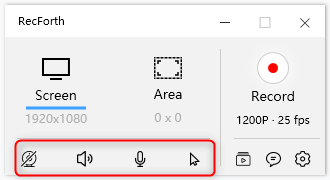
RecForth Setting Buttons
If you want to record a video with customized resolution and frame rate, you can set it in advance. Click the value below Record to reset the video resolution and video frame rate.
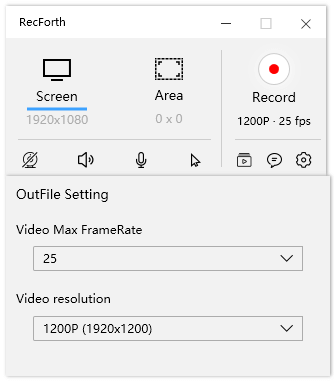
FrameRate and Resolution Settings
Step 4. Exported the Captured Videos
Once set up, you can click on the red Record key to start capturing Zoom meetings or lessons on your computer. If you want to pause or continue recording, please click the corresponding button in the action box.
Check the Recorder Videos
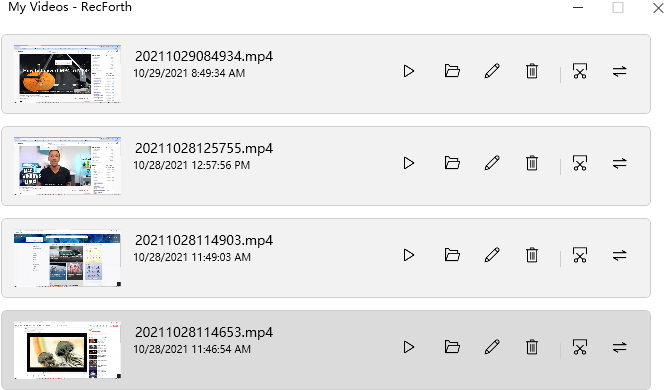
You can also click RecForth’s Stop button to Stop recording when the session or class is over. After recording, RecForth automatically exports the recorded Video, and the ‘My Video’ window pops up for you to preview the recorded video clip.
What Features Make RecForth Stand out
Webcam Overlay
When recording a Zoom meeting or class, you may need to add the camera’s content to the video at the same time and display it as a picture in a picture. RecForth has camera overlay recording support, which helps you capture high-quality video with your computer’s built-in camera and microphone. You can capture your movements and put them in the corner of recorded meetings and lectures.
Scheduled Recording
If you want to preset a recording task in advance, RecForth supports automatic stop recording. To record, you simply fill in the value box with a valid number from 1 to 60 and click Start recording. RecForth will stop recording at the specified time and automatically save the recorded video. RecForth doesn’t limit how long you can record, so you can record Zoom meetings and classes without having to worry about stopping.
Adding Audio Narration
Whether you want to record audio information on your computer rather than just motion pictures on your screen. When you’re recording a Zoom meeting or class, for example, you want to record full sound and images and not mime. In many cases, you will need to use a microphone to add narration or instructions. RecForth can help you capture system audio and voiceovers while recording Zoom meetings or lessons.
Taking Screenshots
Taking screenshots is an important feature of a screen recorder, but not all screen recording software can do this trick. RecForth’s Rectangle mode not only supports custom recording areas but also allows you to take screenshots of important content while recording a Zoom meeting or class. When you run into something important and don’t have time to record it, you can use this feature to take screenshots and save important content.
How to Record Zoom Meeting FAQs
Listed below are some frequently asked questions about how to record a Zoom meeting.
How to Record Zoom Without Permission
If you are not the moderator of a Zoom meeting, you will need the moderator’s permission to record on-screen. If you want to record a screen without permission, you’ll need third-party software to help. Download RecForth and install it on your computer > select the recording mode you want > Preset sound parameters > Click the Record button to start recording > Stop recording and export the file
How to Record Zoom Meetings as Participants
As a participant, you can record on-screen with the host’s permission. There is a record button in the toolbar at the bottom of the program. Click to start recording and other participants will be notified while you record. If you want to stop recording, click the Stop button and wait for it to be converted into a video file.
How to Record Zoom Meeting on Mac
The Mac has a built-in screen recording program for its users called QuickTime Player, which you can use to record Zoom meetings as follows: Open QuickTime Player in the application center>In the menu bar [file] find “New Screen Recording”> “Record screen” window opens>Click the red record button to start recording
Conclusion
The development of the Internet allows us to work and learn more than just on the site, especially in the current situation of the pandemic. A computer and an Internet cable allow us to work and study from home, and Zoom meetings play an important role in that. So you need to know how to use a screen recorder, and the method above shows you how to record a Zoom meeting, so you can choose the best method for your needs.
More Related Articles

Karen is a professional writer with a background in column writing who enjoys resolving complex topics and explaining them in interesting ways.
Related Articles
RecForth - Free full-featured screen recorder for all
- Free and easy-to-use
- One-click to exported videos without watermark
- Customized the size and color of the pointer to highlight important content
- Allowing webcam overlay to capture the action
- Record system sound and voiceover
- Free set up automatic stop recording