Cool Effects to Make Videos Standing out
This article introduces some cool effects and describes detailed steps to edit videos with these cool effects.
Add all the cool video transitions and effects that will help your video stand out amongst the crowd.Use effects such as serene time-lapse, filters, magnificent transitions, picture in picture, amongst several other things, to embellish your video.
Plain video editing is boring and monotonous. The trim, cut, join doesn’t cut it anymore. You need to make the videos amazing with effects, transitions, and overlays, amongst other things, to stand a chance. Everybody is producing content left and right, but you stand a chance to stay ahead of the curve. Add an aesthetic flair of different elements that many video editors offer. Time-lapse, for example, is a great way to provide a unique perspective. Imagine star gazed skylines or the work being fast-forwarding the boring parts to avoid losing the viewers’ attention.
How to Add Cool Effects to Video Free – FilmForth
Meet – FilmForth
Looking for a friendly video editing companion that gets editing done with ease without ruffling your feathers, then meet FilmForth. A free video editor that has impressed many with its versatile abilities takes editing a step further. Visualize the legendary Windows Movie maker, plus several modern features. That’s what you get from this video editing software.
Prerequisites for Adding Cool Effects
- Install FilmForth from the Microsoft store. Downloading the software from any third-party source can be a risky affair for your PC.

- Keep your videos ready that need the cool effects for dazzling them.
- Relax because you found the ideal video editor. The editing part is easier than your imagination.
What are Transitions in Video?
A post-production technique, transitions are used to connect one scene, video with another. Join two shots together in a seamless manner without appearing abrupt. They are also used for the fade-ins and outs of video. Let us try cool video transitions.
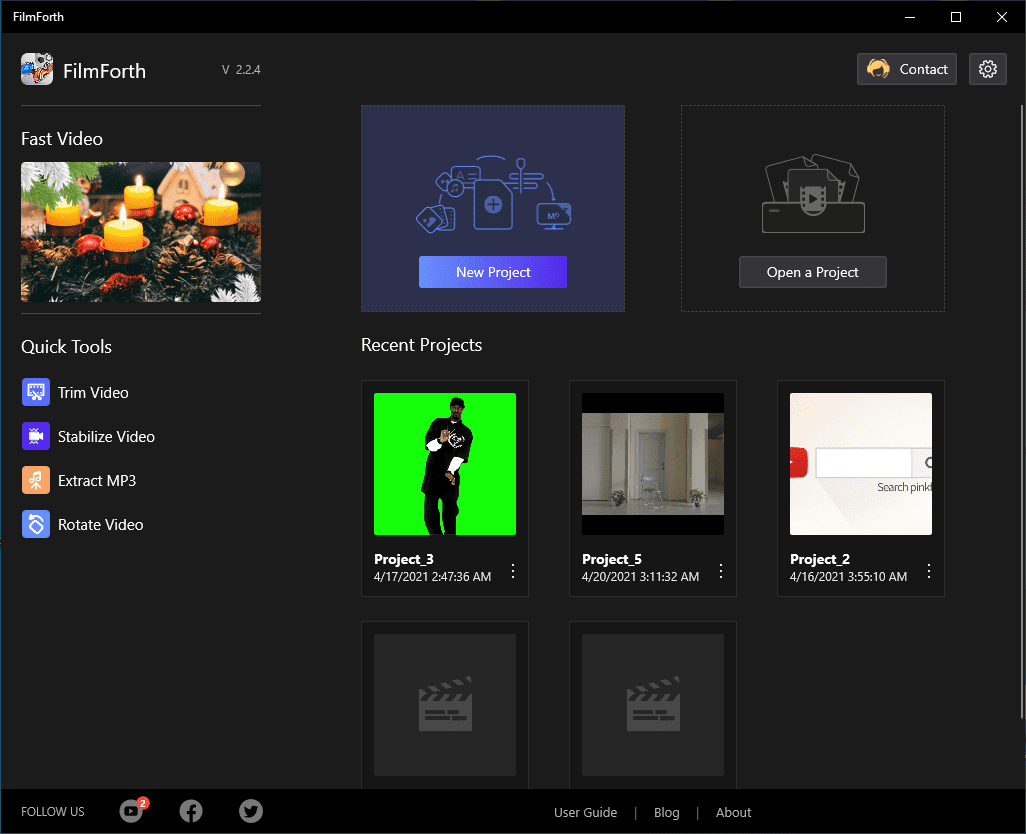
Step 1. Launch FilmForth, and start a new video project by clicking on the new project button.
Choose the Coolest Effects in 2021 to Make Videos Stunning
Step 2. Add a video using the Add Videos/Photo Clips button. You can also take advantage of the drag and drop feature to import the videos.
Step 3. Click anywhere on the timeline feed, and you will see transition buttons appear on the video bar.
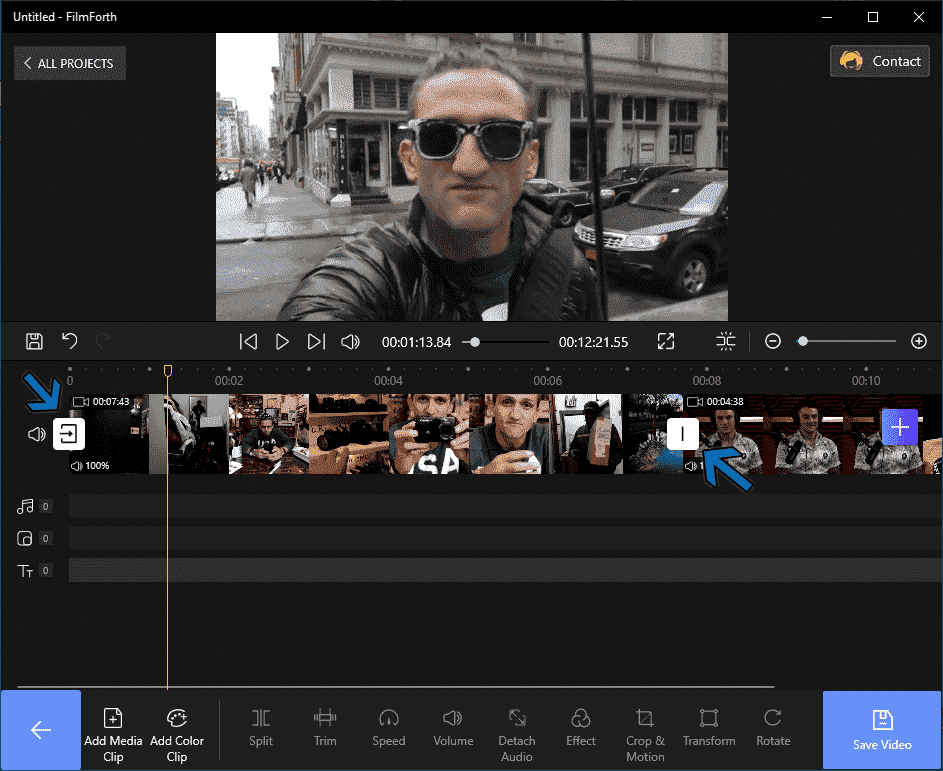
Add Transition to Video
As you can see, we have two video clips in the feed joined together. The start and end of the entire video have different transition buttons compared to the ones between the two clips.
Step 3. We go with the transition button between the two video clips.
Step 4. In the transition menu, select the transition effect of your choice. Go ahead, and give Fade to Black a chance, as it provides an excellent way to join two scenes or videos.
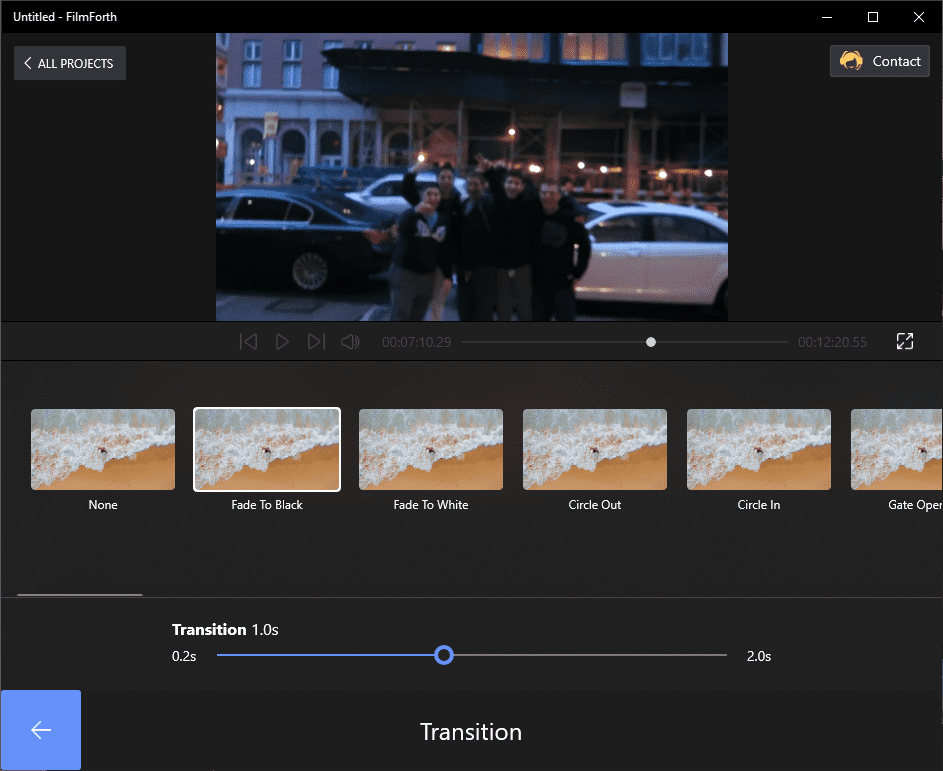
Choose Your Transition Fade to Black
- Good to Know – FilmForth offers over 35 transition effects to apply to the video.
Step 5. When we look a little down, there is the Transition time. It is for setting for how fast or slow the transition will happen. You can set it between 0.17 to 2 seconds using the slider button.
Click on the back button, and the transition effects will be applied.
What are Filters?
Filters are the different palettes of colors in a frame of videos. Default colors of the videos can sometimes fall short of what you want to convey through the content.
Cameras are capable of capturing a myopic view. It’s up to the post-production editing to make something out of the ordinary. Make use of the filters for setting the undertone of the video.
Filters are called Effects in FilmForth, which can be accessed from the dashboard.
Step 1. Since we have two videos in the editor, select a particular video from the timeline feed.

Add Effects to Video
Step 2. Head to the Effects menu from the tools dashboard.
Step 3. Try different filters for your video and compare it with the default colors of the video using the compare button.
- Good to Know – You have over 25 filters to apply to your video. Take your time and try different ones.
Add Pic in Pic
What is Picture in Picture
Picture in Picture, also known as PIP, is a very popular effect that is found everywhere. The feature allows for two videos to appear together on the screen. One of them generally occupies a smaller part of the viewing area.
You see it on TV, news, sports programs, reality game shows, and many more. On the Internet, it has become popular amongst reaction videos.
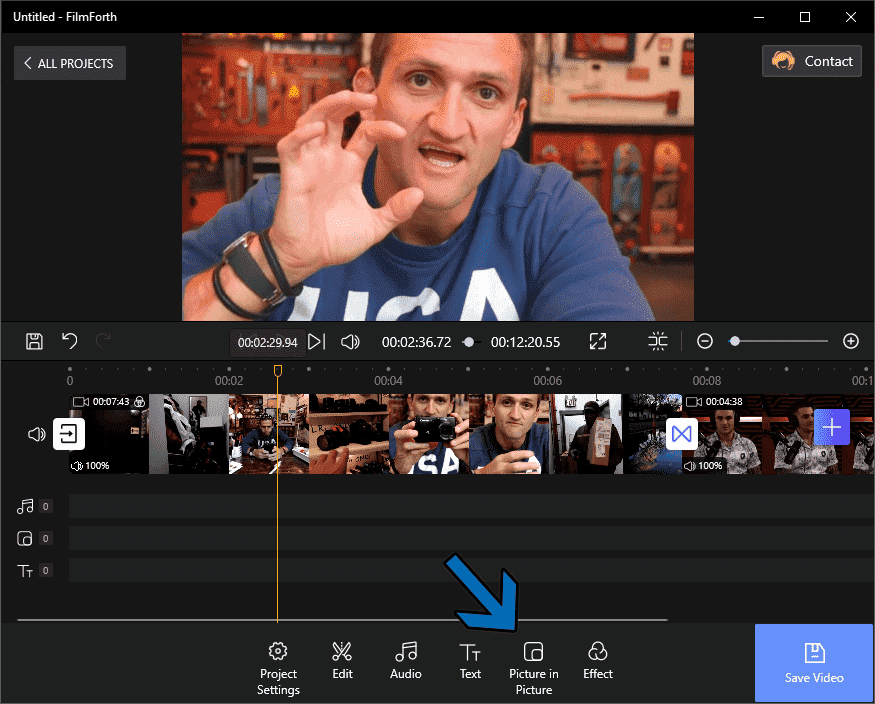
Step 1. Head to the project home screen and click on the Picture in Picture option.
Step 2. Click on the Add Pic in Pic option from the tools dashboard. You will be asked to upload an overlay video by browsing through the computer.

Add Pic in Pic to Video
Step 3. You have successfully added a video over another video.
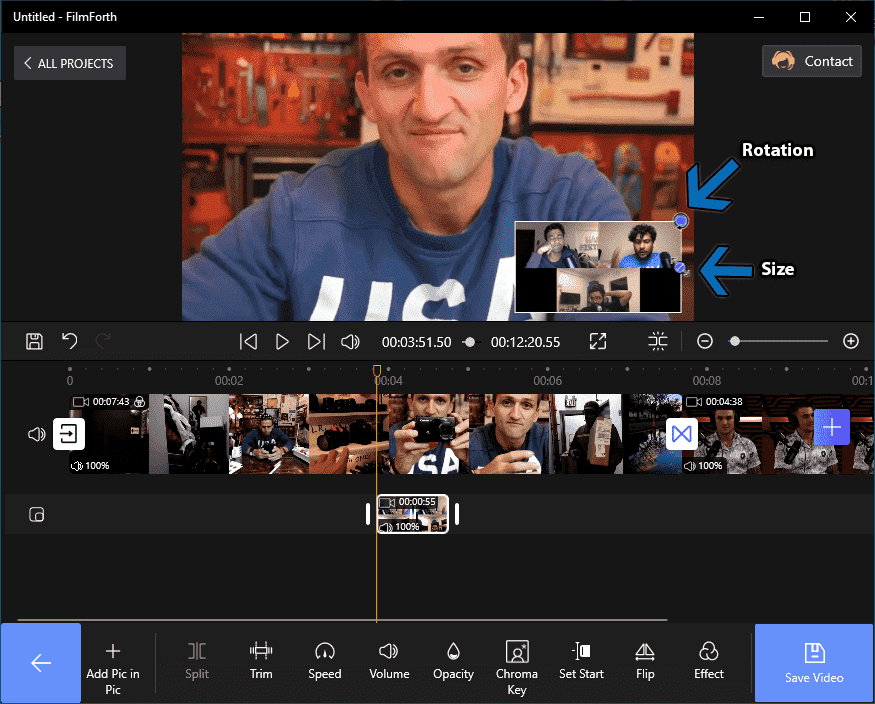
Check Size and Rotation
You Must Know:
- Before we forget, the video can be resized using the button located on the right wall of the video clip.
- Similarly, the button on the edge of the clip is for rotating the video.
- The opacity of the overlay video can be set using the option from the tools dashboard.
- Make sure the duration of the clip is ample for the base video. Calibrate it to match the content requirements.
What are Time-Lapses
Time lapses are fast-paced frames in a video. They go through more frames in a second than they do typically. Generally done using the camera, it can also be made using the speed tool of FilmForth.
They are found in construction work videos, star gazing skylines, and other mundane stuff that can be fast-forwarded. Time lapses are a terrific way to move forward while providing a peek into what goes behind in the buildup of the next scene.
Step 1. Select the video from the feed, and head to the speed menu. It is located in the tools dashboard
Step 2. Now we are in the speed menu. You have the option to speed up the video up to 4x speed.
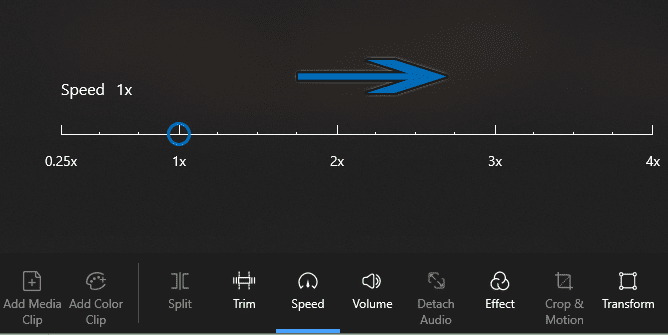
Time Lapse
Step 3. Slide the button to the right, incrementing 1x at a time—experiment with what feels natural for a time-lapse video for you.
You Must Know:
- The speed of the video will increase as well in the time-lapse. Therefore, you can replace it with the background music of your choice.
- You can keep the audio intact of non-time-lapse parts by splitting the video.
- Separate the time-lapse part of the video from the rest by splitting it from the rest of the video.
- This way, the audio of other parts remains normal without the effects of the speed
Conclusion
A video is as good as the editor and the software they are using. FilmForth, when combined with a good pair of hands, can open avenues of wonders. Cool effects such as Filters, Time-lapse, PIP, Slideshow, amongst others, help bridge the gap to creativity and individuality.
Don’t wait for anything, and start applying cool video effects to your content. Let the Internet know that you have arrived and are here to stay for the long haul.

Karen is a professional writer with a background in column writing who enjoys resolving complex topics and explaining them in interesting ways.
Related Articles
FilmForth - Free Video Editor
- Easy to use and no skill required at all.
- Export video to MP3 with one click.
- Add transitions, effects, filter, text to the video as you want.
- Remove, replace, record and edit the background audio easily.
- Change the speed, volume, and subtitle on video with ease.
- Stabilize, trim, rotate, and convert video in seconds.