How to Change Video Background via Video Background Removers
This post reveals the best video background removers and some detailed steps to remove/change the video background.
Videos can have unflattering backgrounds, with most of them shot in different locations, sets, scenes, amongst other things. Not everything is in our control while shooting videos, so they may not go with the intended theme of what the director has in mind. The good news is that you remove background from a video in the post-editing with some of the best video background removers.
In the next part, there are some video backgrounds removers recommended. Their features, pros, and cons are introduced. All of them can remove video background with ease. Besides the video background removal and changing, they can edit videos with stunning tricks as well. Let’s take a look.
#1. FilmForth – Free Video Background Remover
You don’t have to be very skillful as FilmForth has already simplified its working stream on video background changing. Just a few clicks can remove and change the video background using FilmForth. Also, as an easy-to-use video editor without a watermark, FilmForth helps thousands of video creators release their creativity. With its stunning features, it inspired the users to find more possibilities while editing the video.
- Chroma Key Effect – A post-production technique that helps to remove or “key out” the background from the video objects instantly.
- Camera Movement Available – FilmForth enables users to control camera movement with Start and End frames.
- Dynamic Transition Effects – Multiple dynamic effects are supported while jumpy or monotonous clip movements are avoided.
Pros
- Easily remove the background
- Totally free to use
- No watermark at all
- Suitable for beginners or professional users
Cons
- No option to add an external subtitle file
How to Change Video Background on Windows via FilmForth
Step 1. Download FilmForth on the computer. Once you completed the installation, you can launch it right away.

Step 2. Click on the New Project on the front page. Then you will see the ADD VIDEO/PHOTOS CLIPS button, tap on it to import your footage. Or you can do this by dragging and dropping video files from the storage folder
Add Video/Photo Clips
Step 2. Click on the Picture in Picture icon at the bottom bar and add a video file into FilmForth.
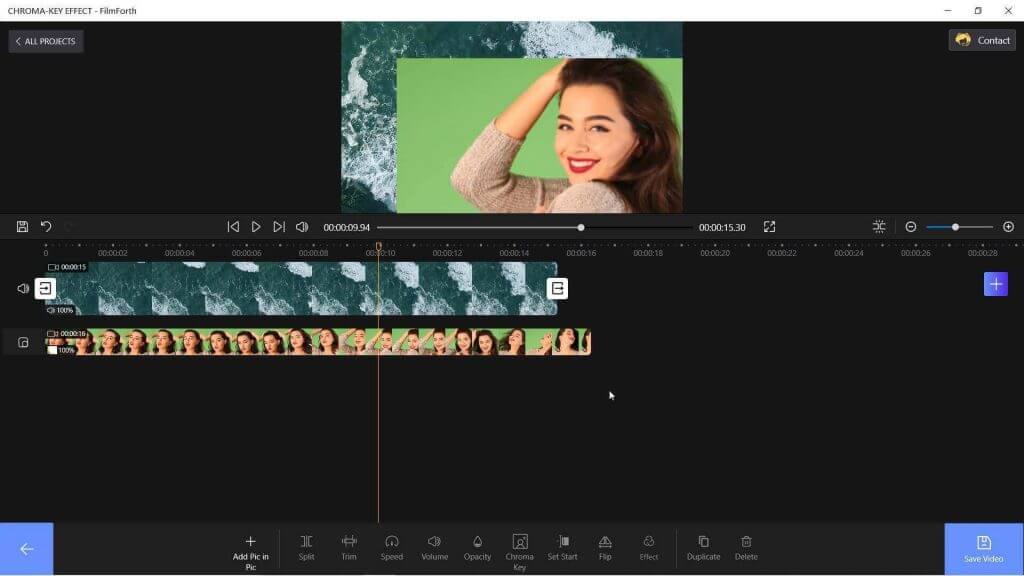
Tap on Add Pic in Pic to Add Video
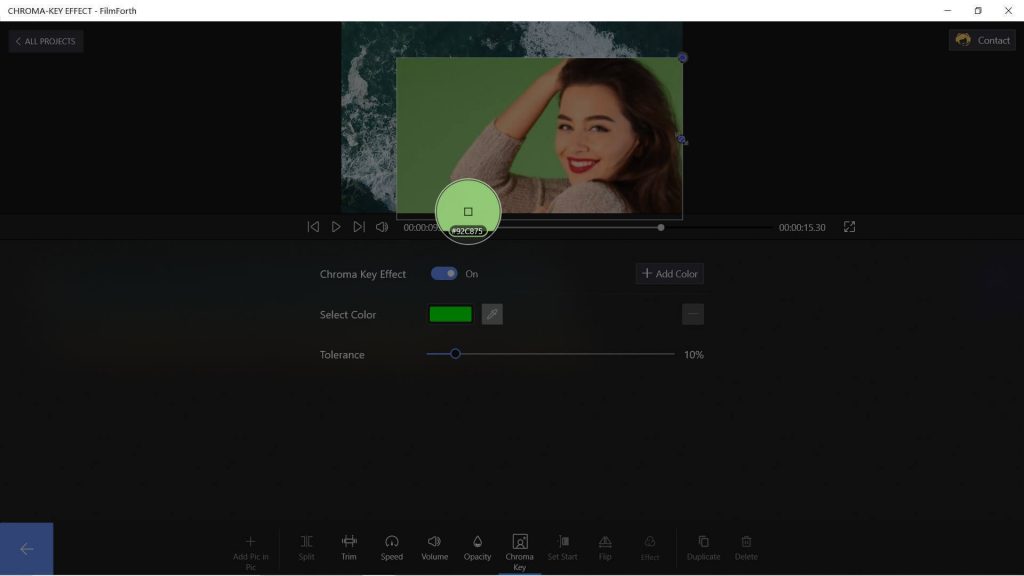
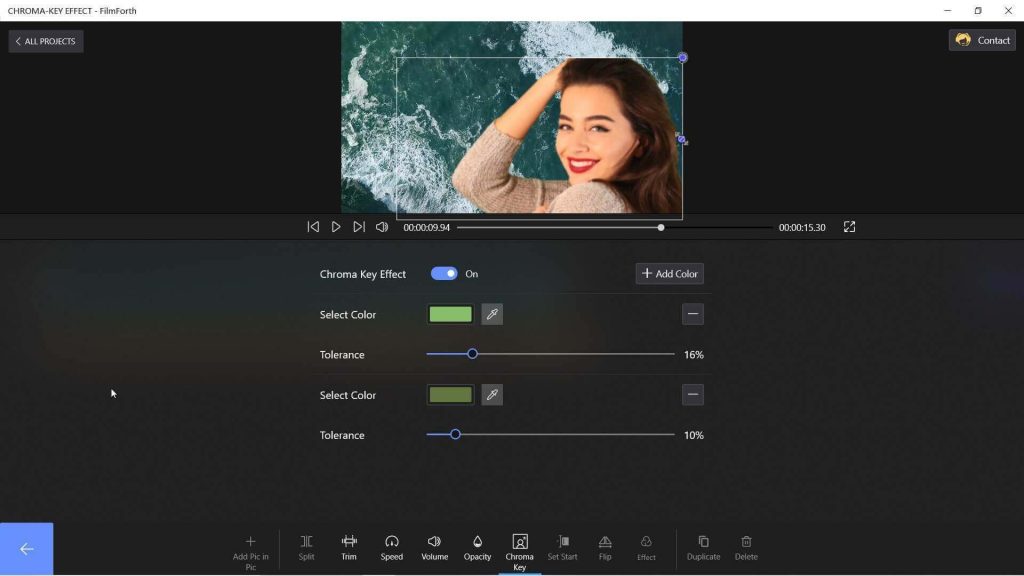
Step 3. Click the PIP track and hit the “Chroma Key” button. Turn on the switch to apply it. After that, tap on select color and choose the background’s color. Drag the blue sliders to adjust the tolerance level.
Enable Chrome Key and Remove Video Background
Tap on Add Color if other colors are in the background.
Video Background Removal Successfully
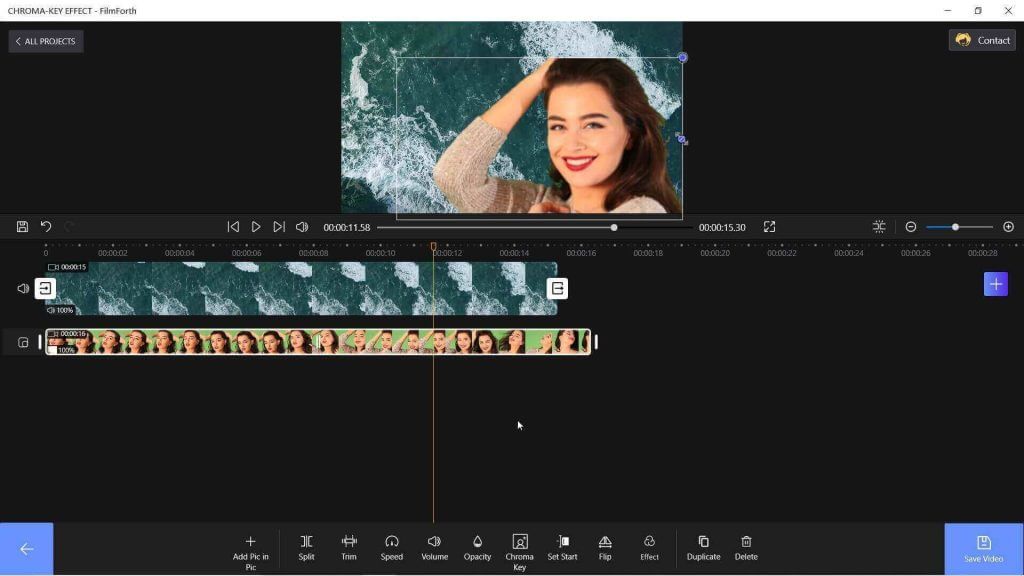
Step 4. Check out the results and click the blue Save Video button. Then set the output setting to ensure the file will not be lost.
Save the Background Changed Video
Also, you can learn how to change the video background with this video tutorial.
#2. VSDC Video Editor – Video Background Remover
VSDC is an editor with many feathers on its hat. Besides basic background removal, you can take advantage of features such as video filters, 360 video editing, color correction, and much more.
- Chroma Key tool – A power visual effect tool helps remove background from a video based on color composting of two images.
- 360-degree Video Editing – Conveniently preview and edit panoramic, VR, and 360 videos.
- Elegant Masking Tool – The masking tool on VSDC offers convenient shapes, premade templates for easier editing.
Pros
- No watermarks
- Automatic video background removal
- Export in presets of different settings
Cons
- Overwhelming for beginners
- Inaccurate background removal in lower quality videos
Remove Video Background via VSDC on Windows
Step 1. Create a new project. You can go to the Projects and tap on New Project to start a new work. Add the video by drag and drop. You can also press Shift+V or manually browse your computer for the video.
How to Change or Remove Video Background
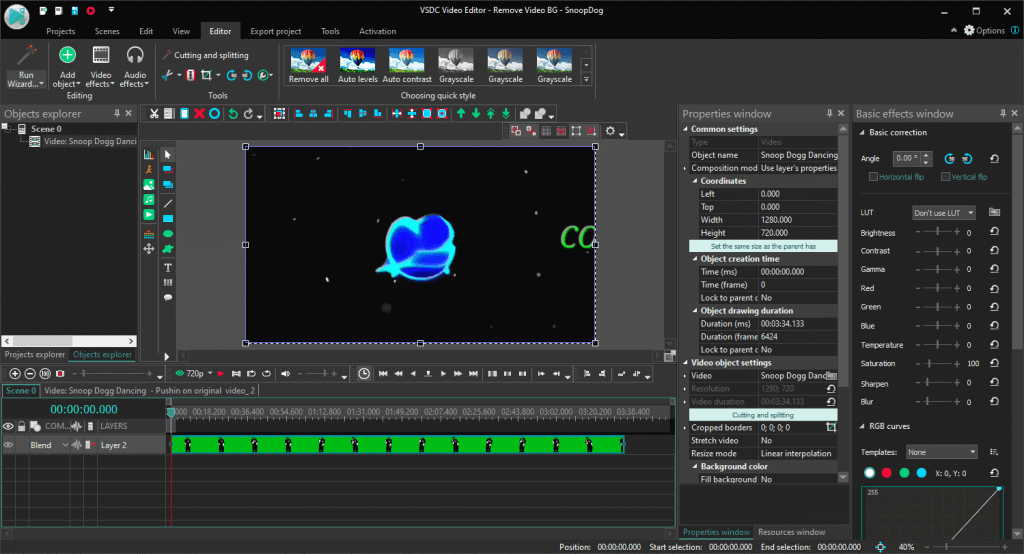
Step 3. Now that the video has been loaded, head to the top menu for Video Effects. Find Video Effects > Transparency > Background Remover.
Click OK on the prompt(object settings) that appears on the screen. Now, you will notice a new layer in the timeline. Just click on it, and the properties will appear on the right-hand side. You will notice the Chromakey Color in Background Remover Settings in the properties window.
Click on the eyedropper tool, denoted by A, and then single-click anywhere on the green background, as suggested by B, in the screenshot. Now you have successfully removed the background.
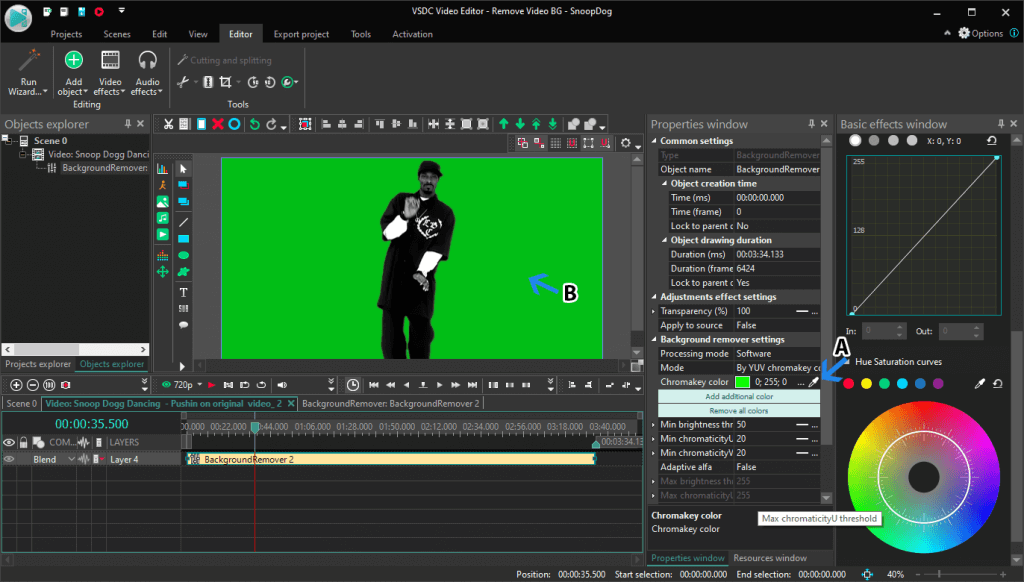
Removed the Background
#3. Lightworks – Change Video Background on Mac
If you are running a Mac, you can choose Lightworks which works out wonderfully on the Apple ecosystem. As a straightforward video editor, Lightworks relies on the Chroma key to remove the videos’ backgrounds.
- Straightforward UI – The user interface is easy to comprehend without the complicated features.
- Collaboration Editing – Work in collaborations with your team. Share bins, edits, media, etc., in real-time.
- Multicam Support – Edit videos of multiple cameras in one timeline. Edit them swiftly and provide an extravagant final cut.
Pros
- Green-screen friendly
- Multiple Chroma-Keys Available
- Batch-editing available
Cons
- Lack of tutorials to understand features
- Only MP4 video export in the free version
How to Remove Video Background via Lightworks
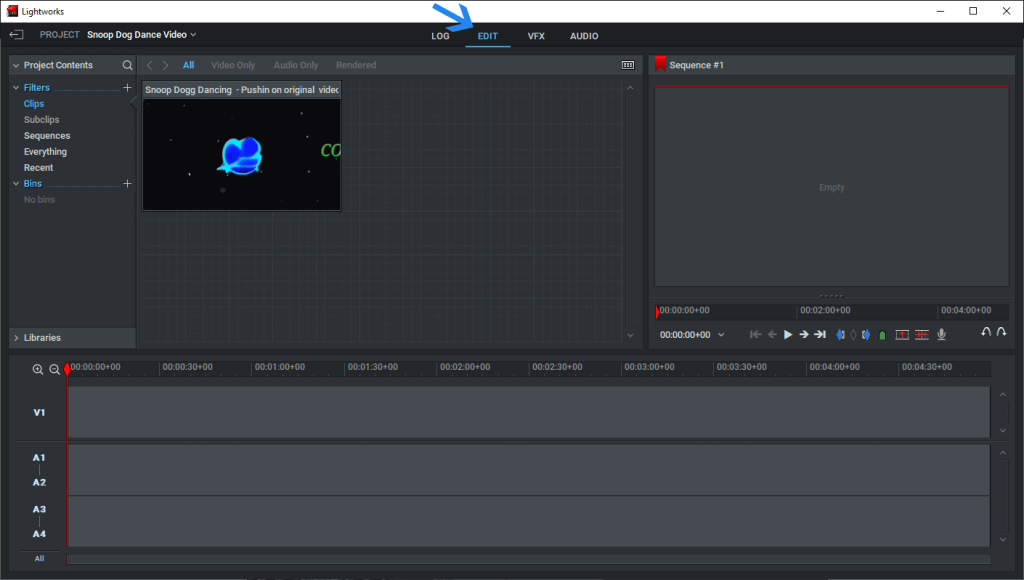
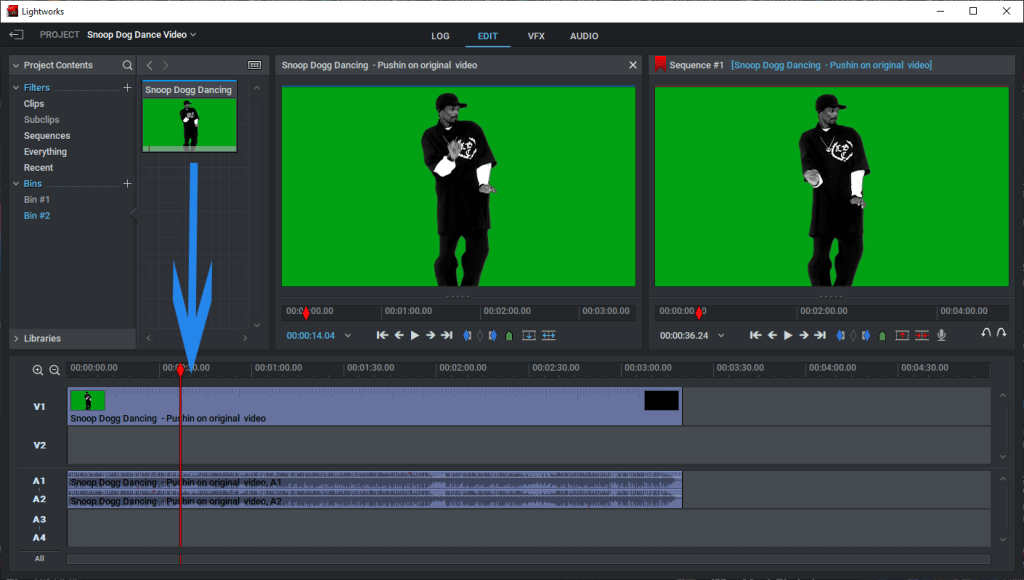
Step 1. Create a new project, and add the video through drag and drop. You can also refer to Local Files from the Libraries section for loading your video. Head to the Edit section of the editor.
Change Video Background on Mac
Step 2. Drag and drop the video into the timeline, as shown in the screenshot.
Change Video Background via Lightworks
Step 3. Now, head to the VFX section and right-click on the video in the timeline. Then find the Effects > Add > Key > ChromaKey. We have numbered the sequence in the screenshot.
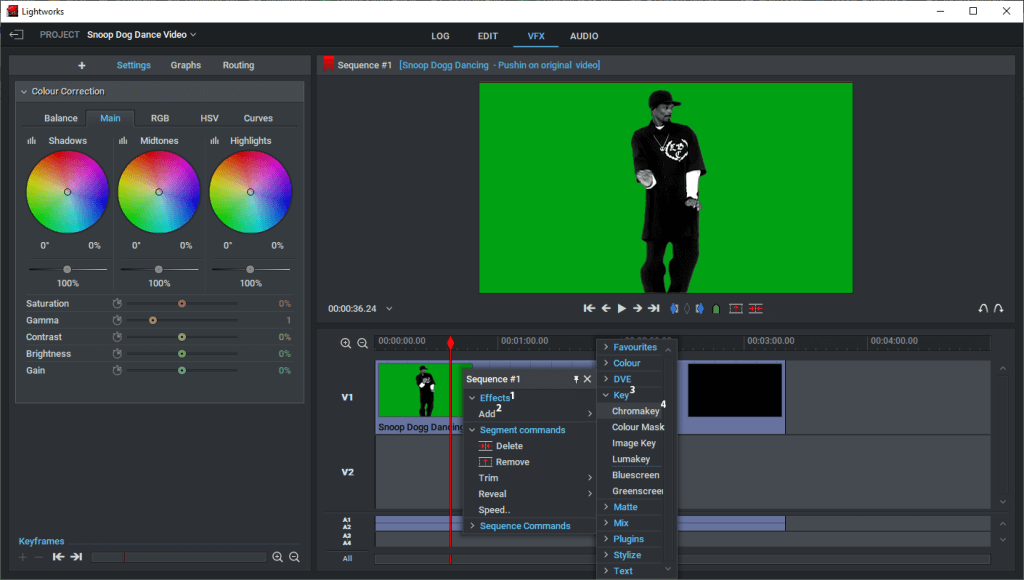
Use ChromaKey on Mac
Step 4. Click on the color picker, as denoted by A, and then select the green background, as represented by B. Your background will be removed instantly. Export the video by heading to the Log section—Right-click in Sequence #1. In the right-click menu, go to Access Export > Media Files > Format of your choice.
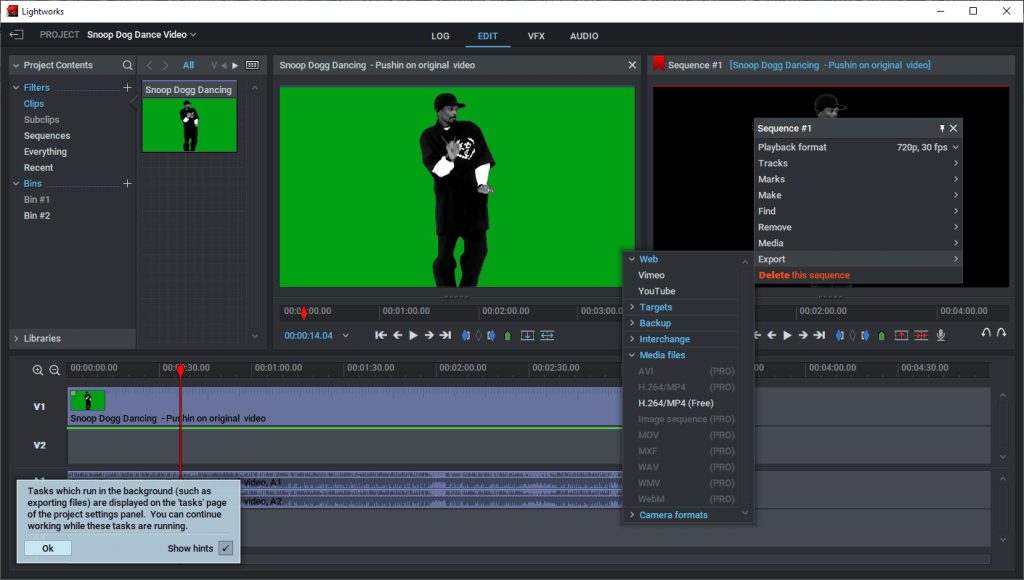
Export Video on Mac
#4. Change Video Background on Android and iOS Devices
KineMaster is available for both Android and iOS, offering the same features across the board. Moving towards the Apple ecosystem, we have Lightworks, a straightforward video editor that relies on the Chroma key to remove the videos’ backgrounds.
- Automatic Chroma Key – Amongst the few on Android that offers automatic Chroma Key feature.
- Background Templates – KineMaster offers premade templates for adding a background to videos.
- Record Video – You can record a video through the camera of the phone, and edit the video in the editor right away.
Pros
- Accurate background removal
- Supports up to 4K videos
- EQ presets for high-quality audio
Cons
- The watermark in the free version
- Multiple ads in the app
How to Remove Video Background on Android Phone
Step 1. Install and launch the app on your Android phone. Select the video option, which is appearing in the middle.
How to Remove Video Background on Android Phone
Step 2. Select the aspect ratio of the project. We will choose 16:9 as it’s a standard video. Tap on Media and head to the Images folder.
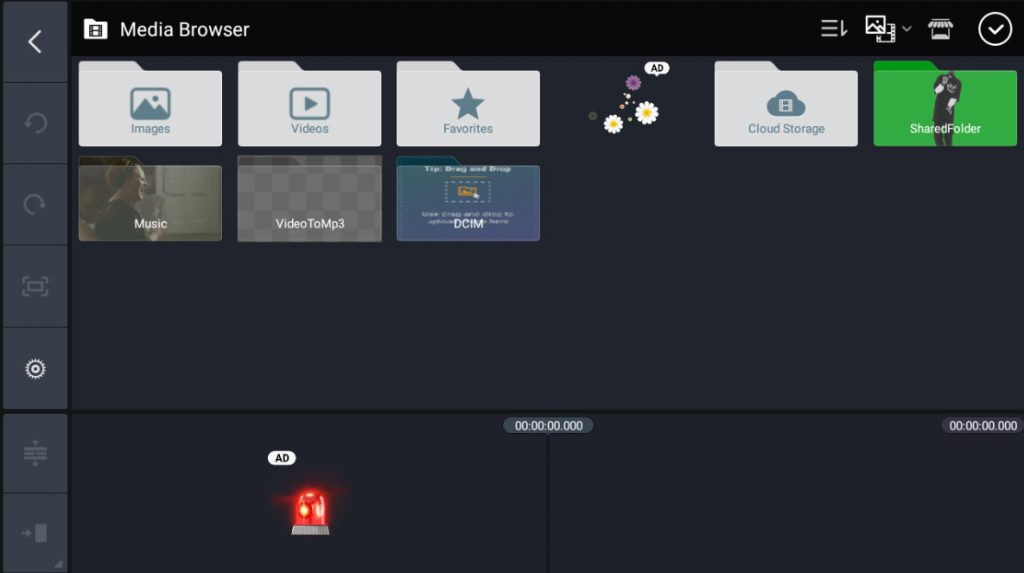
Tap on Media and View Media Browser
Step 3. Select the background color image of your choice. You can also go to other folders if you have a video added as the background. Now, come back to the home screen of the project and go to Layers > Media
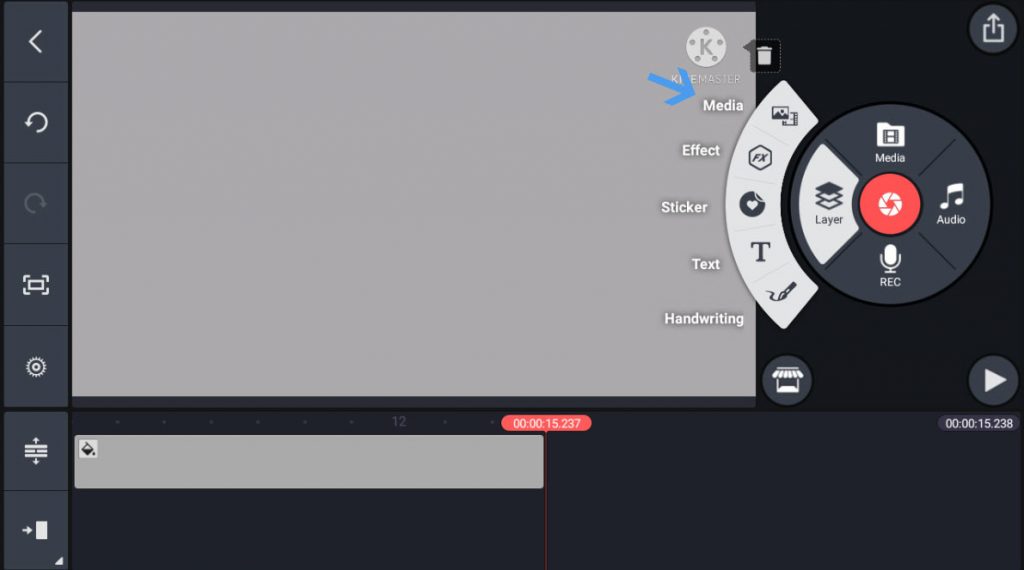
Check Media in Project
The video will be loaded in the timeline. Match the length of both the media by selecting and stretching them. Select the video from the timeline and tap on the Chroma key. Enable the key.
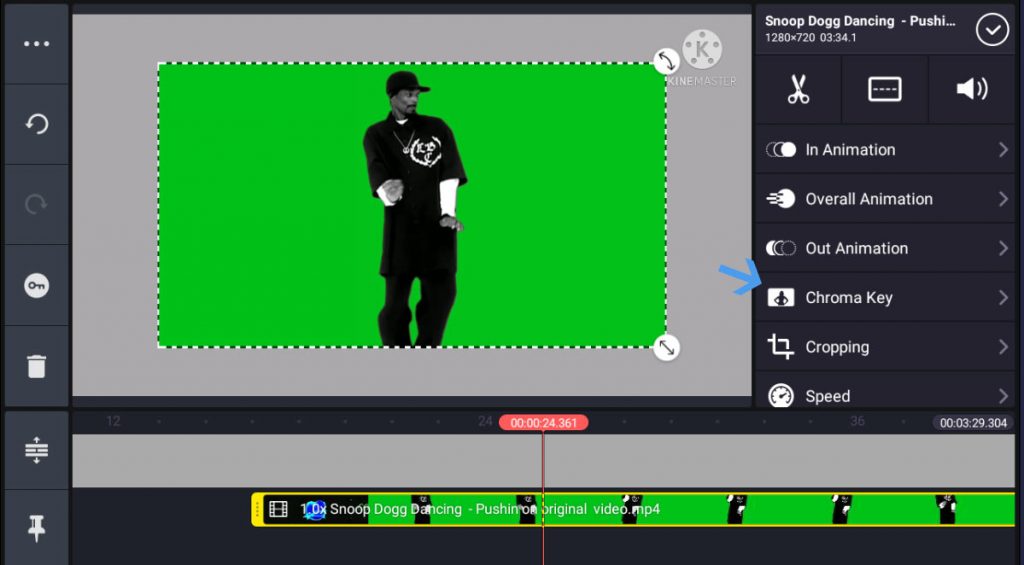
Enable the Key and Change Background
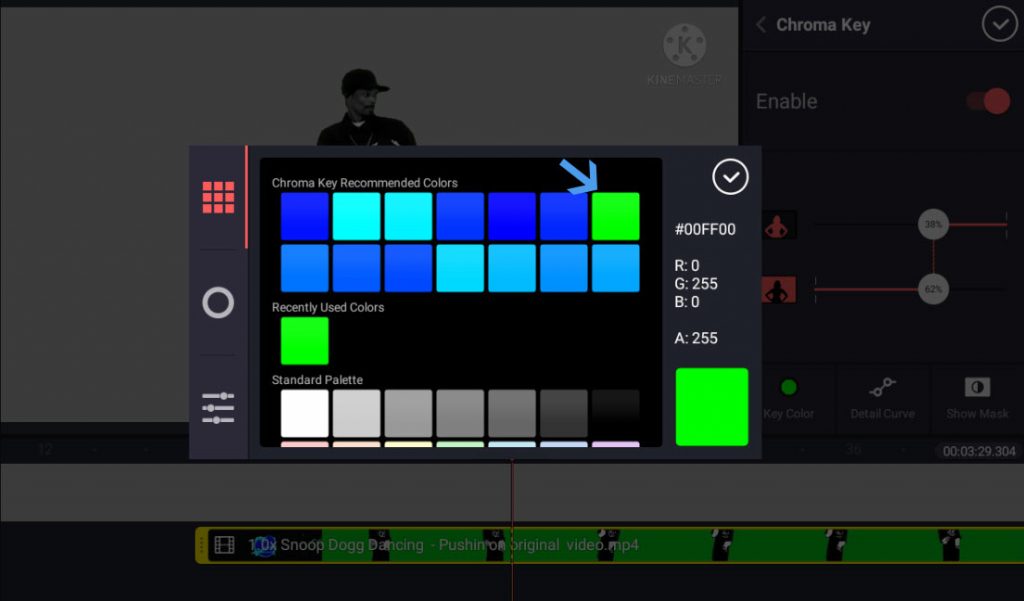
Step 4. After that, tap on the key color and select the background’s color. The background will be removed.
Remove Video Background
Step 5. Head to home-screen and tap on the Save button. You will be prompted with export options. Choose the appropriate resolution and FPS. Tap on export to save the video.
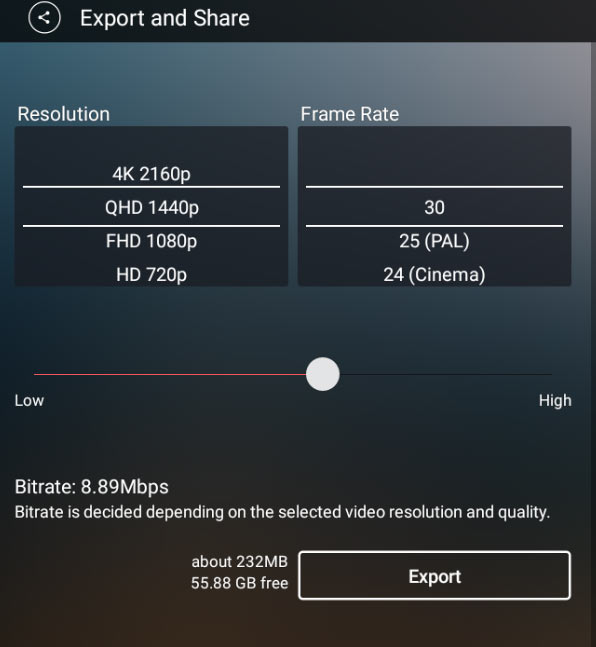
Export Your Video
The Bottom Line
Manual removal of background from a video is a painstaking task. Therefore the Chroma key feature in all the editors is an essential feature that helps save time and effort. You can try online tools such as Veeb.io but they have their inefficacies while some premium ones do offer value but charge a fortune.
For a quick and easy way to make video background removed and changed, FilmForth would be the best choice for most video creators. Why not give it a try now?

Karen is a professional writer with a background in column writing who enjoys resolving complex topics and explaining them in interesting ways.
Related Articles

FilmForth - Free Video Editor
- Easy to use and no skill required at all.
- Export video to MP3 with one click.
- Add transitions, effects, filter, text to the video as you want.
- Remove, replace, record and edit the background audio easily.
- Change the speed, volume, and subtitle on video with ease.
- Stabilize, trim, rotate, and convert video in seconds.