How to Add Transparent Video/Image Overlays to Videos in 2023
With FilmForth, you can add add transparent videos, images, stickers and GIFs overlays to your videos within a few clicks.
Transparent video overlay is a practical video editing skill used by most YouTubers and professional video editors, but it’s actually not as tricky a job as it may sound. In this post, I’ll step by step show you how to add transparent video or picture overlays to videos, and even the most inexperienced users will easily get the hang of it. Now let’s get to it.
What are Video Overlay and Transparent Video Overlay?
Video overlay is a video editing technique where a picture or video is displayed on top of another video, and used as background, which is a common practice of the PIP (picture-in-picture) effect.
In film productions or YouTube content creation, video overlays have been extensively used to present two or more separated but intrinsically connected scenes to the audience simultaneously. In so doing, the mingling of ideas is delivered at once.
On the other hand, transparent overlays make it possible to display two or more scenes, while keeping the full screen of the background video visible. From the tutorial section below, you’ll learn how to do transparent video overlays on your own, using video or picture (or both) as video overlays.
How to Add Video/Image Transparent Overlays to Videos with FilmForth
To get started, we need an adequate transparent video overlay video editor, and FilmForth is the highly-recommended choice. FilmForth is a free video editing toolkit that offers tons of useful video editing features including trimming, rotating, clips merging, audio replacing, voice changing, aspect ratio resizing, transitions, etc.
With FilmForth, you can add image or video overlays in two practical manners, and FilmForth allows you to adjust the opacity of the overlay. Hit the download button below to get FilmForth from the Microsoft store for FREE!

Step 1. Upload the Video Footage to FilmForth
When FilmForth is fully installed, launch it from the Windows start menu. Hit the New Project button in the middle to start a new editing project.

Load Media Files into the Program
Drag and drop the video clip(s) into the FilmForth program to import the videos you intend to use as the video background, then you’ll see the background video(s) in the timeline.
Step 3. Add Transparent Video Overlay
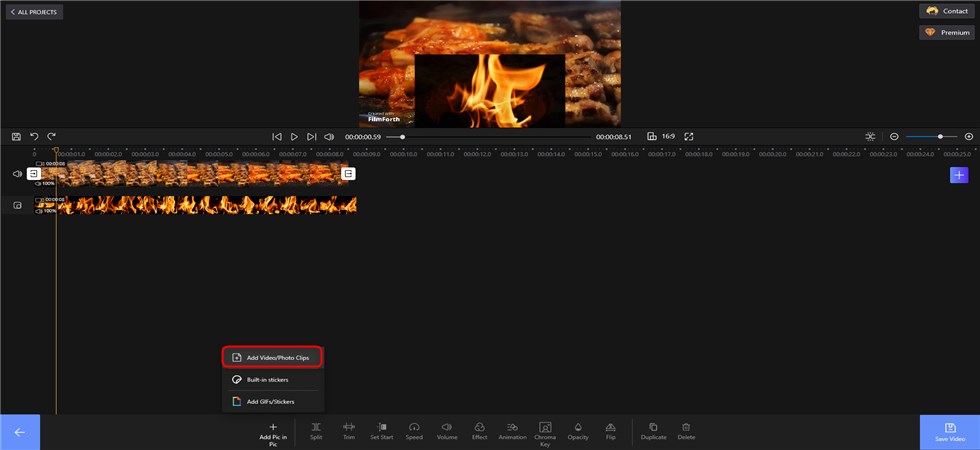
Hit the Picture in Picture button from the lower panel, and you can see there are three options available add your own video/photo clips, add built-in stickers, and add GIFs/stickers from Giphy. Here we choose to add a video clip as an overlay.
Add A Video Overlay to Video
Pull the playhead to the location where you want to add the video overlay, then upload the target video from your system.
Step 4. Adjust the Overlay Opacity
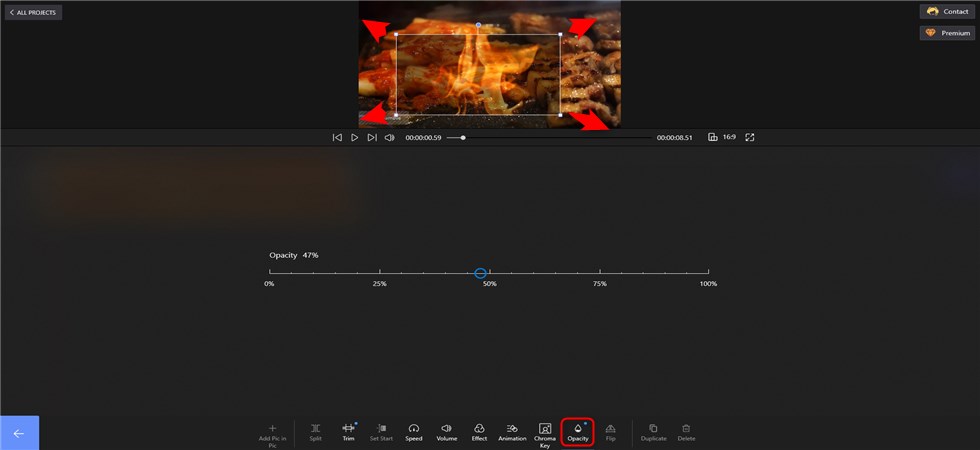
When the video overlay is added to the video, you can drag it from the preview window to relocate it in the video frame.
Transparent the Video Overlay
Select the picture overlay in the timeline and hit the Opacity button below, with the transparency slider, you can adjust the overlay opacity from 0% (completely transparent) to 100% (intransparent).
Step 5. Add the Image Overlay to the Video
In addition, you can add photo overlays to the video.
Add Image Overlay and Adjust Opacity
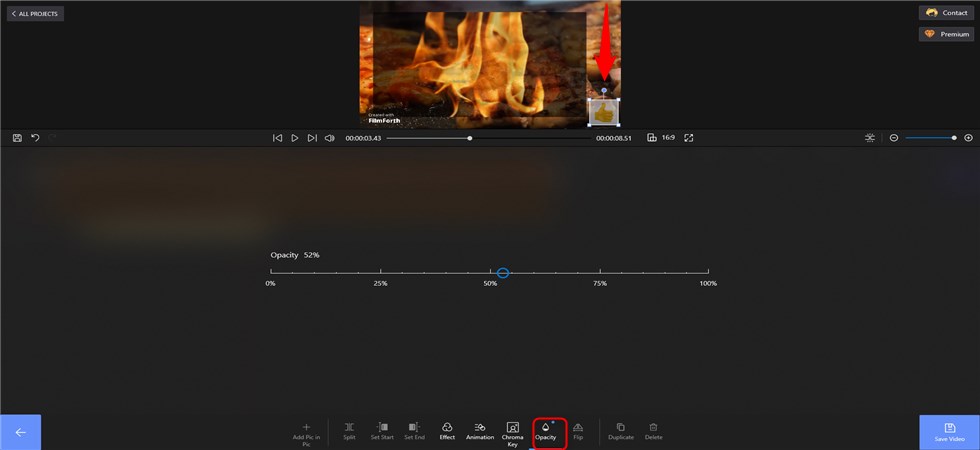
Pull the image overlay to any position after it has been uploaded successfully, you can also pull the timeline to determine how long the image overlay will appear in the video. Finally, customize the opacity of the image as described above to make it a transparent overlay.
Step 6. Save and Export the Overlaid Video
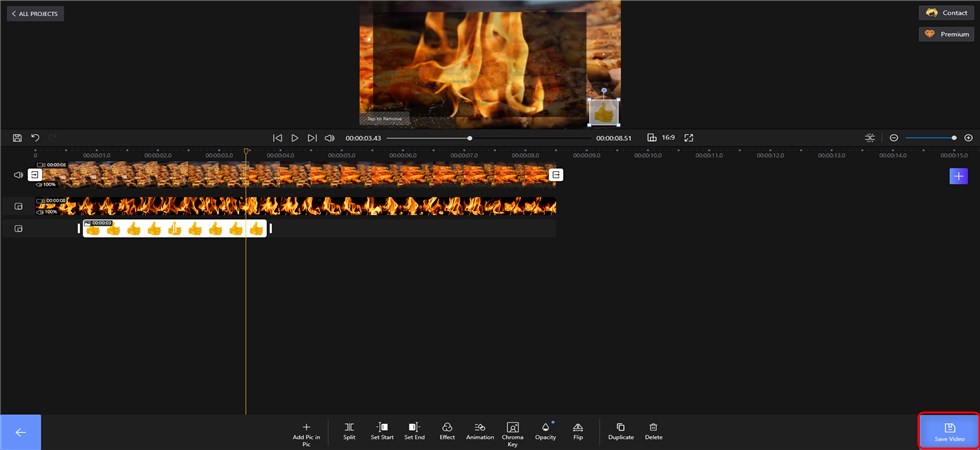
When you’ve done editing, hit the lower-right Save Video button from the main workplace to save and export the overlaid video.
Save the Overlaid Video
Tips: A really fun and useful feature is that FilmForth even enables you to apply various motion effects (like fade in/fade out) to the video overlay.
Hit the Animation button below, and you’ll see three types of animation effects available: Entrance, Exit, and Emphasis, hundreds of animations in total.
Additional Method: How to Make Transparent Overlaid Videos Using Chroma Key
Apart from the conventional method of adding transparent video overlay, FilmForth offers another approach with its Chroma Key feature. Chroma Keying is a post-production technique for compositing images or videos based on color hues, offered by advanced video editors like CapCut. Chroma key helps to remove certain colors and make parts of the overlay video transparent.
FilmForth chroma key can be used to achieve the effect that a video overlay with transparent background is added to the background video.
- Launch FilmForth, create a new project, and import the background video.
- Hit the Picture in Picture button and then Add Pic in Pic.
- From the three given options, hit the Add Video/Photo Clips
- Import a video with monochrome background (to be the background green-screen, but the background color doesn’t have to be green), to use as the video overlay
- Select the added overlay clip in the timeline, and hit the Chroma key button from the lower panel.
- Tick on the Chroma Key Effect option, and use the Select Color button or the color picker to customize the Chroma key color. Additionally, the Add Color button helps you key out multiple colors.
- Adjust the Tolerance of the chroma keying to apply the chroma key effect as per your need.
- Hit the lower-left backspace button to head back to the main workplace, and hit the Save Video button to save and export the video with Chroma keyed transparent overlay.

Chroma Key Transparent Overlay
Transparent Video Overlay: FAQs
How Do I Make a Transparent Video Overlay for Free?
To make a free transparent video overlay, you need the best free video editor FilmForth. With FilmForth, you can easily add overlays to your videos from a library of 1000+ free video overlay templates.
How Do I Make a Free Transparent Overlay?
FilmForth is a free transparent overlay video editor that allows you to make and create transparent overlays from built-in stickers, GIFs, or your own footage.
How do I Make an Animated Video Transparent Overlay?
FilmForth is an all-in-one video editing toolkit integrating both video transparent overlay and motion animation effects features. With it, you can easily make an animated transparent video overlay.
How to Add Transparent Video Overlay in Premiere
Adobe Premiere Pro is a pro-level video editing program that offers advanced video overlay features. To add transparent overlay video in Premiere Pro, go to the Applied Effects panel, expand the Opacity effect, and customize with the Clip Opacity slider.
Conclusion
That’ll be all about how to add transparent video/picture overlays to videos, and it’s actually quite easy using FilmForth. Moreover, apart from adding video or photo overlay to a video, FilmForth is also a versatile video editing tool that also helps to add stickers to video, add incredible transition effects, add animation to videos, and do many other things to make your video look awesome. Anywho, don’t forget to download FilmForth and give it a try!

Karen is a professional writer with a background in column writing who enjoys resolving complex topics and explaining them in interesting ways.
Related Articles
FilmForth - Free Video Editor
- Easy to use and no skill required at all.
- Export video to MP3 with one click.
- Add transitions, effects, filter, text to the video as you want.
- Remove, replace, record and edit the background audio easily.
- Change the speed, volume, and subtitle on video with ease.
- Stabilize, trim, rotate, and convert video in seconds.