Adobe Premiere Pro Review – The Superb Video Editing Tool
If you’re looking for a professional video editing program, then Adobe Premiere Pro is definitely a top option. It’s the ultimate video editing software for creating great video content. In this comprehensive review, you can learn more about Adobe Premiere Pro video editor.
Premiere Pro Review: Content Table
- Adobe Premiere Pro: Pros and Cons
- Premiere Pro Software Features
- Premiere Pro User Interface
- Premiere Pro Assembly
- Premiere Pro Editing and Tools
- Premiere Pro Color
- Premiere Pro Effects
- Premiere Pro Audio
- Premiere Pro Graphics
- Premiere Pro Libraries
- Premiere Pro Workspace
- Premiere Pro Rendering
- What’s New in Adobe Premiere Pro 2022?
- Adobe Premiere Pro Specifications
Adobe Premiere Pro Review
Adobe Premiere Pro is a popular video editing software trusted by people around the world. This software provides users with all the tools and features related to video editing. In this article, we will do an in-depth review of the Adobe Premiere Pro video editor features, advantages, and disadvantages. If you are looking for this software, please refer to the article immediately. Adobe Premiere Pro works on both Windows and Mac, and it’s a top-level professional video editing program on both platforms, and one of our 16 best video editing software for Mac.
Do Not Miss: 20 Best Video Editing Apps, 22 Online Video Editors, 16 Intro Maker Apps
Pros and Cons of Adobe Premiere Pro
PROS
- Integration with Adobe Creative Suite
- The preset sound modes are very suitable for user needs
- Workspaces and shortcuts make the application easy to use when you interface down
- The lighting and color correction features live up to the expectations from the company that made Photoshop
- Professional video editing capabilities
- Supports most video formats
- Large library of images, videos, and templates, easy to use
- Easily add animations and effects
- Professional sound tuning
- Export files in many formats and with high quality
CONS
- Subscription-based pay model, no lifetime version
- A large number of effects & features make it difficult to find basic tools.
- Many of the built-in effects look confusing and largely unusable.
- Complex effects tend to slow down or overload the preview window
Software Features
- Processing and editing video, image, and typographic files.
- Arrange and trim the original video file (output from camcorder) into a complete video.
- Add effects, filters, and effects in the video
- Make Subtitle (subtitle) – Intro at the beginning of the movie – Credit at the end of the movie – Insert logo and image.
- Professional-level slow-motion video editing software
- Process audio directly on Adobe Premiere software
- Export videos in a variety of formats, including videotape recordings, DVDs, and popular Internet video formats.
User Interface
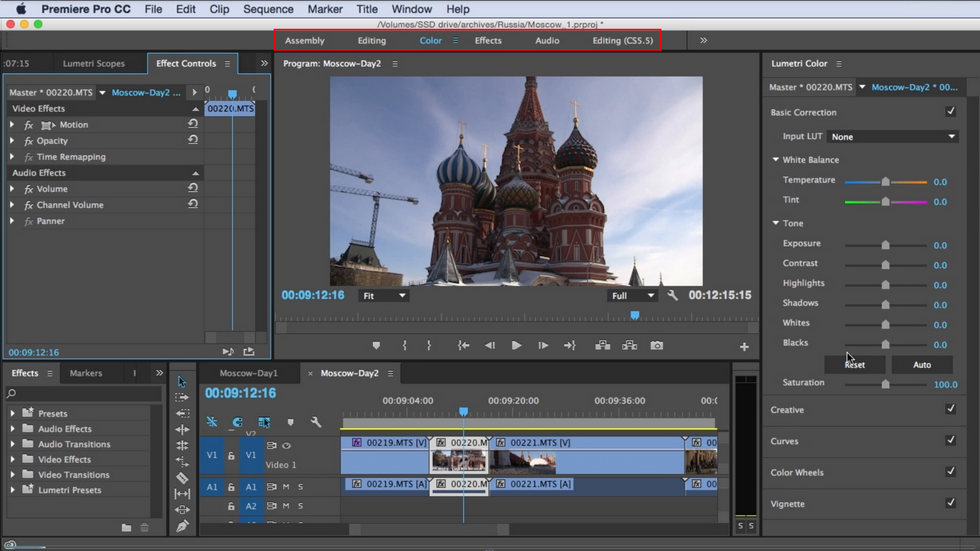
This video editing software is made up of seven key features, which you can easily follow in the image above. Going from left to right you’ll see the tools: Assemble, Edit, Color, Effects, Sound, Graphics, and Library.
While most other video editors choose a drop-down menu approach to the interface, Adobe decided to organize the program in a way that highlights the current task you’re using. This helps Adobe Premiere Pro present more features without messing on each screen compared to other programs. For example, with some simple steps, you can easily add titles in Premiere Pro.
However, the Adobe Premiere Pro user interface still has some limitations. Most quests can only be done in the sum zone, which means you’ll have to do a lot of work to find what you’re looking for. Fortunately, the keyboard shortcuts in Premiere Pro are extremely useful and will save you a lot of time if used correctly.
Adobe Premiere Pro User Interface
Assembly
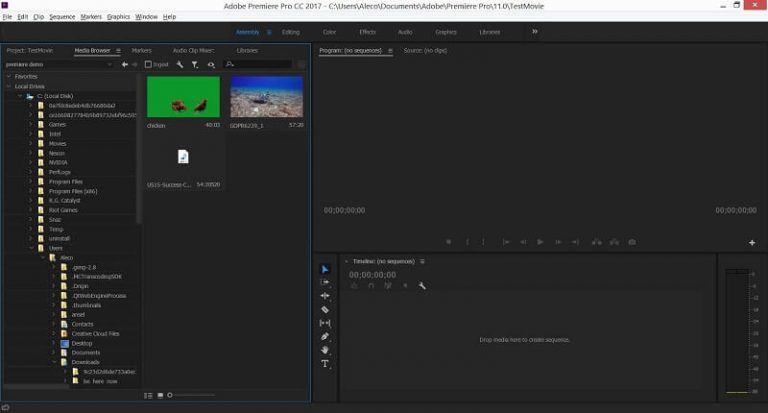
The first area of the Adobe Premiere Pro user interface is the Assembly menu. This is where you import the original video from your computer’s PC into your video project. However, Adobe Premiere Pro does not have the video drag and drop feature like other editors. This is sometimes frustrating for many editors.
Adobe Premiere Pro Assembly
Editing and Tools
Adobe Premiere Pro Editing and Tools
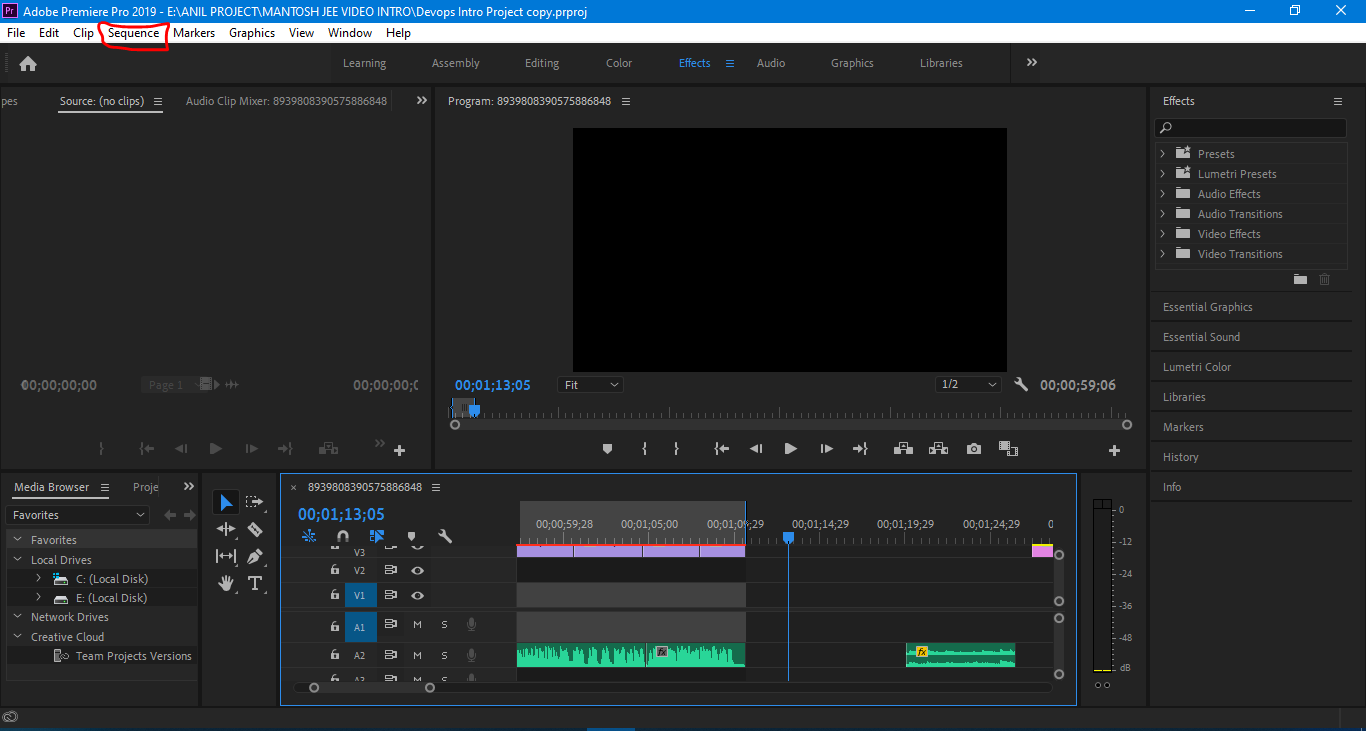
The Editing area is where you’ll join and organize your audio & video files. It’s pretty straightforward to use: Just drag and drop your imported files onto the timeline to start moving them around. The editing area is also where you’ll get your first look at the camera tools in Premiere Pro:
The image above shows the Tools (tools) located vertically on the left side of the application. This is the default tool you use to select project elements and move them. Your cursor will change the highlight to reflect the current tool you selected.
Users may feel a bit confused about the need for Tools in Adobe Premiere Pro. They make a lot of sense in Photoshop, but it’s hard for a video editor to present the same features in a more intuitive way. Also, there should be consistency across Adobe Creative Suite, but the tools in the app are a bit cluttered or unnecessary for those familiar with other video editing apps.
Naturally, advanced video editing effects such as split video screen could get tricky when editing with professional video editors like Adobe Premiere Pro.
Color
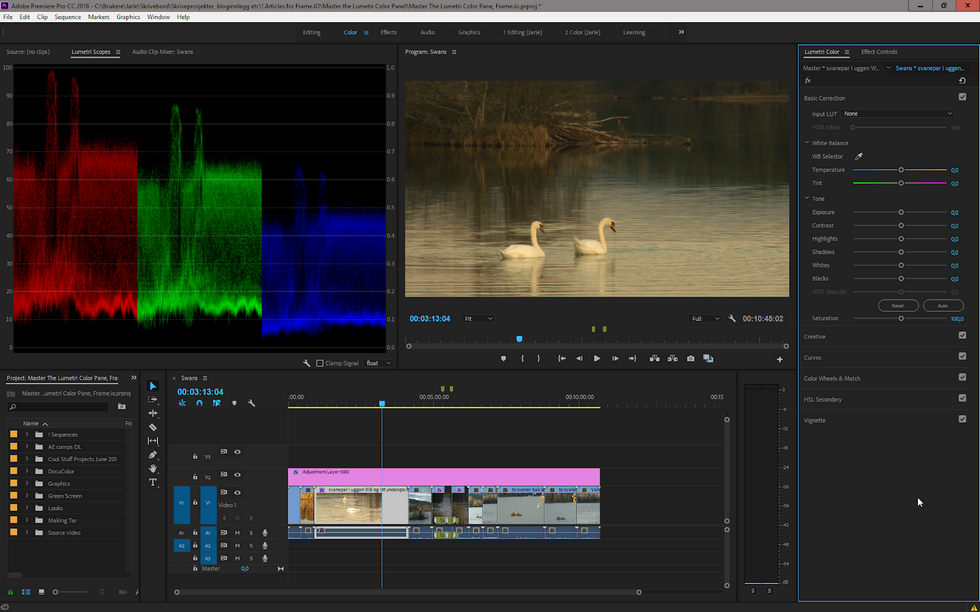
Premiere Pro Color
Color is probably the biggest takeaway from the entire show. The amount of control you have over the colors in the video is phenomenal. The user interface for the Color area is responsive and highly intuitive for anyone even without experience in video or photo editing.
On the left side, you will get a very detailed view of the color data in your video clips, which is quite useful for the average user. Adobe does color correction better than anyone else, and Premiere Pro is no exception.
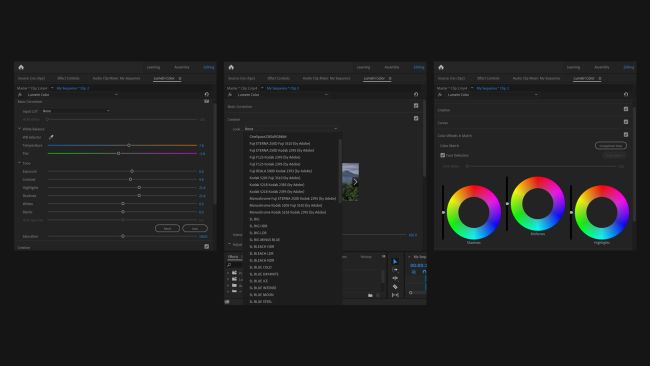
Premiere Pro Color Correction
The software also features an extensively equipped Lumetri palette with several Lightroom-style color adjustment screens for precise color grading and cinematic color styling. Tools include color and tone sliders, curves, color wheels, vignette controls, and preset LUTs (Lookup Tables) as well as providing the ability for you to import your own LUTs into the project.
Each tool is incredibly easy to learn, categorized in separate drop-down menus in the Lumetri Color panel, and shows real-time changes to the video you’re editing in the Program Monitor panel. And with Premiere Pro’s advanced chrome key feature, you can change the background of a video at the advanced level.
Effects
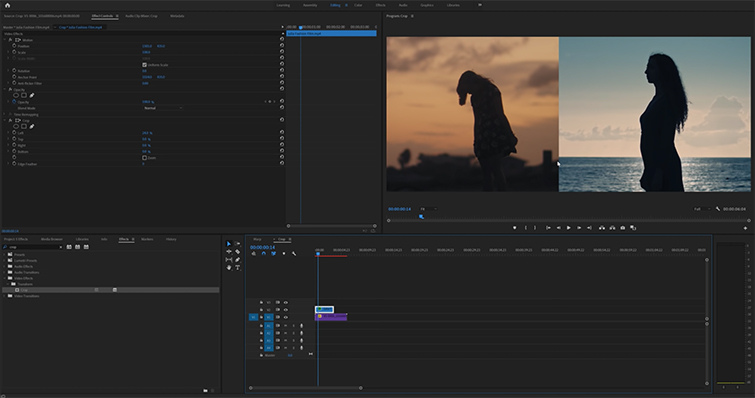
Premiere Pro Effects
The Effects area is where you apply ready-made effects to your audio and video clips. Clicking on the effect on the right side of the screen sends its parameters to a menu on the left side of the screen, called Source Monitor. The Source Monitor allows you to adjust various settings of the effect.
Other video editors typically require you to navigate a series of pop-up menus to apply effects, while Adobe lets you quickly select, apply, and adjust settings with as few steps as possible. good. It’s easy to copy effects applied to one clip and paste them into another clip.
Adobe Premiere Pro classifies many things, including effects. Basic changes, such as adjusting the alignment of your video in the frame or applying a color key (blue screen), are made by applying effects. This categorization makes it easier to find the resources you want and saves time in editing.
Most video effects apply some kind of dithering to your video clips. Many things seem quite similar, but this refined approach to creating the perfect color schemes and lighting is exactly what professional editors need.
In addition to the color modification effects, there are some more sophisticated effects that distort or modify the content of your video. Unfortunately, most of these effects bring benefits rather than disadvantages to computing resources. With a more complex effect like flashing in the clip, the video preview window will slow down. The program often freezes, crashes, or needs to be restarted every time one of these complex effects is applied.
Simple effects like “sharpen” and or “Blur Blur” work well, but added together can also cause resource overload problems and slow computers. You can still display any effects for testing without any issues, but most of the effects cannot be viewed correctly in the preview window before execution. To be fair, Premiere Pro is clearly not designed to be a special effects editor for low-end machines. If you’re looking for some basic video effects, then Premiere Pro can be quite excessive, learn from our guide to adding special effects to video for free.
Audio
Audio is one of the most impressive parts of the entire show. The tools for adjusting your sound are almost the same as the tools for color and lighting. The presets are also amazingly accurate with their feature descriptions, from radio stations or in a large room, creating your sound exactly as described. Tools for editing audio are also covered in the Audio section, and you can also check out our alternative method to add audio to videos for free.
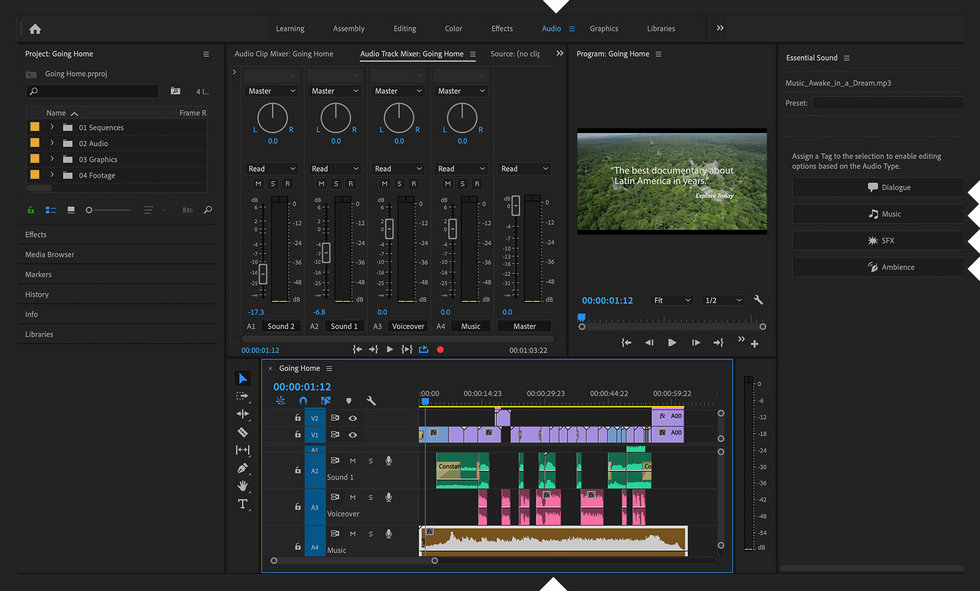
Premiere Pro Audio
Graphics
The Graphics tab is where you can apply all kinds of generated assets to your movie. Titles, textures, text backdrops, or anything else that needs to appear on top of your video can be found here. Simply drag and drop the generated content directly onto the video’s timeline and it will become a new element that you can modify however you have chosen. The Graphics area is one of many powerful features of Premiere Pro.
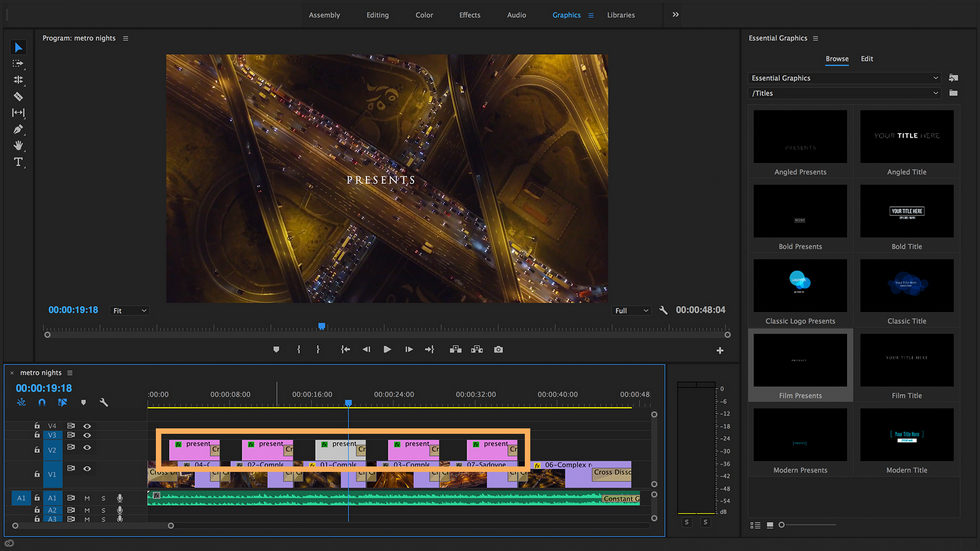
Premiere Pro Graphics
Libraries
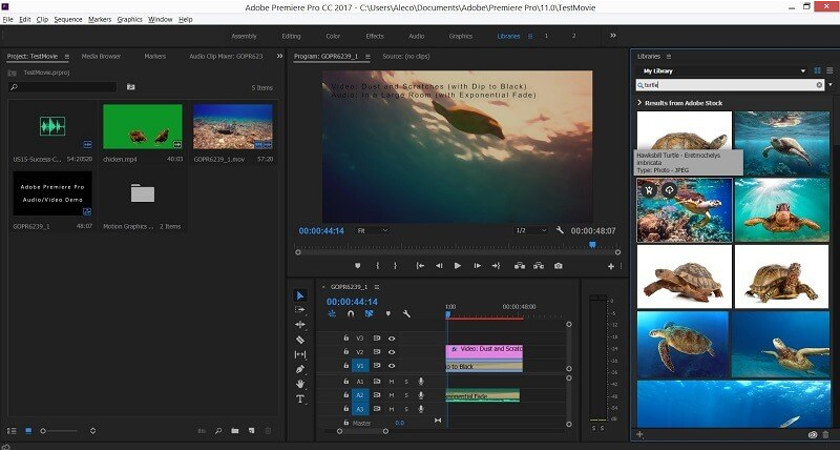
Premiere Pro Libraries
In the Libraries area, you can search through Adobe’s huge database of images, videos, and templates. It is convenient to have such high-quality images and videos available. However, you need to buy an Adobe license to be able to add it to your project.
Workspace
Premiere Pro Workplace
The last element in the navigation toolbar is the workspace. Workspaces are like snapshots of your workspace allowing you to quickly jump between locations in your projects that you use most. This feature is extremely convenient, you can swap between workspaces using keyboard shortcuts.
Rendering
Premiere Pro Rendering
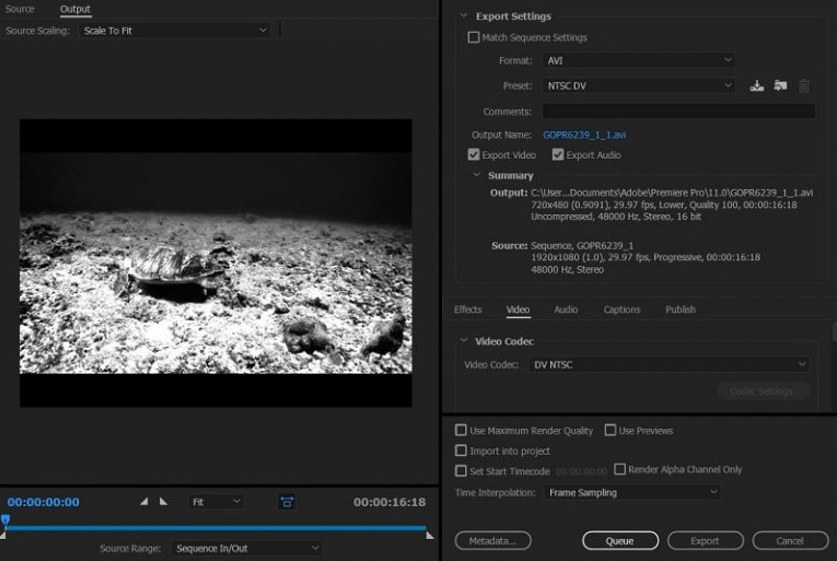
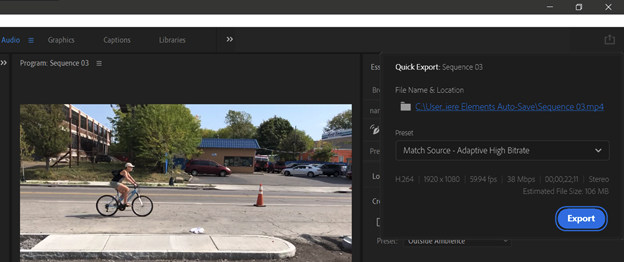
The final step for any video project is rendering, which is super simple with Premiere Pro. Just choose your desired output format and let Adobe do the rest. This editing software can output almost any type of video format. At the same time, it also automatically adjusts the frame to match your posting position. Examples are Youtube, Facebook, and TikTok.
One downside to video rendering that makes many editors consider Adobe Premiere Pro is that it consumes a lot of RAM. With low configuration machines, it is not possible to work effectively, even not to output video. Besides, when you use a lot of effects for the video, in the long run, it can reduce the life of the PC set. Various output formats are supported such as ProRes, MP4, Premiere, etc. Learn from our guide on how to render and export in Premiere Pro.
What’s New in Adobe Premiere Pro 2022?
Adobe launched the 2022 version of Premiere Pro earlier this year, which can be seen as Adobe Premiere Pro 15. This update includes bug fixes, some new features, and, importantly, performance improvements. . According to Adobe, the “keyword” of this release is SPEED…which contributes to speeding up the workflow. Here are a few new features of this video creation tool.
New Caption Making Feature
In Premiere Pro 2022, the implementation of captions is completely new. Subtitles are seamlessly integrated into the editor, connecting text to the Timeline and design tools in the Essential Graphics panel. You’ll have a handy set of tools to quickly add, customize, and “makeover” captions. Adobe says Caption’s workflow will be further accelerated with Speech to Text features later this year.
Media Replacement
You can now very easily swap specific media files, such as logos and even videos, in Motion Graphics templates, using After Effects capabilities on the Premiere Pro timeline with Customizable graphics and animations.
Ultra-fast Anti-vibration Feature
This is one of the best improvements in Adobe Premiere Pro version 2022. Adobe claims that a newly developed optimization feature makes Warp Stabilizer 4 times faster.
Compared to the old version, the Warp Stabilizer function is significantly improved. The tool analyzed shaky footage faster even though the workflow remained the same. As a result, the quality of the stable system remains as good as before.
Team Project Improvements
Accessing content in the search bar and SmartBin is noticeably faster. The Search Bar in the Project Panel will no longer be disabled while indexing occurs, allowing immediate access to the ability to query the metadata database, Adobe says.
Remove Old Sound Effects
Adobe Premiere Pro has removed many outdated, underused sound effects. And instead, there are newer effects and resources that keep up with modern creative trends. Adobe says the goal is to keep Premiere Pro lean and efficient. That means a number of legacy sound effects have been dropped, including Chorus, DeClicker, DeCrackler, DeEsser, DeHummer, DeNoiser, Dynamics, EQ, Flanger, Multiband Compressor, Phaser, Pitch Shifter, Reverb, and Spectral Noise Reduction. Adobe emphasizes that all of these have been replaced with new or equivalent effects.
Adobe Premiere Pro Specifications
System Requirements
For Windows
- Operating system: Windows 10 64-bit update 1803 or later.
- CPU: Intel Core i3-6100 or AMD Ryzen 1000 Series.
- RAM: 8GB.
- GPU/Graphics: 2 GB of GPU VRAM.
- Free space: 8GB.
- Screen resolution: 1280 x 800px.
For MAC
- Operating system: macOS v10.15 (Catalina) or later.
- CPU: Intel Core i3-6100.
- RAM: 8GB.
- GPU/Graphics: 2 GB of GPU VRAM.
- Free space: 8GB.
- Screen resolution: 1280 x 800px
| Number of languages supported | 13 |
| 3D video editing | Yes |
| 4K video processing | Yes |
| 360 video editing | Yes |
| Multicam Editing | No |
| Number of filters | 2000 |
| Number of transition effects | 10000+ |
| Use on Macbook | Yes |
Verdict
With the above analysis, you can see that Adobe Premiere Pro is professional editing software full of “heavyweight” features. However, this tool still has a few downsides to it. The first is that the system requires a high configuration, the second is that because there are many features, users need to spend a lot of time learning to use it, and the third is that the price of this tool is not yet economical. However, if you are pursuing a career in video editing, then this tool cannot be ignored. With Adobe Premiere Pro, you can create blockbuster-like stellar videos.
Additional Reading: Best Free Pinnacle Studio Alternative You Should Totally Try
FilmForth is on the top of our list of best free video editing software and it can serve as a perfect Pinnacle Studio alternative for Windows 10 and Windows 11 PCs. FilmForth is completely-free, intuitive, and incredibly easy to use, and it doesn’t export videos with watermarks, making it a perfect option for video editing beginners.
What’s more, FilmForth can be versatile as well, it offers a variety of video editing options including trimming videos, cropping videos, resizing videos, adding customizable text to videos, splitting videos, adding gifs/stickers/special effects to videos, detaching/changing/adjusting audio, adding transitions, reversing video, changing video playback speed, even creating YouTube intro with templates, and a lot more.
FilmForth is available from the Microsoft store, hit the download button below to get it for free, and it will install on your computer in less than 2 minutes!
How to Edit Videos with FilmForth Free and Effortlessly
Step 1. Import Video into FilmForth
Editing video with FilmForth is super duper easy, first launch FilmForth from the Windows start menu, hit the New Project button in the middle, and click ADD VIDEO/PHOTO CLIPS button to import your videos/photos.
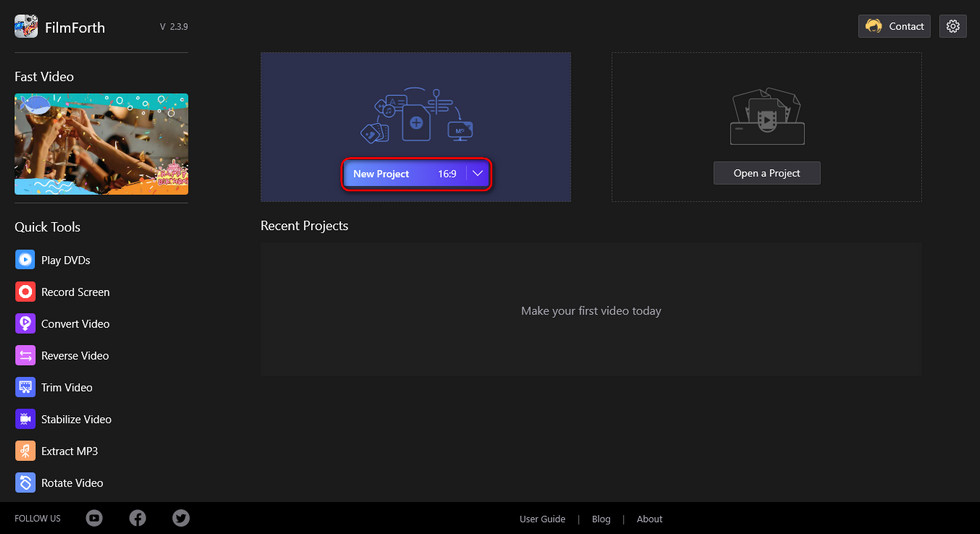
Import the Video
Step 2. Edit Videos with FilmForth
After videos are added to FilmForth, you can click to select a video clip in the timeline to edit it. There are clickable buttons in the timeline and the operation panel below for you to quick edit the video.
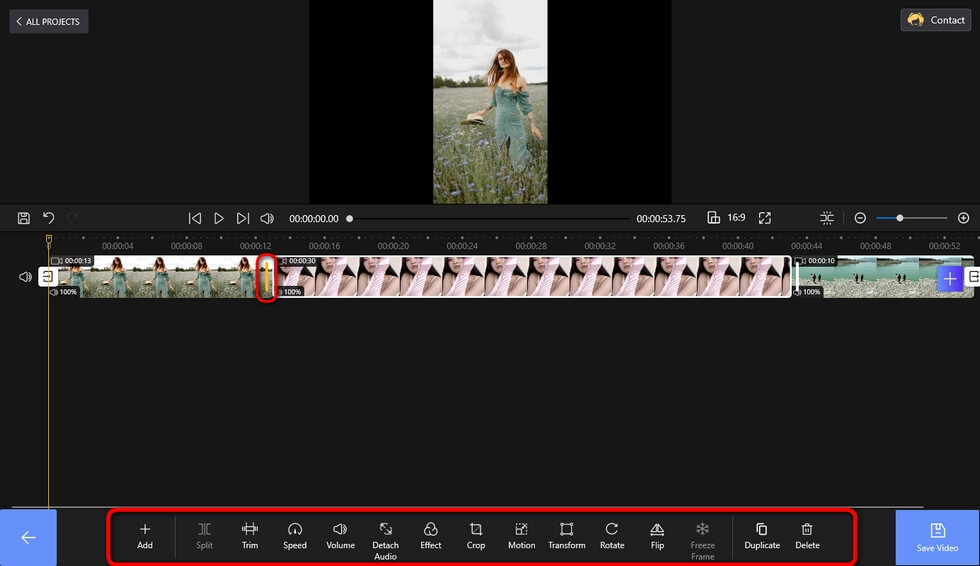
Edit Your Videos
Step 3. Export Videos from FilmForth
When you’re done editing, hit the Save video button from the lower right side to customize video parameters and export the video, simple as that! So don’t hesitate to give FilmForth a try!
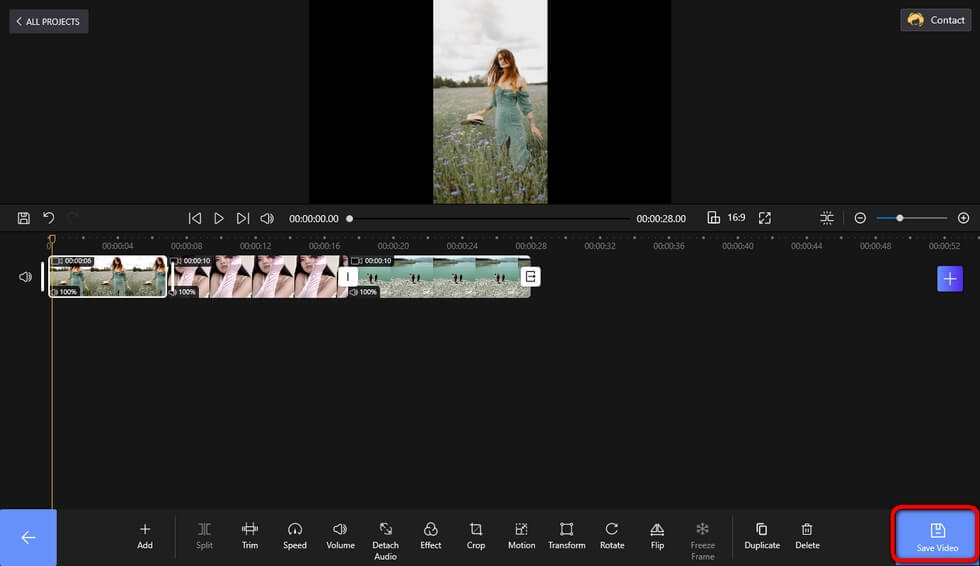
Save and Export Video
More Related Articles
Related Articles
FilmForth - Free Video Editor
- Easy to use and no skill required at all.
- Export video to MP3 with one click.
- Add transitions, effects, filter, text to the video as you want.
- Remove, replace, record and edit the background audio easily.
- Change the speed, volume, and subtitle on video with ease.
- Stabilize, trim, rotate, and convert video in seconds.


