How to Crop A Video on KineMaster[Update in 2023]
If you are new to the KineMaster, then this article will show you how to crop a video on KineMaster in detail. For those who are used to cropping videos on Windows PC, you can also get an easy way to do it from this post.
Crop video is one of the important video editing tools that can bring your video to a pro-level. There is no doubt that sometimes you need to crop your video to remove unnecessary information and draw the viewer’s attention to the most important elements. But if you are a novice in video editing, cropping videos may be difficult for you.
KineMaster is a powerful editing tool that lets you create professional-quality videos in minutes! It not only has basic cropping, cutting, and rotating features but also enables some advanced effects. How to Crop A Video on KineMaster? Don’t worry, below is a detailed tutorial for you.
How to Crop A Video on KineMaster
As a robust video editing tool, KineMaster supports you to edit your videos on Android, Chrome OS, iPhone, and iPad. You can simply crop your video with KineMaster to make your video clips more highlightable to get more subscribers on YouTube or TikTok. Without further ado, let’s go to the next step.
Step 1. Download and Install KineMaster
First of all, you need to download the KineMater video editor, then install and launch it on your device. On the home screen, pre-select an aspect ratio to start a new project.
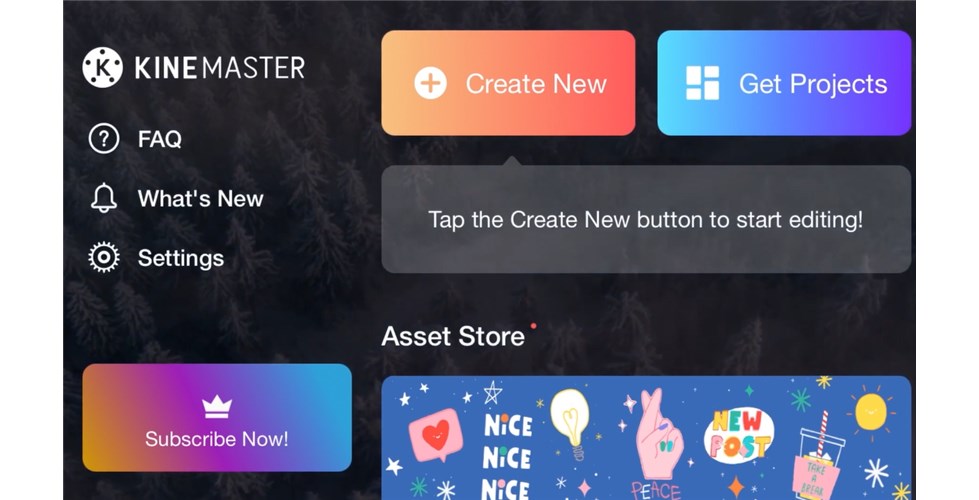
Create A New Project in KineMaster
If you click Media directly and import the video you want to crop, you will find that the crop tool is not visible in the list.

Import the Video as Media Layer
You need to click Media and import a photo to use it as a video background, followed by importing the video as a media layer.
Step 2. Crop A Video with KineMaster
Now select your video and scroll down the menu on the right, and select the Crop tool. On the crop screen, manually enter the size of the crop area or drag the four corners of the rectangular box in the original preview to crop your video.
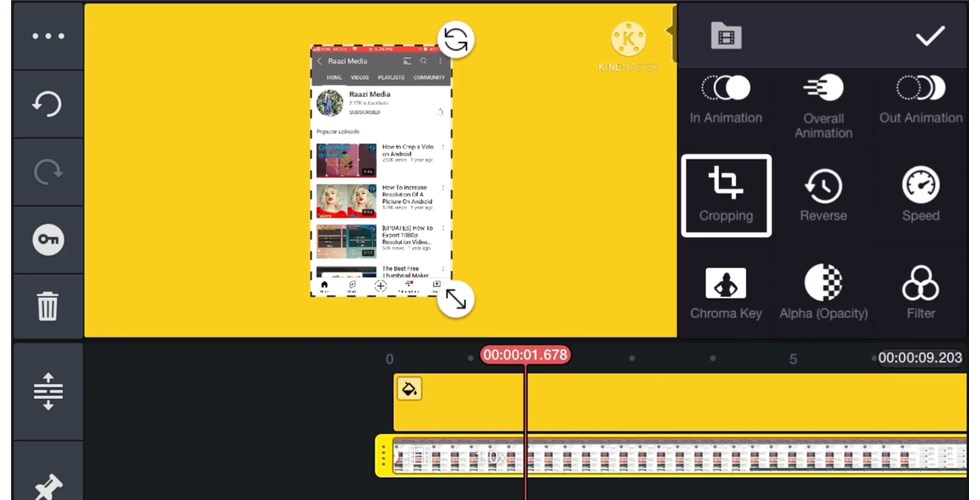
Crop the Video with KineMaster
Once you have finished cropping, you can easily change the position of the video.
Step 3. How to Pan&Zoom the Video with KineMater
In addition, you can add pan & zoom effects to your video in KineMaster. To apply a pan&zoom effect to your cropped video, click the button next to the scissors icon.
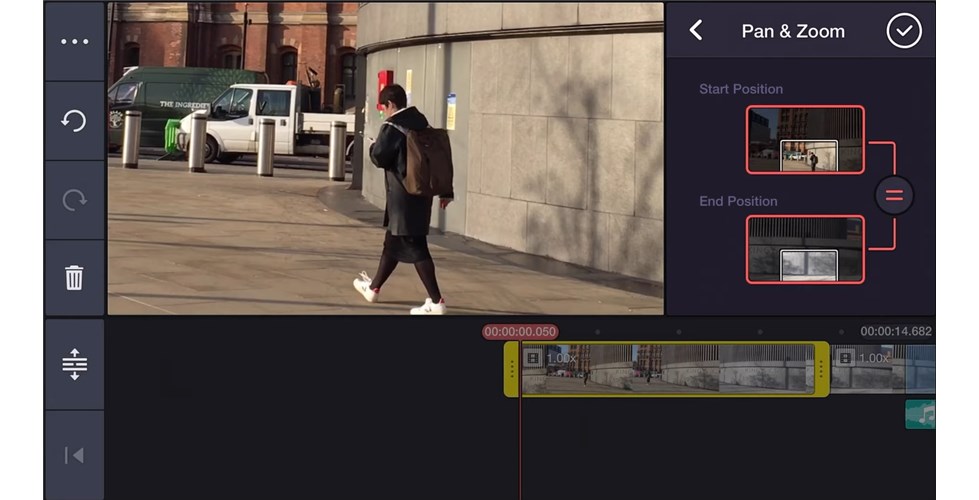
Use Pan and Zoom in the Video
To create the zoom effect, all we need to do is create the first frame and the last frame. To apply the zoom effect we will start from the full-screen position at the start position, for the end position we zoom it by pinching on the window preview, and the opposite when we want to apply the zoom effect.
Step 4. Exported the Cropped Video
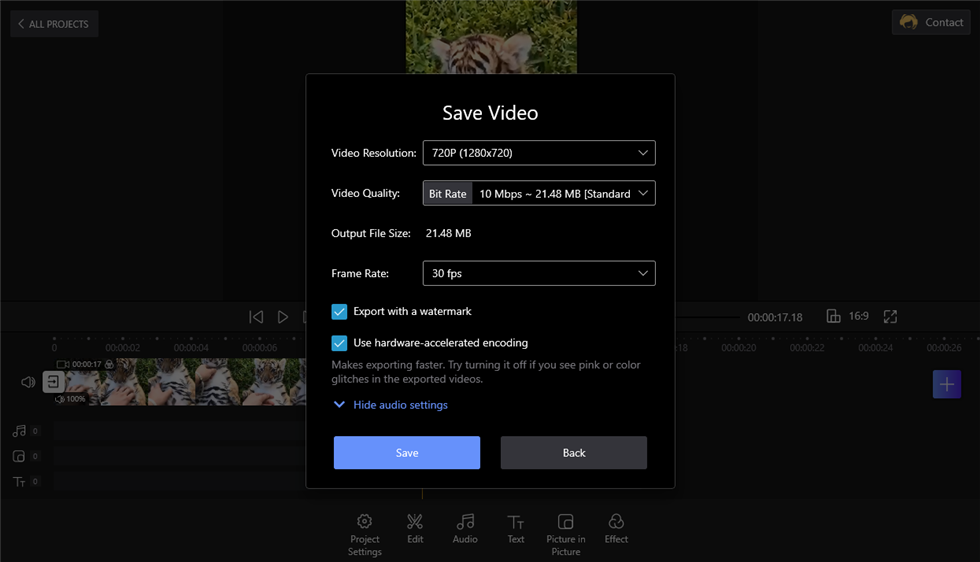
To export your video, click the Share icon. Before exporting your video, you can choose the best settings for your video (screen resolution, frame rate, etc.). Select the output format and folder, then click Save to save the cropped video.
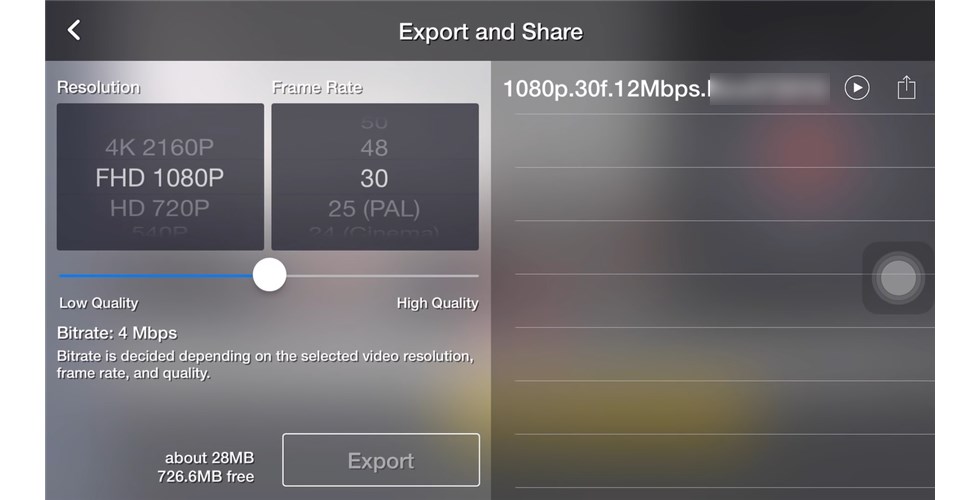
Export and Share the Video
That’s how to crop a video easily in KineMaster, below we are exploring how to use the best alternative to KineMaster to do the job of crop video.
How to Crop A Video with the Best Kinemaster Alternative
FilmForth offers a fast and free solution for Windows 10/11 users’ daily video editing needs. You can easily edit videos with crop, pan, and zoom effects, let’s find out.
Step 1. Free Dwonload FilmForth
Click the button below to download FilmForth from Microsoft Store and wait for its successful installation on your Windows computer.

After launching FilmForth, start a new project on the main screen. Click ADD VIDEO/PHOTO CLIPS button in the pop-up window to import the target video.
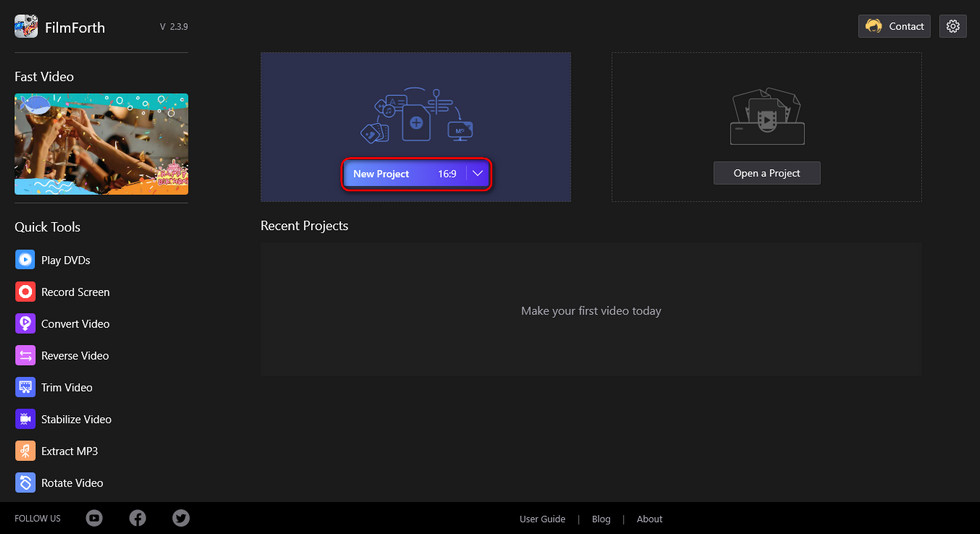
Create a New Project
Step 2. Crop Video with FilmForth
Pull the playhead to any position you want to crop, then click the Crop button in the toolbar at the bottom, which will take you to the crop window.
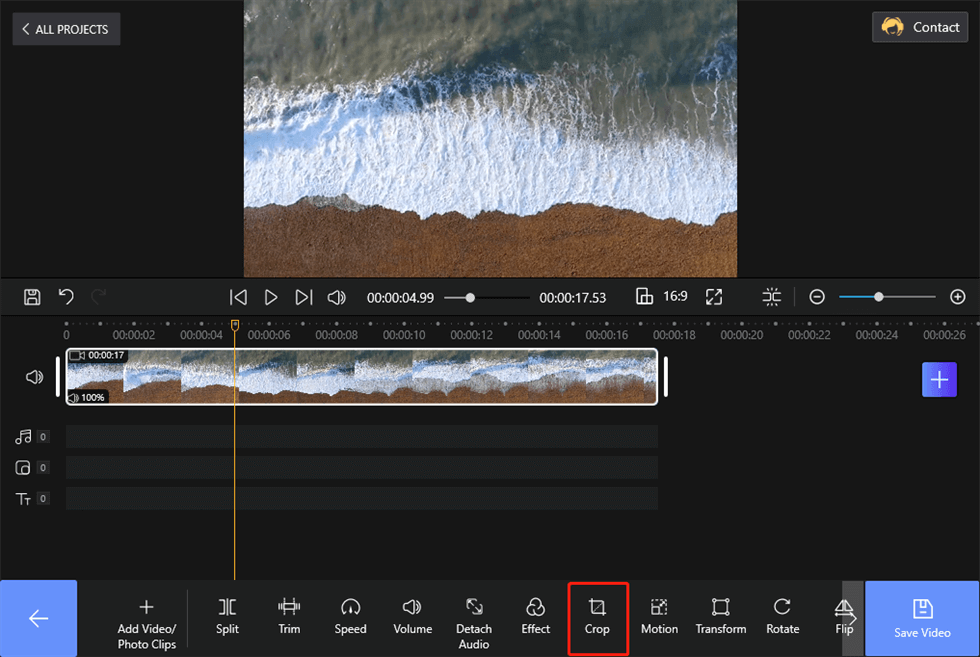
Click Crop Button to Crop the Video
Click the Ratio button and select the aspect ratio for your cropped video in the drop-down menu. Pull any of the four corners of the crop box to adjust the crop area until you are satisfied.
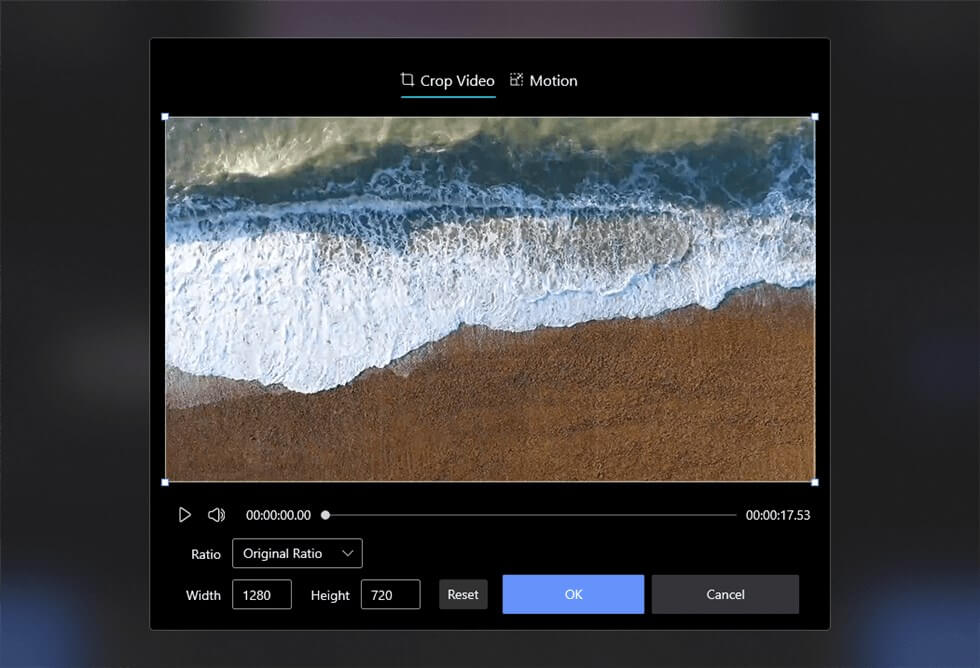
Crop the Video with FilmForth
Step 3. How to Use the Motion Effect
Additionally, you can zoom and pan an object in your video to emphasize it. First, select a start frame and an end frame for your video, making sure the playhead is in the middle of the video.
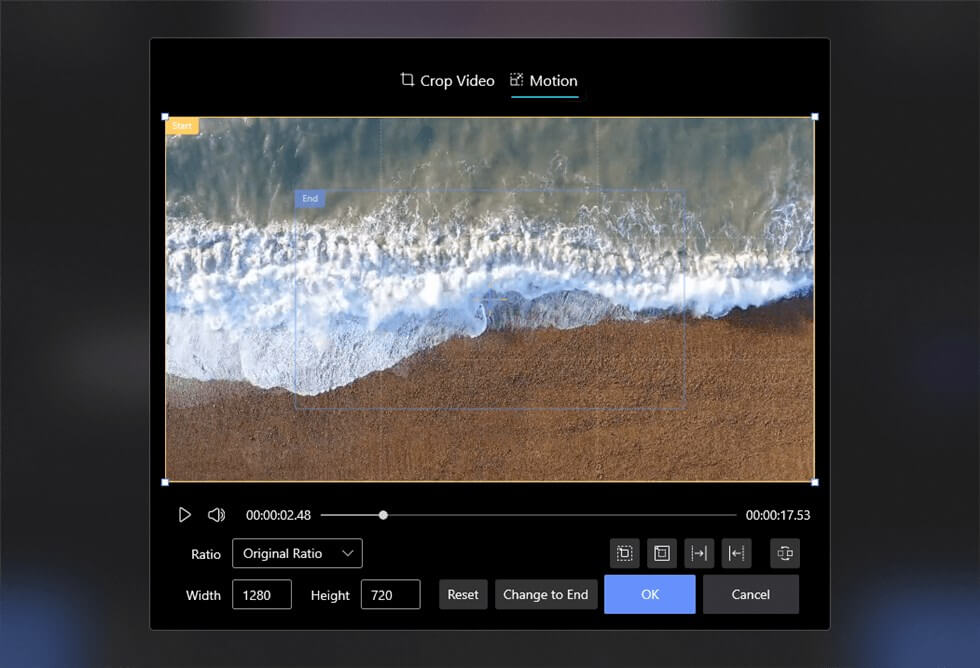
Set Motion Effect for the Video
Click on the Motion button at the bottom and then select an effect for your video in the pop-up window (zoom in/zoom out/pan left/pan right). Set the size and position of the start and end frames, then click the Ok button to finish the operation.
Step 4. Save the New Video
When you are satisfied with the cropping process, you can choose to export a new video. By default, your FilmForth will add a watermark to your video clip, you can upgrade to FilmForth Premium to remove the watermark from your video.
Export and Save Video
The Conclusion
As a video fancier, you won’t miss any opportunity to customize your video with editing features. By cropping you can remove unwanted parts and provide a close-up of your video to show your viewers a clear vision. Whatever the reason you need to crop your video, KineMaster can help you do it effectively.
We’ve discussed in detail how to properly use the crop function on KineMaster above, and also provided a tutorial for beginners who need to crop video on a Windows 10 computer. Whichever method you choose, we hope you have fun with your video editing!
More Related Articles
- 16 Best Video Editing Software for Mac: Free and Paid
- 12 Best Face Swap Apps to Add Some Fun to Your Photos
- Top 18 Slow Motion Video Editors to Slow Down the World
- The Complete Guide on How to Make a Smooth Video Slow Motion
- 15 Best Split-Screen Video Editors for Professionals and Beginners
- Top 24 PC Games Download Websites [Updated]

Karen is a professional writer with a background in column writing who enjoys resolving complex topics and explaining them in interesting ways.
Related Articles
FilmForth - Free Video Editor
- Easy to use and no skill required at all.
- Export video to MP3 with one click.
- Add transitions, effects, filter, text to the video as you want.
- Remove, replace, record and edit the background audio easily.
- Change the speed, volume, and subtitle on video with ease.
- Stabilize, trim, rotate, and convert video in seconds.