12 CapCut Filters to Make Your Video Textured in 2023
Summary :
CapCut is one of the most popular video editing software in the world. This page will introduce you to 12 quality filter presets and let you know how you can access and use CapCut filters.
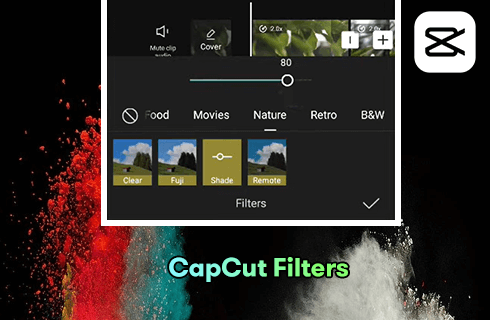
12 CapCut Filters to Make Your Video Textured
As we all know, if you want to make an ornamental video, you need handy video editing software as an assistant. The texture of the video has a lot to do with the filter preset in the software. Therefore, CapCut came into being.
CapCut is a piece of video editing software that is famous for its templates and filters. Initially, it was not called CapCut but Viamaker. It can be considered a video editing program for Tiktok. It allows you to edit videos on your mobile device anytime and anywhere. Why is CapCut known for its filters here? CapCut video editor is a piece of video editing software that provides you with a lot of advanced filters that distinguish it from other video editing software, making your videos less monotonous. You no longer need to worry about whether your video is not advanced enough or not classy enough. CapCut filter is not fixed, it will be updated from time to time to follow the trend of the times.
Do Not Miss: 22 Best Free Video Editing Software, 22 Online Video Editors, 16 Best Video Editing Software for Mac
12 Best CapCut Filters in 2023
CapCut is an all-in-one video editing toolkit and it has earned a place on the 20 Best Video Editing Apps. The reason why CapCut is deeply loved by users in all stages and groups is mainly its built-in amazing advanced filters. CapCut filters are divided into seven categories: Food, Movies, Nature, Retro, B&W, and Style.
Of course, apart from some filter presets, you can use the Adjust button to personalize settings. Next, this article will introduce you to the 12 popular CapCut filters.
1. Princeton CapCut Filter
Princeton is a CapCut preset filter that deepens the color of the image to make it more film-like. Especially suitable for adjusting the color of the sky, Princeton can make the sky bluer and the clouds snowier white to create a strong color contrast. At the same time, other things in the picture will also have some sharp contrast between light and dark to highlight the characteristics to catch the viewer’s eye.
Of course, if you want to apply this filter to a picture with people, one thing you need to be aware of is the time of day. Photos taken in the afternoon when the sun is soft will be much better than those taken at midday under strong sunlight. Of course, you will find the Princeton filter preset under the Retro CapCut filter directory, so if you want to generate a retro blockbuster effect, Princeton CapCut Filter will also be a very good choice.
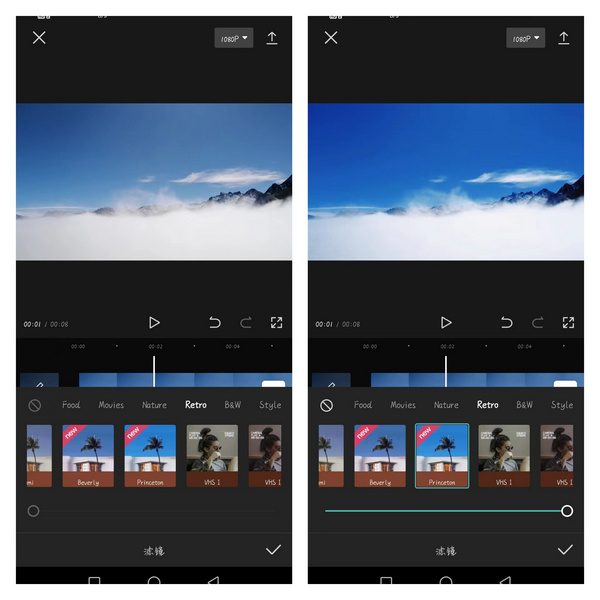
Princeton CapCut Filter Application Comparison Chart
2. Dracula CapCut Filter
A recommended filter, also located under the Retro option column, is the Dracula CapCut filter preset. It can be very effective in adding a sense of ambiance to a photo or video, creating a hazy moody beauty. This effect is perfect for applying to shots with the flash on in night scenes to accentuate the light.
Moreover, if you can meet a large wall of flowers or bring a bouquet of bright flowers when you are out on a trip, then the shot will have an unexpected effect.
You can also modify the setting by yourself to adjust the Dracula filter parameters: Brightness:+25 Contrast:+10 Saturation:-10 Sharpening:+35 Color temperature:+25 Hue:+10.
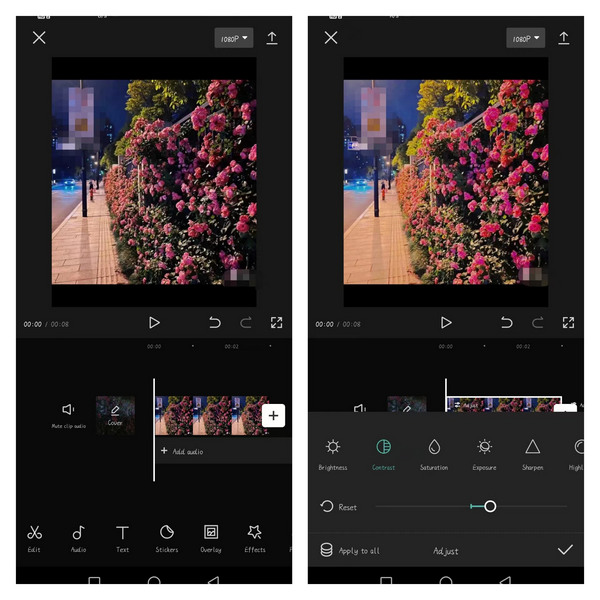
There are Some Blurring Effects in the Dracula CapCut Filter
3. Honey Peach CapCut Filter
One of the most important things on a holiday is to eat and drink, and food should be very popular among everyone. And when you taste a portion of delicious food, you will want to take a beautiful photo of it and share it with others.
Honey Peach is a very popular filter preset in CapCut. It enhances the brightness of the food, makes the surface of the food look more vibrant, brings out the body of the food, and makes the viewer’s eyes focus on it, thus making it more appetizing.
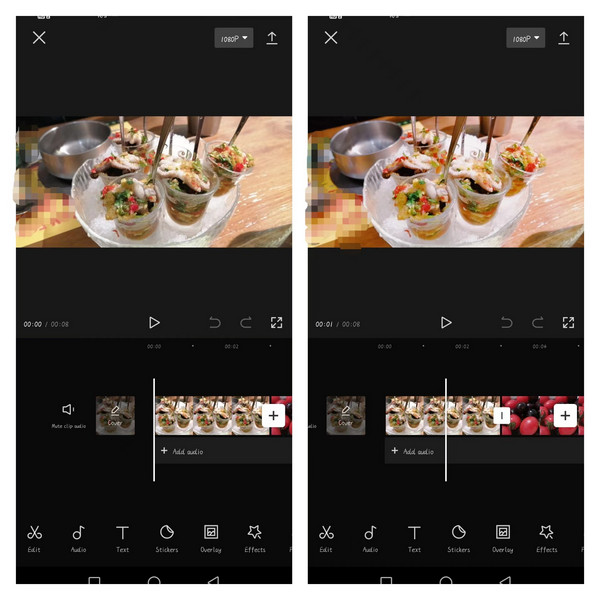
One-click Makes the Food Look Tastier
4. Light Cream Animated Filter in CapCut
To personalize the differences to meet the aesthetic standards of different users, CapCut filters allow you to customize and add filter presets through Adjust to generate your unique recipes, in addition to those presented in the presets section. Adjust at any time to get it at any time. The main purpose of this filter is to make the scenery look more bright and colorful, closer to the colors presented in the anime, and different from the colors in real life itself. And it can make the whole picture and video look fuller and softer, giving a sense of yearning.
You can adjust it by following these steps. Brightness: 19, Contrast: -50, Saturation: 50, Exposure: -50, Sharpen: 50, Highlight: 50, Shadow: 65, Temp: 8, Hue: 6 and Fade: 34. Then You can get this fantastic light cream animation filter.
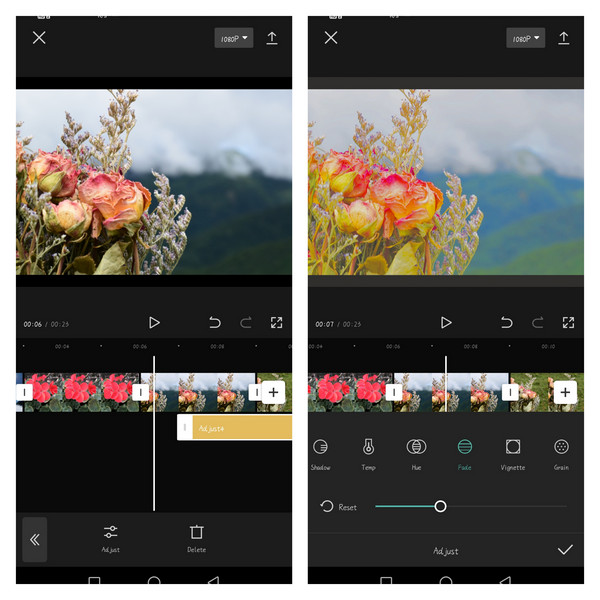
Before and After Filter Application Comparison
5. Conifer Cone CapCut Filter
Conifer Cone filter is a very common built-in filter setting located in the Life directory. It is perfect for applying to any video or photo that we usually take at hand. As the name Conifer Cone suggests, it allows you to adjust the light and shadow position of the overall image with one click, giving the video a feeling of sunlight coming down from the sky and passing through the foliage before finally hitting the ground.
It gives your video a high level of quality. People who watch it will feel pleasant and relaxed. It allows viewers to enjoy a moment of peace and tranquility in a busy world.
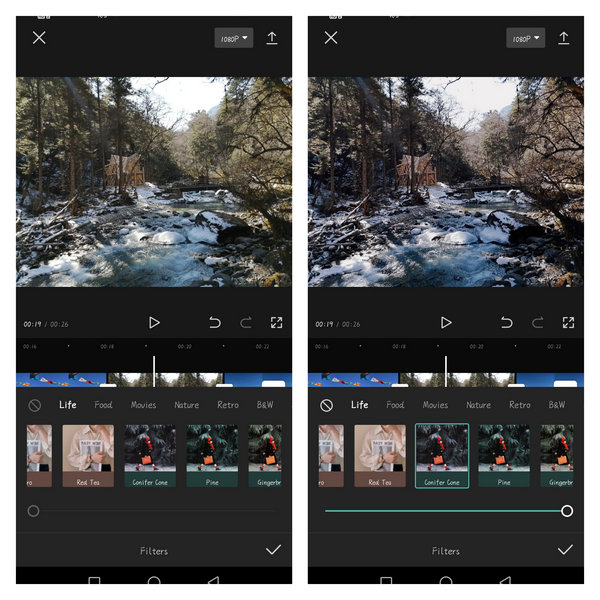
Conifer Cone CapCut Filter Comparison Chart
6. Twilight CapCut Filter
The Twilight filter is an advanced filter for a film. You will often see this filter in the end credits of some films to show a mood that fits the scene. At the same time, the filter you use when editing a video will also be influenced by the mood you are in at the moment. If you want to express a kind of regret or sadness, this filter is perfect.
Of course, the twilight filter can also be used to simply highlight a time. We can use this filter to create the feeling of sunset on a film shot during the day. This will create a sense of lingering emotion.
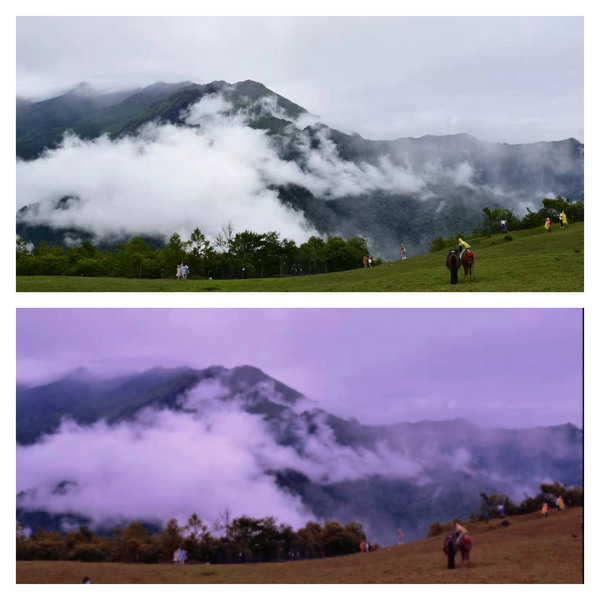
Twilight Filter Comparison Image
7. White Tea Filter from CapCut
The White Tea filter is a CapCut filter preset that can increase the brightness and contrast of colors. Although it is classified under the Food category, it can be used for any scene, too. It’s especially good for videos with gray backgrounds.
When you shoot on a cloudy day or in a scene where the light is not very good, you will find that the background of the video is dark. This is where you can use a White Tea CapCut filter to make up for the lack of light and enhance the overall tone, making it more vibrant and giving it a brighter look.
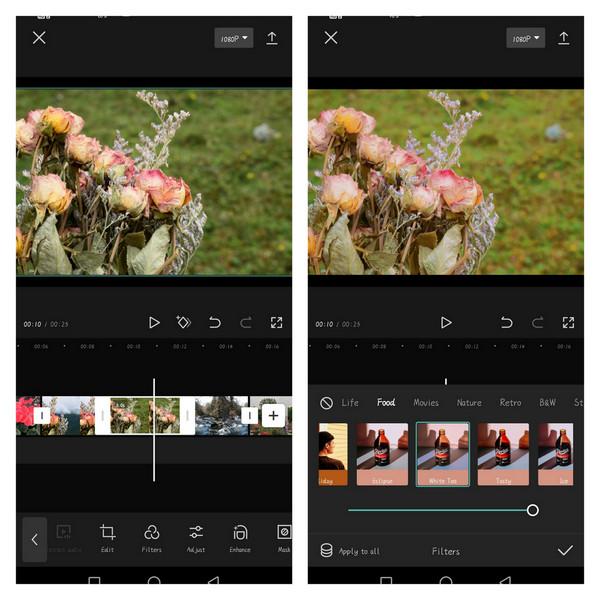
White Tea Filter Comparison Image
8. Brown CapCut Filter
The Brown filter is located in the B&W catalog, as long as it is highlighting the strong contrast between black and white. This filter preset is meant to create a powerful contrast with the world of color. If you want to express some negative emotions, such as sadness, disappointment, disillusionment, and negativity through your videos, then the Brown filter in CapCut would be a good choice. In a video with a strong story or a narrative, you can also use the Brown filter to show a memory or dream to differentiate it from the main story.
In addition, this filter is often used in movies to show scenes from the last century when the economy was not as developed as it is today to show some great changes and suggest human progress.
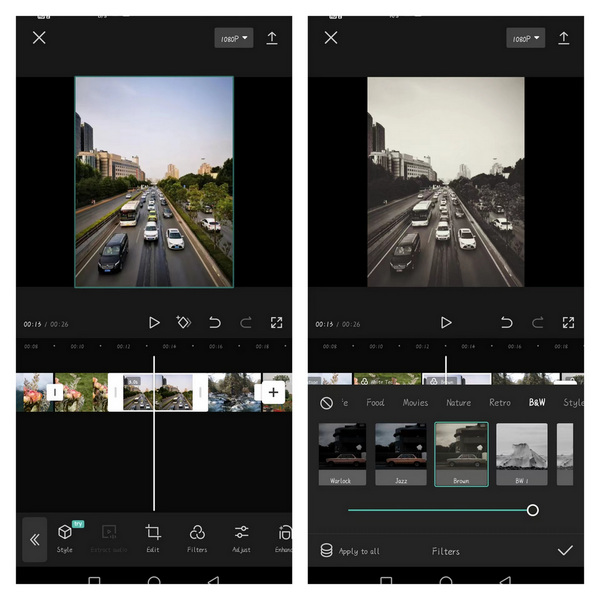
Brown Filter Application Comparison Chart
9. Red Filter in CapCut
The Red filter, as the name suggests is a filter that highlights the background tones with red as the base color. This filter separates the infrared effect from the visible and infrared light environment so that only red light is left and all other colors are absorbed. By doing so, it can enhance the sense of technology, so this filter is widely used in all kinds of technology videos to enhance video viewing.
However, it is worth noting that the Red filter is more suitable for images with rich lines, and it may not be suitable for empty landscape photos or images without any lines, because it will only make the whole picture turn red.
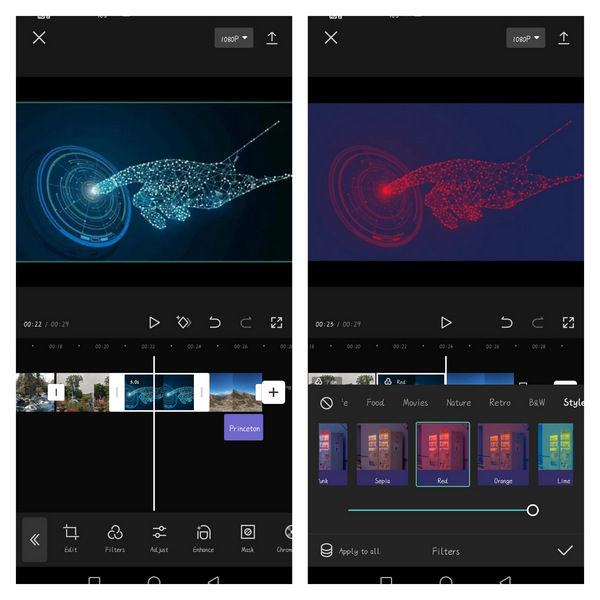
Red Filter Application Comparison Chart
10. Nature CapCut Filter
The Nature filter can be called a filter that most users will often use. Just like its name, all the beautification effects added to it are relatively natural. It will not adjust the brightness, contrast, saturation, exposure, and other parameters to the maximum or minimum value. All the parameters in Nature filter are moderate, so you don’t have to worry about your scene being distorted or over-beautified by adding this filter.
It is to change the overall look and feel through subtle changes of some parameters to create a kind of aesthetic artistic conception that seems to be unadorned and directly made into a film. If this filter is applied to a video showing the scenery, it will bring viewers a comfortable feeling of enjoyment, so that they can be immersed in the beautiful scenery.
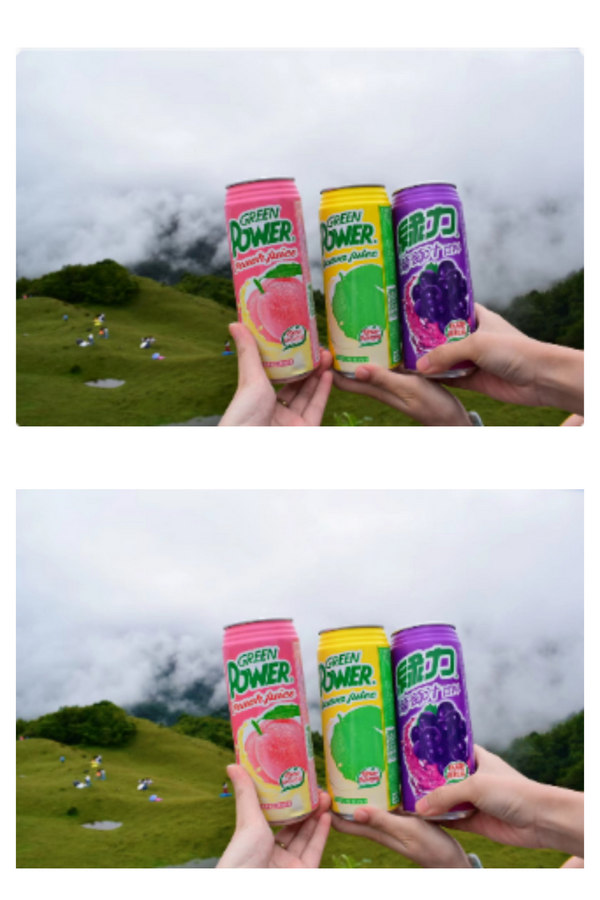
Application Comparison Chart of Nature Filter
11. Seasons CapCut Filter
As a video editing software that provides professional advanced filters, how can it be missing the presentation of different scenes of the seasons or temperatures in style? In the Nature Filters tab, we can find different filters for Autumn, Cool, and Winter. These can help you create a sense of atmosphere for your video that is unique to that particular season.
For example, Autumn, a season that always evokes a bleak and desolate scene, will reduce the overall color of the image after applying the filter. At the same time, some unnecessary lines are weakened to highlight the characteristics of the most subject so that the whole presents a feeling of desolation and loneliness. Let the viewer can easily integrate into the autumn mood.
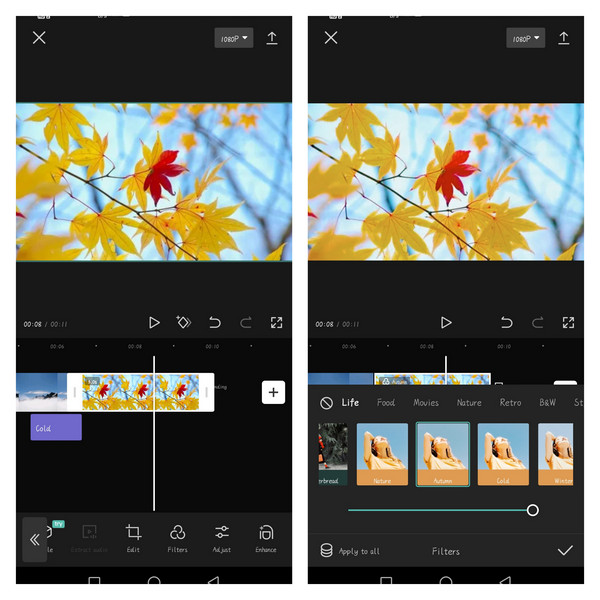
Autumn Filter Demonstration Image
12. Holiday CapCut Filter
The Holiday CapCut filter is a great filter for summer. If you are having a nice weekend/holiday with your family and friends, going out for a picnic, or camping, then this filter is perfect for shooting videos.
The Holiday filter in CapCut will make the edges of your video images weaker and more colorful and brighter so that they always look sunny and vibrant. And when viewers see this video, they can also feel the happy atmosphere through this video, so they can feel the bright afternoon sunshine and your relaxed mood during the holiday.
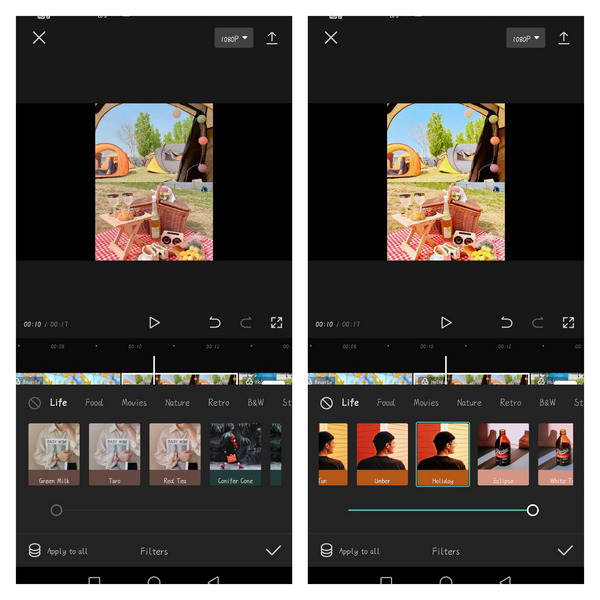
Holiday CapCut Filter Comparison Display Image
How to Download CapCut Filters
CapCut Filters is available for multiple devices: Windows, Mac, Android, and iOS. The following steps will give you the details of how to get it.
If you intend to edit videos with CapCut on a computer, see our guide on how to use CapCut on PC.
Step 1. Download the CapCut. because this is a video editing software for mobile to facilitate people’s life and learning. So if you want to get it on mobile, you just need to download it directly from the App Store or Play Store. However, if you want to download the desktop software for Windows or Mac, you need to install an Android emulator first before you can download it.
Step 2. Double click to open CapCut software, and find the Filters tool option in the toolbar below.
Step 3. Click Filter to enter the filter selection bar. Just touch any filter and the system will automatically download the filter for you. You only need to wait a few seconds to have any filters you want to add.
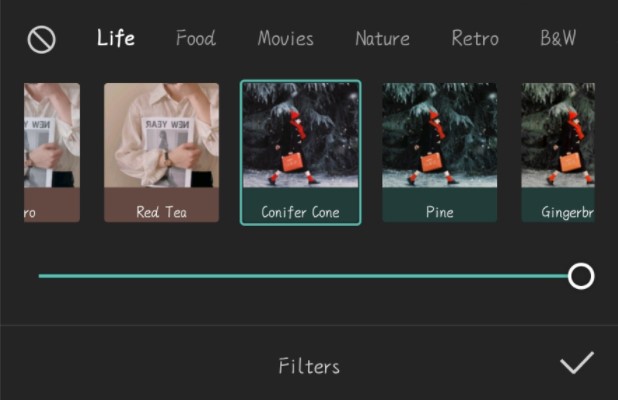
How to Download the CapCut Filters
How to Add Filters to Video in CapCut
Through the above series of filter types, do you already want to try the CapCut filters? Follow a few simple steps to operate it.
Step 1. Open CapCut and go to the startup interface.
Step 2. Click the New Project board to jump to the material addition interface, select the material you need to upload, and click Add to finish adding.
Step 3. Position to the bottom of the function navigation area, swipe left, and then touch the Filters button. Then all the filter presets will be displayed. (If it is a computer version, the function area is on the top left)
Step 4. Touch the Back button, you will find that instead of returning to the original ribbon, there is an Adjust setting next to Filter. You can touch this button to continue adding and setting filters.
Tip: If you are not satisfied with the filter you added or want to modify it, you can delete it by selecting the filter axis and clicking Delete or dragging the filter axis to extend/shorten the filter application time.
More CapCut Tips and Tricks You Should Not Miss
Learn more about fancy CapCut tips to know what’s necessary to make your next viral video!
- How to Do Green Screen on CapCut
- How to Do 3D Zoom on CapCut
- How to Make a Velocity Edit on CapCut
- How to Add Background on CapCut
- 10 Best CapCut Alternatives for PC
- How to Blur on CapCut
Conclusion
To sum up, this article introduces a total of 12 different CapCut filters. They can be used in some special scenarios, and you are free to choose according to your needs. At the same time, CapCut filters do not limit the creativity and imagination of all users, you can adjust the parameters at will to set up a unique filter recipe that meets your aesthetic standards.
Therefore, CapCut can be a savior for ordinary users who want to create advanced videos quickly. There is no complicated and tedious process, you can easily get CapCut Filters presets to enhance the atmosphere and expression of your videos with one click. There is no long learning curve here and it won’t take you a lot of time. Before mastering those advanced professional features, it is the easiest and fastest way to enhance the overall look and feel of your video with filter effects. That’s why CapCut, with its library of professional quality filter presets, is well worth trying.
More Related Articles
- 16 Best Video Editing Software for Mac: Free and Paid
- 12 Best Face Swap Apps to Add Some Fun to Your Photos
- Top 18 Slow Motion Video Editors to Slow Down the World
- The Complete Guide on How to Make a Smooth Video Slow Motion
- 15 Best Split-Screen Video Editors for Professionals and Beginners
- Top 24 PC Games Download Websites [Updated]
