How to Blur a Video on CapCut – The Step-by-step Complete Guide
This page includes step-by-step guides on how to blur a video on CapCut, how to blur part of a video on CapCut, and how to blur a video background on CapCut.

How to Blur on CapCut
Have you ever wanted to blur something on CapCut? We’re seeing the practice all the time on video-sharing platforms like YouTube and TikTok, and it’s actually doable with the video editing app CapCut. Here in this post, you’ll find the step-by-step guides on how to blur a whole or part of a video. Moreover, the steps to blur video background are also introduced.
Content Table:
What Can You Achieve with CapCut Video Blur Effect
The use of video blurring effects in CapCut can be extensive and creative. Not only can you give privacy or a sense of mystery to the individuals in the footage, but you can also blur the background or the unwanted part of the video, in a bid to get rid of distractions, and let your audience focus more on the main scene. And if you’re doing a video commentary, then video blurring is great for giving the captions more legibility.
More CapCut Tips: How to Make Velocity Edit on CapCut, How to Do Slow-mo on CapCut, How to Do 3D Zoom on CapCut
How to Blur a Whole or a Portion of Video on CapCut
To get started, you need CapCut app installed on your phone. If you haven’t got CapCut app already, you can find it from Google Play Store or Apple Store. Moreover, if you intend to edit videos with CapCut app on PC, please see how to use CapCut on PC.
Step 1. Launch CapCut App
To make a video blurry on CapCut, first launch CapCut app on your mobile phone. Then create a new project, and hit Add to import the footage you intend to blur from your camera roll.
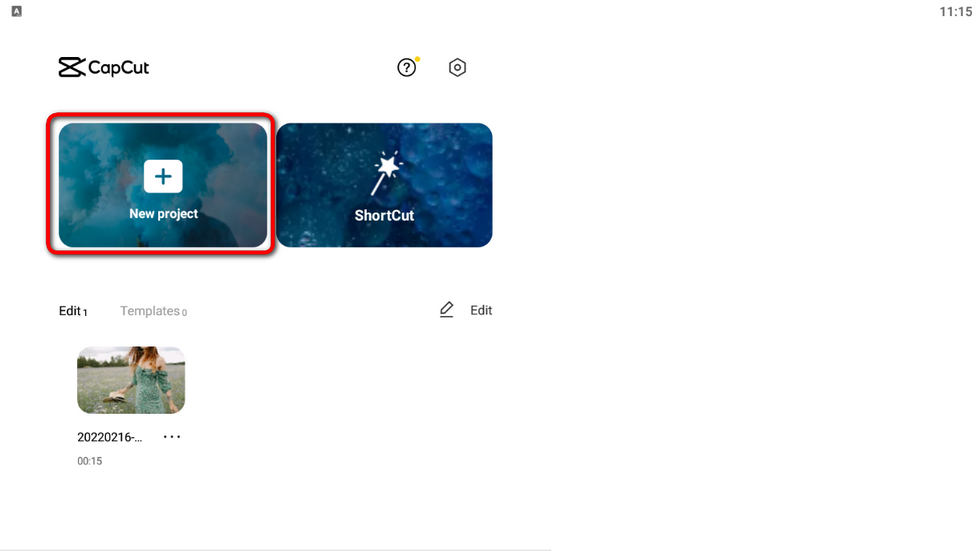
Launch CapCut and Create Project
Step 2: Go to CapCut Effects
From the lower panel, click to choose Effects option from the editing options, and then Video Effect, which covers a wide range of video effects.
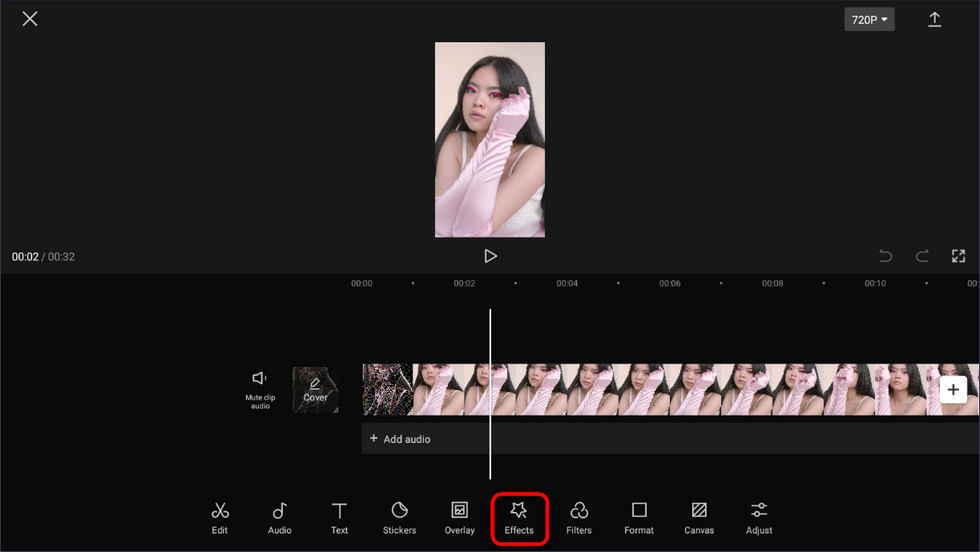
Hit Effects
Step 3: Select the Blur Effect
Now what we should do is to find and select the blur effect. Go to the Basic category, and look for the Blur effect. There are multiple blur effects available such as Motion Effect and Slanted Blur, here we’ll go with Blur.
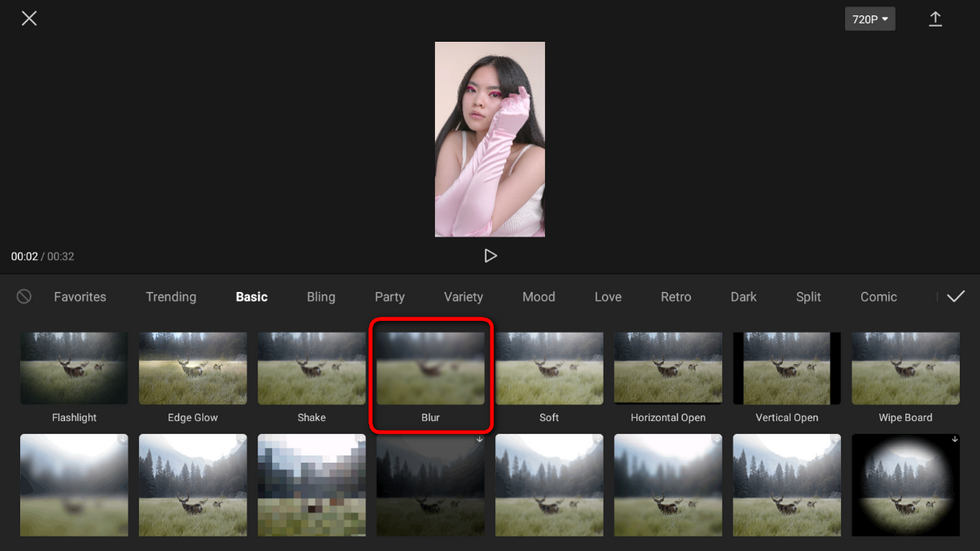
Select the Blur Effect
Step 4: Adjust the Blur Duration
Once you’ve hit the blur option, the Adjust option will pop up for us to change the duration of the blur effect, which indicates the parts in which the blur effect is applied. If you intend to blur the entire video, drag the handlebar to the right.
Adjust Blur Effect Duration
Step 5. Export the Blur Effect Video
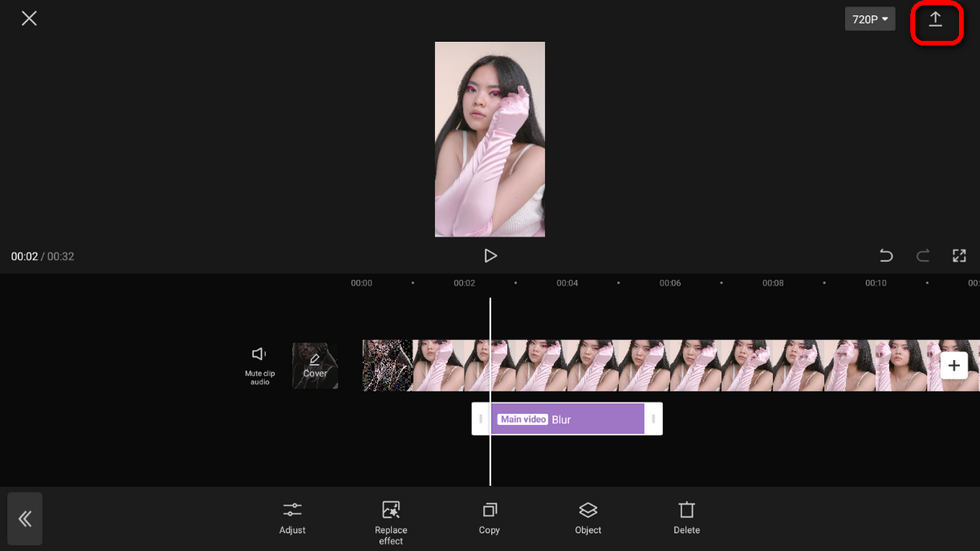
Hit the check button to add the blur effect and return to the workplace. As you can see from the screenshot, you can further adjust the blur duration in the timeline. When ready, go to the upper-right side to export your blurred video.
Export the Blurred Video
How to Blur Out a Part of a Video on CapCut
At times, we do not want the entire scene to be blurred, but only a part of it. In that case, we have to go about another way. By adding and blurring a video overlay, you get to blur out a part of a scene in CapCut. The simplest steps are as follows.
- To blur out a part of a video or blur a certain object in a video, launch CapCut, create a project, and import the video.
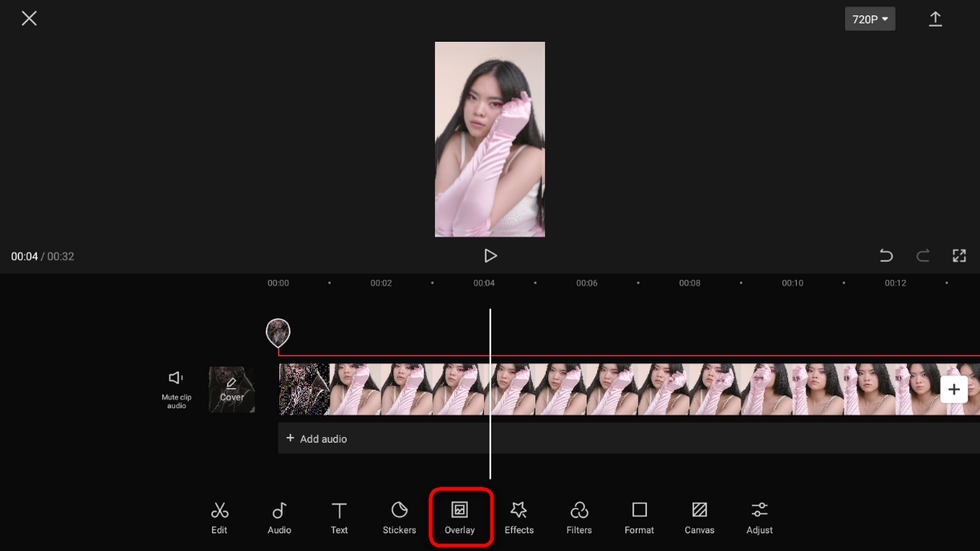
- Go to CapCut Overlay option, and overlay the same video. Before editing, make sure to drag and drop the overlay to match the background video perfectly.
- Just as we did in the first tutorial, go to CapCut effects to apply the blur effect to the video overlay.
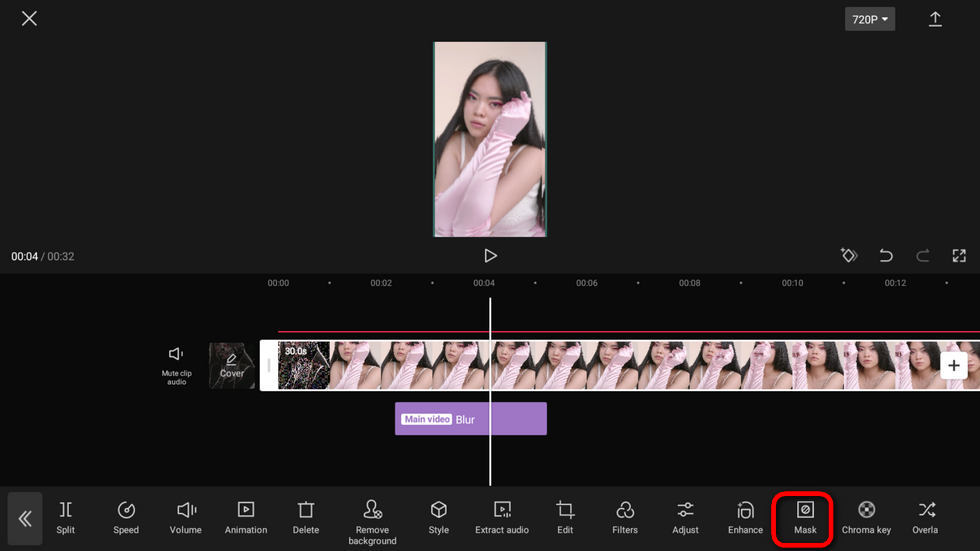
- Now your overlay video is blurred, what we gonna do next is to show up the clear background video. Hit Overlay from the main workplace, and hit Mask.
- Choose a mask shape according to the shape of the object you intend to blur, you may change the positioning and the size of the shape.
- That’s it! Now you can export and share the video!
CapCut Blur Out a Part of a Video
How to Blur a Video Background in CapCut
Occasionally, we may also need to blur the background of a video, instead of blurring the object in the video. In that way, the object in front of the background will be more stressed. To do so, the method is slightly different, but it still can be done from the CapCut app. In the following, I’ll step by step show you how to blur a video background in CapCut.
- First, as normal, launch CapCut, create a project, and import the video.
- Hit the Format option from the lower side of the screen, then you’re allowed to customize the proportion of the video where you want to display, and the rest of the video will be blurred.
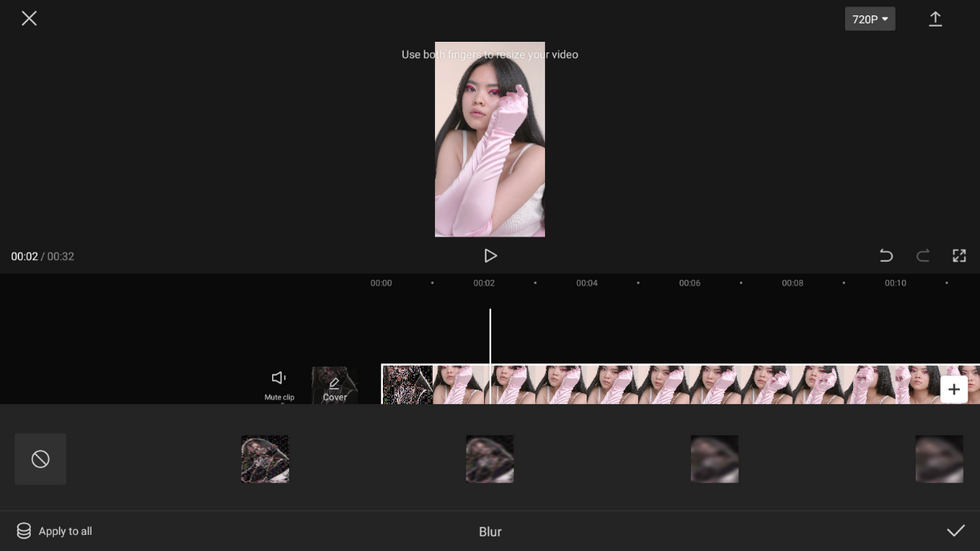
- Next, let’s get back to the video editing workplace and hit the Canvas option. And hit Blur option.
- Then you’ll see various background blurring options, choose one as your needs.
- When the blur background effect is applied, use both your fingers to resize the video, to calibrate the area that you want to keep clear exactly.
- Lastly, head back to the workplace and go to the upper-right side to export the blur background video.
CapCut Blur Video Background
To Sum Up
CapCut is so versatile, isn’t it? Now that we’re already here, I hope the methods are helpful, and you have benefited from this post and learned how to blur a whole video, a part of a video, or the background of a video. Now it’s time for sharing and impressing your friends and followers!
More Related Articles
Related Articles
FilmForth - Free Video Editor
- Easy to use and no skill required at all.
- Export video to MP3 with one click.
- Add transitions, effects, filter, text to the video as you want.
- Remove, replace, record and edit the background audio easily.
- Change the speed, volume, and subtitle on video with ease.
- Stabilize, trim, rotate, and convert video in seconds.


