How to Record Instagram Stories[Complete Solution]
Wondering how to capture Instagram Stories on different devices and systems? This article will provide you with a complete solution to make screen recording easier.
Instagram is one of the most popular social media platforms that allow you to share stories with family and friends. Recording your screen is probably one of the quickest ways when you want to save some interesting stories on it. How to save your Instagram stories on various devices? Let’s delve deeper together.
How to Screen Record Instagram Story on Windows
For desktop users, Instagram offers a web version that allows users to post stories or view updates directly from their browser. With RecForth, you can record everything on Instagram right from your computer screen. The following provides you with a detailed method on how to screen record Instagram Stories on a Windows computer.
Step 1. Select the Recording Mode
Click the button below to get RecForth for free from Microsoft and wait to install it on your computer.
 Open the software to enter the interface, RecForth provides two recording modes. Screen mode allows you to record the entire screen, Area mode allows you to customize the recording area or record a single program window. You can choose the recording mode to capture Instagram Stories according to your needs.
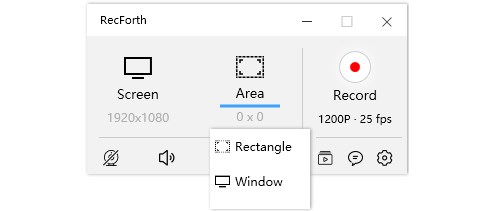
Recording Modes of RecForth
Step 2. Configure the Setup
After selecting the recording mode, you can start customizing the screen recording settings. Different buttons in the bottom toolbar correspond to different settings, and you can choose to click these buttons to open them.
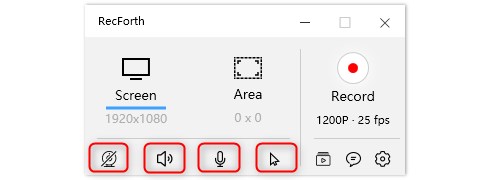
RecForth Setting Buttons
After turning on the Webcam icon, you can record yourself and your screen at the same time to create a picture-in-picture effect. With the Speaker button turned on, you can capture clear system sound when recording Instagram, and the microphone allows you to add voice narration to the screen recording. If the audience notices your mouse movement, you can choose to open the Pointer button to set its size, color, and click effect.
Step 3. Start to Record the Instagram Story
Once everything is ready, you can start your capture mission. Hit the red Record key or press F2 on the keyboard and RecForth will start screen recording Instagram Stories. To pause or resume recording during recording, just click the corresponding button on the floating panel or press the shortcut key F2.
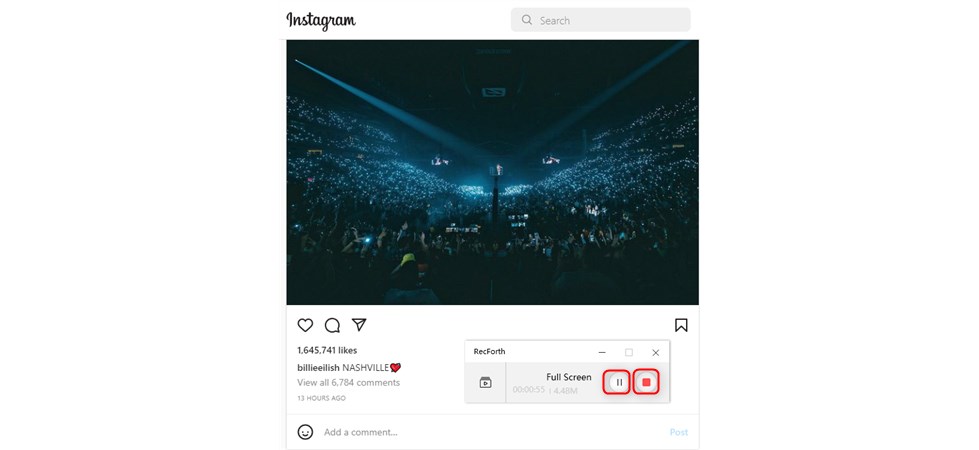
Start to Record Instagram Stories
RecForth doesn’t limit your recording time. But in order to get a good recording experience, please try to keep your recording time under one hour.
Step 4. Check the Captured Story
Hit the red Stop button or press F1 to stop recording your Instagram story, and a window will pop up automatically showing you the recorded video file. You can browse the video clip on the current page, as well as delete or rename it. All your recording files can be found in the path you set, and then you can share them with others.
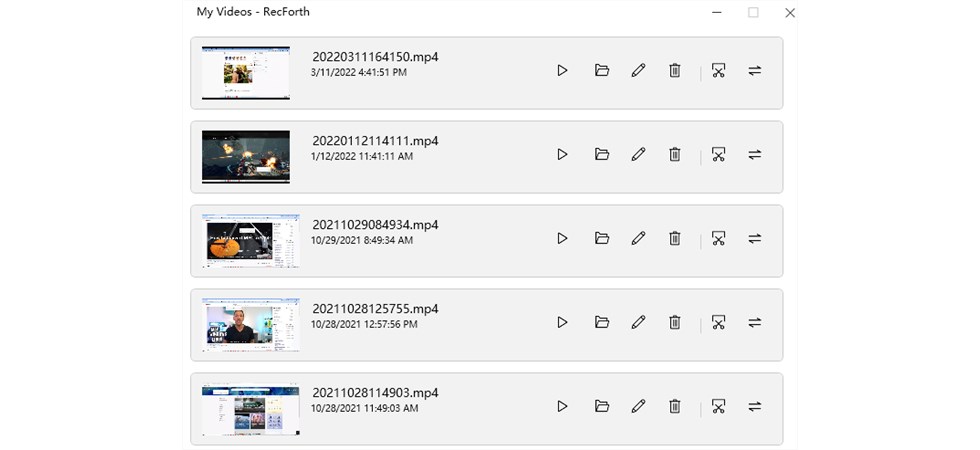
View My Videos
How to Screen Record Instagram Story on Mac
How to capture everything on the screen on Mac? You can use the built-in tool QuickTime Player, but this feature does not support recording system sound and webcam overlays. With EaseUS RecExperts, you can record webcam, screen, and sound simultaneously. Now let’s see how to record Instagram Stories on Mac with this screen recording tool
Step 1. Choose the Screen Recording Options
Double-click on your computer desktop to open EaseUS RecExperts and enter the main interface of the software. The app offers multiple recording modes that allow you to record the entire screen, lock a window or customize the recording area. Click to select the audio source and optionally add a webcam to your recording screen. If you want to start or stop the screen recording automatically, you can turn on the “Auto Stop” button.
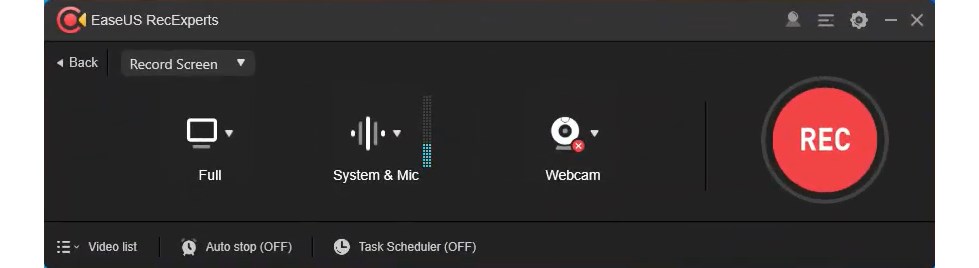
Configure the Screen Recording Options
Step 2. Customize the Other Advanced Setting
If you can make other advanced settings, click the Setting button in the upper right corner. After entering the Settings page, you can see many settings options such as Audio, Mouse, Hotkeys, etc. are provided. Then you can adjust it to suit your needs.
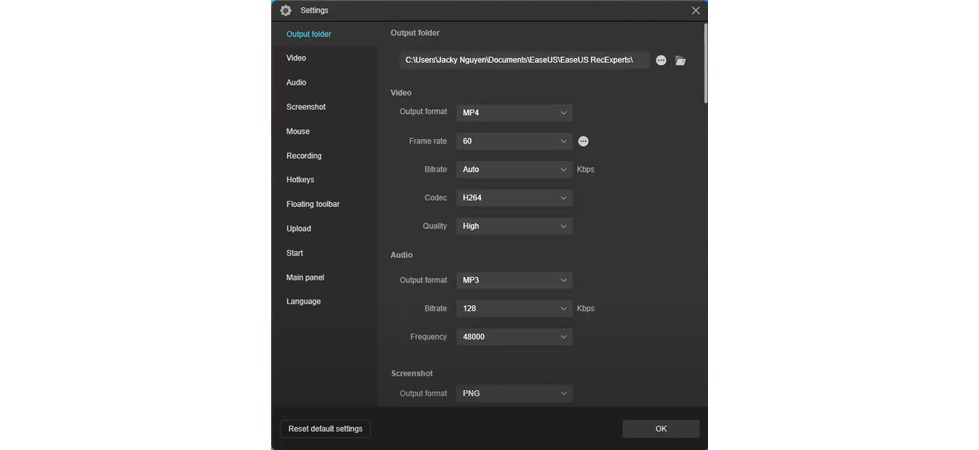
Customize Advanced Settings
Step 3. Start and Stop the Screen Capturing
After completing the settings, return to the main interface. Then open Instagram, click “REC” to start recording. During recording, you can click the corresponding button in the toolbox to pause or resume recording.
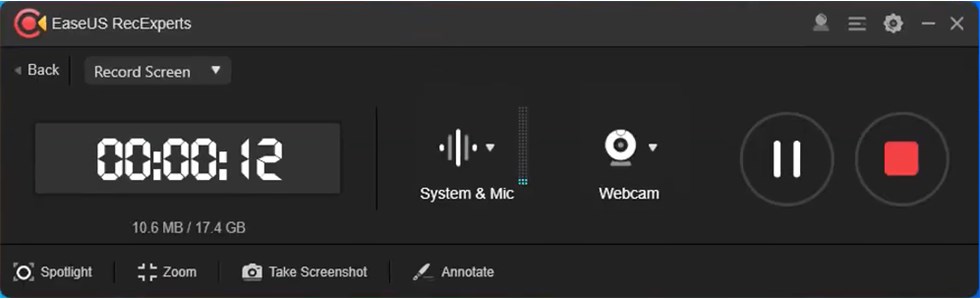
Start to Record Screen
Step 4. Preview All Your Videos
To stop recording, find the Stop button in the toolbar and click it. After the recording is stopped, you can click the Video List in the lower-left corner of the main interface to browse your recording files. The built-in simple editor allows you to trim and cut recorded videos.
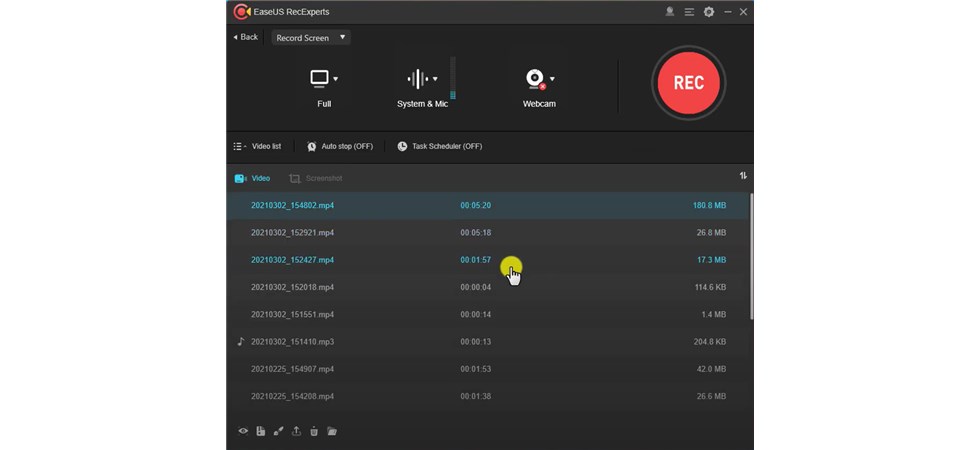
Check the Video List
How to Screen Record Instagram Story on iPhone
The great thing about recording Instagram Stories is that you can permanently save your favorite content to your device for later viewing. If you want to record Instagram on your iPhone, then you can use the easiest way. iPhones have a built-in screen recorder, and you can use this tool to record everything on your phone’s screen, including online meetings and video calls. The following provides a guide on how to use this built-in tool to record your iPhone screen.
Step 1. If you want to record the screen on the iPhone, you need to ensure that the mobile phone system is iOS 14 or higher. Go to Settings > Control Center, then click the Add button next to Screen Recording.
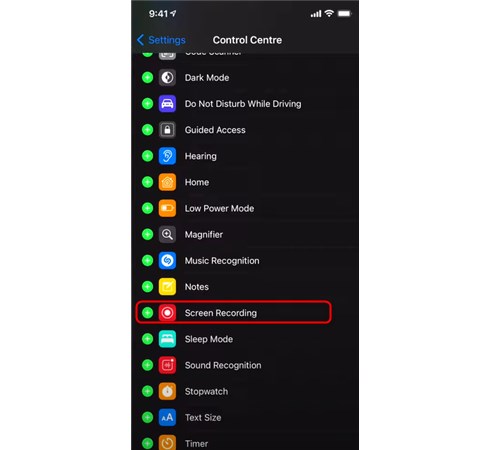
Add Screen Recording to iPhone
Step 2. Open Instagram on your iPhone and find the content you need to record. Then hold down the gray record button and tap Microphone. Click “Start Recording”, the recording will start after a three-second countdown.
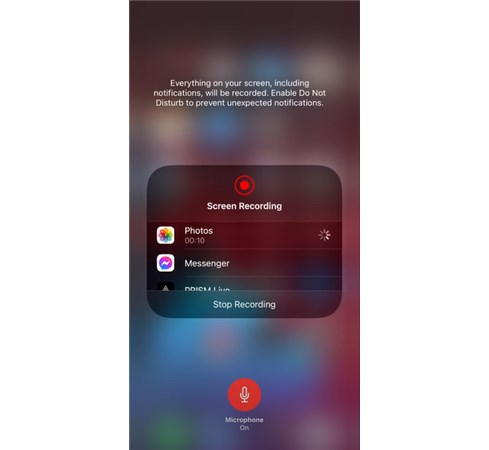
Start Recording on iPhone
Step 3. To stop recording, go to “Control Center” and click the red record button or press the “Stop” button in the red status bar at the top of the screen.
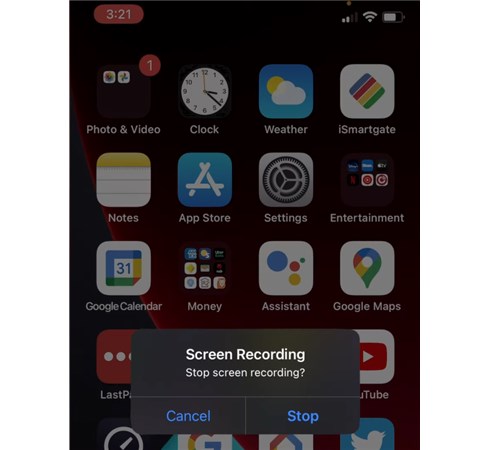
Stop Recording on iPhone
Step 4. If you want to browse your recordings, go to “Album”, all your recordings will be there.
How to Screen Record Instagram Story on Android
For users who want to record Instagram on Android devices, there are many screen recording software available in the market. But the easiest way is to use the built-in tools. Like iOS, Android also provides its users with an effective screen recorder. This tool can meet almost all your recording needs. Some bloggers will delete the stories posted to Instagram. The advantage of using the screen recording tool is that you can capture and save these contents to your own device. Let’s take a look at it together. How to Record Instagram Stories on Android Devices.
Step 1. Open Instagram on your phone, then swipe down from the top and find the screen recorder icon in the menu options.
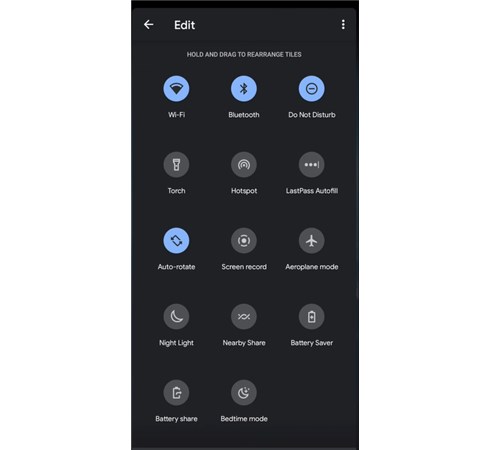
Find Screen Recorder on Android
Step 2. Then click Screen Recording to start, after which some options will pop up. You’ll see options on the screen to record audio (Microphone or Device audio) and display touch on screen, which you can enable or disable. Then, click the Start button to start recording.
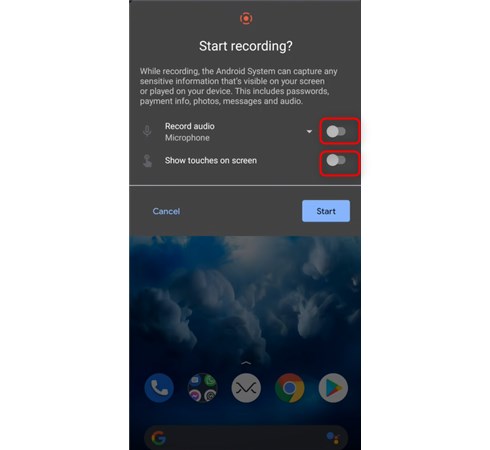
Do Recording Settings
Step 3. When you want to stop recording, swipe down from the top to display your notification. Then click to stop.
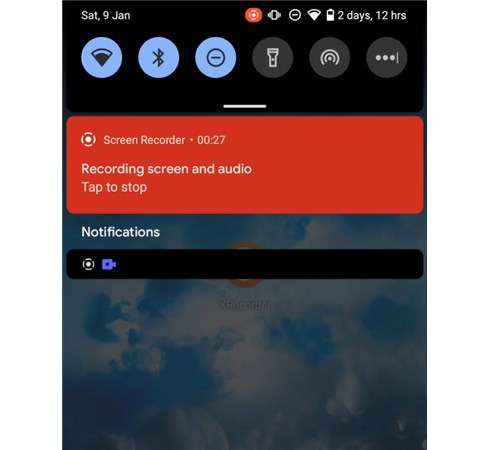
Tap to Stop Recording on Android
Step 4. Go to the “Album” application to find your captured videos, even edit or share these recorded Instagram Stories.
Conclusion
Thanks to the screen recorder, sharing Instagram Stories has become more simple. The various methods described in this article are simple and effective, and you can choose the method that works best for you based on your device. If you’ve ever used an easier way to record Instagram Stories, please leave your suggestions in the comments section below.
More Related Articles

Karen is a professional writer with a background in column writing who enjoys resolving complex topics and explaining them in interesting ways.
Related Articles
RecForth - Free full-featured screen recorder for all
- Free and easy-to-use
- One-click to exported videos without watermark
- Customized the size and color of the pointer to highlight important content
- Allowing webcam overlay to capture the action
- Record system sound and voiceover
- Free set up automatic stop recording